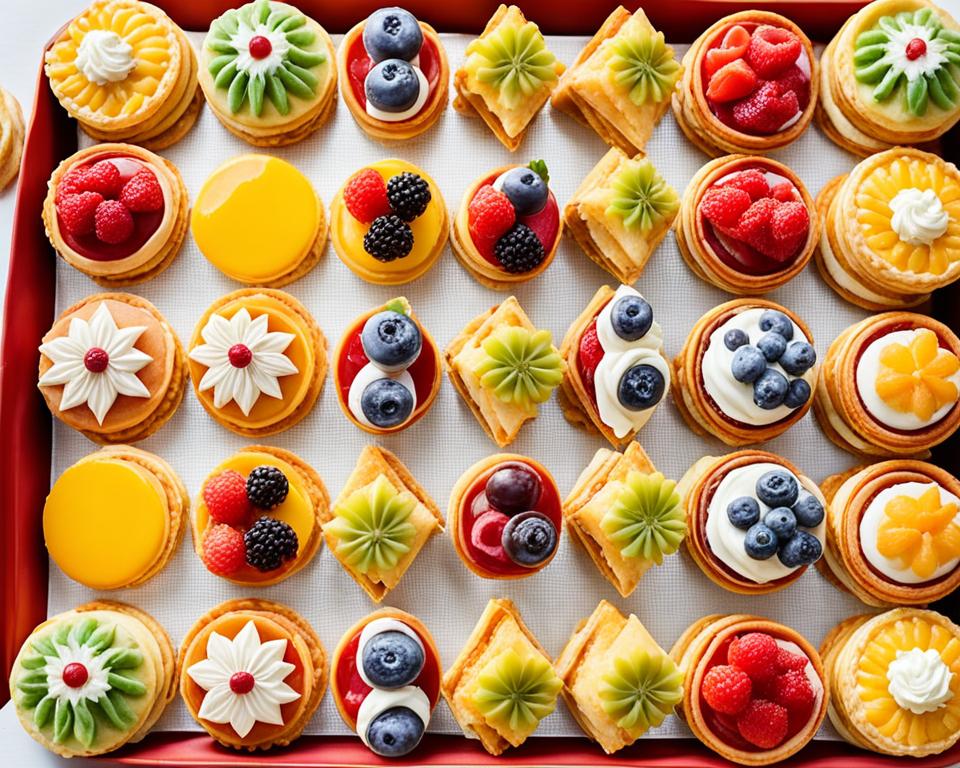
Baking can be a fun and rewarding hobby, but it can also seem daunting, especially if you’re new to it. The good news is that with the right guidance and a few handy tricks up your sleeve, you can become a master baker in no time. In this article, we’ll share some easy baking tips and hacks that will help you elevate your skills and create delicious treats right in your own kitchen.
Key Takeaways:
- Accurate measuring is essential for perfect bakes
- Invest in a good mixer for seamless mixing
- Room temperature ingredients ensure better texture
- Check your oven temperature for consistent results
- Avoid making substitutions for best outcomes
Measure Properly for Perfect Bakes
Accurate measurements are crucial in baking. To achieve consistent and delicious results, it’s essential to measure your ingredients properly. Whether you’re measuring dry or liquid ingredients, following the correct techniques will ensure you achieve the perfect bake every time.
The Spoon and Level Method for Dry Ingredients
When measuring dry ingredients such as flour, sugar, or cocoa powder, use the spoon and level method. This method helps you achieve precise measurements without excess or lack of ingredients. Here’s how:
- Begin by fluffing up the dry ingredient with a spoon to loosen it.
- Use the same spoon to scoop the ingredient into your measuring cup, overfilling it.
- With the back of a knife or a straight edge, level off the excess by gently scraping it across the rim of the measuring cup. This will give you the exact amount required for your recipe.
Using Clear Cups with Pour Spouts for Liquid Ingredients
Liquid ingredients like water, milk, or oil should be measured in clear cups with pour spouts. These cups allow for easy pouring and accurate measurement. Here’s how to measure liquid ingredients correctly:
- Place the measuring cup on a flat surface.
- Pour the liquid into the cup, ensuring the bottom of the meniscus (curve) aligns with the measurement line. This will give you an accurate measurement.
Proper measuring is key to achieving consistent results and preventing dry or dense baked goods. Take your time and measure with precision for the best outcome.
| Ingredient | Measurement |
|---|---|
| All-purpose flour | 1 cup |
| Granulated sugar | 1/2 cup |
| Butter, melted | 1/2 cup |
| Milk | 1/4 cup |
Follow these measurement guidelines to ensure your baked goods turn out perfectly every time. Remember, precision in measuring is the secret to baking success!
Invest in a Good Mixer
A good mixer is an essential tool for any baker. Whether you’re a beginner or an experienced baker, investing in a high-quality stand mixer or an electric hand mixer can greatly enhance your baking experience. These mixers provide the convenience and efficiency you need to create perfect textures and incorporate ingredients with ease.
When it comes to choosing a mixer, there are a few factors to consider. Stand mixers are versatile and powerful, making them ideal for heavy-duty baking tasks like kneading dough or mixing large batches of batter. On the other hand, electric hand mixers are compact, lightweight, and easy to maneuver, making them perfect for lighter tasks and smaller quantities.
A high-quality mixer will have various speed settings, allowing you to control the mixing process according to your recipe’s requirements. The powerful motor ensures smooth and even mixing, eliminating any lumps or inconsistencies in your batter.
A mixer also saves you time and effort. Instead of manually mixing ingredients for an extended period, you can rely on the mixer to do the job efficiently while you focus on other preparation or cleaning tasks in the kitchen.
Notable Features to Consider:
- Powerful motor for efficient mixing
- Multiple speed settings for versatility
- Durable construction for long-lasting use
- Attachments for different baking tasks (e.g., dough hook, whisk attachment)
- Easy-to-clean design for hassle-free maintenance
“Investing in a good mixer is like having a reliable sous chef in your kitchen. It makes baking easier, faster, and more enjoyable.”
To help you make an informed decision, here’s a comparison table of popular mixers in the market:
| Mixer | Key Features | Price |
|---|---|---|
| KitchenAid Artisan Stand Mixer | Powerful motor, variety of colors and attachments | $299 |
| Cuisinart Power Advantage Plus Hand Mixer | 9-speed settings, built-in storage case | $59.99 |
| Hamilton Beach Electric Stand Mixer | 4-quart stainless steel bowl, quick-release head | $99.99 |
Remember, a good mixer is an investment that will benefit you for years to come. Choose a mixer that suits your baking needs, matches your kitchen decor, and fits within your budget. With a reliable mixer by your side, you’ll be well on your way to creating delectable treats that impress family and friends.
Use Room Temperature Ingredients
When it comes to baking, room temperature ingredients play a crucial role in achieving the perfect texture and consistency. Cold ingredients like butter and eggs can negatively impact the final result of your baked goods. Understanding the importance of using room temperature ingredients will elevate your baking game to a whole new level.
When butter is at room temperature, it becomes soft and pliable, allowing for easier creaming with sugar. This process incorporates air into the mixture and creates a light and fluffy texture in your cakes, cookies, and other confections. Cold butter is more difficult to cream, resulting in a dense and heavy end product.
Similarly, using room temperature eggs ensures proper emulsification in the batter. Cold eggs may not mix well with other ingredients, leading to an uneven texture or a broken batter. Room temperature eggs blend seamlessly, producing a smooth and uniform result.
But how do you bring ingredients to room temperature quickly if you forget to plan ahead? Don’t worry! There are a few techniques you can use to expedite the process.
To quickly bring butter to room temperature, you can place the desired amount in a microwave-safe bowl and heat it in short bursts on low power. Check the butter’s temperature frequently and stop heating when it is soft to the touch but not melted. This method ensures that the butter reaches the desired consistency without compromising its integrity.
For eggs, place them in a bowl of warm water for a few minutes. The warmth from the water will gently raise the eggs’ temperature, making them ready to use in your recipe. Be careful not to use hot water as it may start cooking the eggs.
Remember, planning ahead is always the best approach. Before starting your baking project, take the time to bring your ingredients to room temperature naturally by leaving them out on the countertop for about 30 minutes to an hour. This will ensure consistent results and guarantee that your baked goods turn out perfectly every time.
Room Temperature Ingredient Tips:
- Plan ahead and leave ingredients at room temperature before baking.
- If you forget, use techniques like warming butter in the microwave or placing eggs in warm water to quickly bring them to room temperature.
- Avoid using hot water to warm eggs, as it may start cooking them.
“Room temperature ingredients are essential for achieving the best results in baking. Taking the time to let ingredients come to the right temperature ensures that your baked goods turn out light, fluffy, and delicious.”
| Benefits of Room Temperature Ingredients: | Techniques to Bring Ingredients to Room Temperature |
|---|---|
| 1. Allows for proper creaming of butter and sugar, resulting in a light and fluffy texture. | 1. Leave ingredients on the countertop for about 30 minutes to an hour before baking. |
| 2. Ensures proper emulsification of ingredients, leading to a smooth and uniform batter. | 2. Warm butter in the microwave in short bursts on low power. |
| 3. Improves the overall taste and texture of baked goods. | 3. Place eggs in a bowl of warm water for a few minutes. |
| 4. Prevents dense and heavy end products. |
Check Your Oven Temperature
A reliable oven temperature is crucial for successful baking. Inaccurate temperatures can lead to underbaked or overbaked treats. To ensure your oven is heating to the correct temperature, consider using an oven thermometer. Place the thermometer in the center of the oven and preheat it to your desired temperature. This will give you an accurate reading and allow you to make adjustments if necessary.
Avoid opening the oven frequently during baking, as it can cause temperature fluctuations and disrupt the baking process. Instead, rely on your oven light and the oven window to monitor progress. If you need to rotate pans for even baking, do it quickly and efficiently to minimize heat loss.

By maintaining consistent oven temperatures, you can ensure that your baked goods turn out perfectly every time. Your delicious creations will be baked to perfection, with a golden brown crust and a tender, moist interior.
Don’t Make Substitutions
Baking is a precise science that requires careful attention to detail. It’s best to avoid substitutions whenever possible to ensure the best results in your baked goods. All-purpose flour, sugar, butter, and eggs each play specific roles in baking, and substituting these key ingredients may alter the chemistry of the recipe, resulting in undesirable outcomes.
However, there are some minor substitutions that can be made without compromising the final product. For example, adding nuts to a recipe or swapping citrus zest for another type of citrus can add a delightful twist to your baked goods without major consequences.
“Baking is both an art and a science.”
To truly master the art of baking, it’s important to understand the reasons behind each ingredient and their interactions. Rather than relying on substitutions, take the time to familiarize yourself with different ingredients and their unique properties. This knowledge will empower you to make informed decisions and create delicious treats consistently.
Remember, successful baking is all about precision and attention to detail. While it might be tempting to make substitutions for convenience or dietary preferences, it’s best to follow recipes closely, especially if you’re new to baking. This will give you a solid foundation to experiment with different flavors and techniques in the future.
Common Baking Substitutions
| Original Ingredient | Possible Substitution |
|---|---|
| All-Purpose Flour | Bread Flour, Cake Flour |
| Sugar | Agave Nectar, Honey |
| Butter | Vegetable Oil, Margarine |
| Eggs | Applesauce, Yogurt |
While these substitutions may work in certain recipes or dietary restrictions, they may not yield the same texture, taste, or rise as the original ingredients. It’s important to keep this in mind and experiment cautiously when making substitutions in baking.
By understanding the importance of each ingredient and its role in baking, you’ll be able to create beautiful and delicious baked goods that truly shine. So, resist the urge to make substitutions whenever possible and embrace the art and science of baking!
Use a Light Hand
When it comes to baking, handling the ingredients with care is essential for achieving the perfect texture and consistency in your baked goods. Overmixing can lead to tough and dense results, especially when it comes to dough for items like scones and biscuits. It’s important to know when to stop stirring and avoid overworking the dough.
Overworking dough can result in excessive gluten development, which can make your baked goods chewy or tough. To prevent this, stir your batter just until it is uniform, and be gentle when incorporating dry ingredients into wet ones. This will help you maintain a light and airy texture in your finished products.
Remember, the goal is to mix the ingredients enough for them to combine without overdoing it. It may be tempting to keep mixing until every last trace of dry ingredients is gone, but this can lead to undesirable outcomes. Embrace a little bit of imperfection and trust that the baking process will take care of the rest.
“Mixing batter just until it is uniform and avoiding overworking dough are key techniques in achieving desirable textures in baking.”
Steps for avoiding overmixing in baking:
- Combine the wet and dry ingredients until just incorporated.
- Stir gently, using a light hand, to avoid excessive gluten formation.
- Stop mixing as soon as the batter or dough becomes uniform in texture.
- Embrace a few small lumps or streaks in the batter, as they will often disappear during baking.
By employing a light touch when mixing your ingredients, you’ll be able to achieve baked goods with a tender crumb and delightful texture. So remember, when it comes to mixing, sometimes less is more!
| Baking Method | Description |
|---|---|
| Stirring | Gently combine wet and dry ingredients until just mixed. Avoid overmixing to prevent gluten development. |
| Folding | Use a spatula to gently incorporate delicate ingredients, such as whipped egg whites, into the batter. This technique maintains airiness and avoids deflating the mixture. |
| Kneading | Use a gentle kneading technique for doughs that require it. Stop kneading as soon as the dough becomes smooth and elastic. |

Understand Leavening Agents
When it comes to baking, leavening agents play a crucial role in creating that perfect rise and texture. Two commonly used leavening agents are baking powder and baking soda.
Baking soda is a powerful leavening agent that requires an acidic ingredient to activate. When the acidic ingredient comes into contact with baking soda, it creates carbon dioxide, which causes the baked goods to rise. It’s important to note that baking soda needs to be paired with an acidic ingredient, such as buttermilk, yogurt, lemon juice, or vinegar, to ensure proper activation.
On the other hand, baking powder is a mixture of baking soda, cream of tartar (an acidic ingredient), and a moisture-absorbing agent. This combination allows baking powder to activate when it comes into contact with liquid. As a result, carbon dioxide is released, causing the dough or batter to rise. Baking powder is a convenient choice as it already contains the necessary acidic component.
Understanding the roles of baking powder and baking soda will help you choose the right leavening agent for your recipe. If your recipe contains an acidic ingredient, then baking soda is the go-to option. On the other hand, if your recipe doesn’t have an acidic ingredient or calls for baking powder specifically, then baking powder is the ideal choice.
Using the correct leavening agent will ensure that your baked goods rise properly and have the desired texture. So, next time you’re baking, pay attention to the leavening agent called for in the recipe and make the right choice!
Add Ingredients in Little Piles
When it comes to baking, organization is key. One useful technique to stay organized is to add your ingredients to the mixing bowl in little piles. This simple method not only helps you keep track of what you’ve already added, but also ensures that you don’t miss any key additions.
By creating small piles of each ingredient, you can easily see at a glance which ones you’ve already incorporated into the recipe. This prevents any confusion or accidental omissions, saving you time and ensuring a more successful bake.
Here’s how you can implement this technique:
- Before you start, gather all of your measured ingredients and place them within reach.
- Add the first ingredient to the center of the bowl, forming a small pile.
- Continue with the rest of your ingredients, adding them to the bowl in separate little piles.
- As you incorporate each ingredient, you can easily remove the corresponding pile, keeping track of your progress.
Not only does this method help you stay organized, but it also serves as a visual reminder of which ingredients are still needed. No more forgetting a crucial addition halfway through the recipe!
By adding ingredients in little piles, you can confidently follow the recipe without the worry of missing any key components. This simple technique ensures a smoother baking process and helps you create delicious treats with ease.
Line Pans and Prepare Baking Pans Properly
Properly preparing your baking pans is key to achieving perfect, professional-looking baked goods. Whether you’re making cookies, cakes, or bread, using the right techniques can ensure your treats come out of the pan with ease, without sticking or breaking apart.
There are two main methods for preparing baking pans: lining them with parchment paper or using nonstick spray. Both approaches have their advantages, so choose the one that suits your needs and preferences.
Lining Pans with Parchment Paper
Lining pans with parchment paper is a foolproof way to prevent your baked goods from sticking to the pan. Simply cut a piece of parchment paper to fit the bottom of the pan, and then lightly grease the sides with butter or nonstick spray. The parchment paper creates a barrier between the batter and the pan, allowing for easy removal of the finished product.
“Using parchment paper is a game-changer when it comes to baking. It not only prevents sticking, but it also helps to distribute the heat more evenly, resulting in better browning and a more uniform texture.”
Parchment paper is readily available in most grocery stores and online, making it an inexpensive and accessible tool for home bakers. It’s ideal for baking cookies, brownies, and cakes, as it ensures even browning and prevents delicate treats from falling apart.
Using Nonstick Spray
Nonstick spray is another popular option for preparing baking pans. Simply spray an even layer onto the bottom and sides of the pan, making sure to cover all surfaces. The nonstick spray creates a barrier that prevents the batter or dough from sticking to the pan, allowing for effortless release once your baked goods have finished baking.
Nonstick spray is particularly helpful when working with intricate or non-traditional-shaped pans, as it ensures every nook and cranny is well-coated. It’s also convenient for quick baking projects when parchment paper may not be readily available.
Benefits of Properly Preparing Baking Pans
By taking the time to line your pans with parchment paper or use nonstick spray, you’ll enjoy several benefits:
- Easy removal: Your baked goods will effortlessly come out of the pan, preserving their shape and appearance.
- Prevent sticking: Lining your pans or using nonstick spray eliminates the frustrating struggle of trying to pry your baked treats out of the pan.
- Professional presentation: Properly prepared pans result in bakery-worthy creations that look as good as they taste.
Don’t let all your hard work go to waste by neglecting to prepare your baking pans. Take a few extra minutes to line them with parchment paper or use nonstick spray, and enjoy perfect, fuss-free baked goods every time.
Use Quality Ingredients
Using high-quality ingredients is essential for achieving superior results in your baking endeavors. Opting for the finest ingredients can elevate the flavors and textures of your creations, ensuring a delightful culinary experience. When it comes to choosing the right flour, butter, vanilla extract, and eggs, it’s important to consider the following factors:
- Flour: Selecting the appropriate flour is crucial in achieving the desired texture and structure of your baked goods. Different flours, such as all-purpose flour, cake flour, bread flour, and pastry flour, have varying protein content, which affects the gluten formation. Higher protein content results in a stronger gluten network, suitable for bread and pizza dough, while lower protein content is ideal for cakes and pastries that require a softer crumb. Choose a high-quality flour that suits your specific recipe to ensure optimal results.
- Butter: Butter adds richness, flavor, and moisture to baked goods. Opt for high-quality unsalted butter, as it allows you to control the salt content in your recipe. Look for butter with a higher fat content, as it contributes to a tender and flaky texture in pastries and enhances the creaminess in frostings and buttercreams. Consider using European-style butter, known for its richer flavor due to the higher butterfat content.
- Vanilla Extract: Vanilla extract serves as a flavor enhancer in various baked goods. Choose a pure vanilla extract for the best flavor, as it is derived from real vanilla beans. Alternatively, you can use vanilla beans or vanilla bean paste, which add a more intense and aromatic flavor profile to your recipes.
- Eggs: Eggs contribute to the structure, moisture, and richness of baked goods. Opt for fresh, high-quality eggs from free-range or organic sources for optimal results. The size of the eggs can also affect the outcome, so be sure to follow the recipe’s specifications regarding egg size. Additionally, consider the source of the eggs, as eggs from pasture-raised chickens are known to have a superior taste and quality.
Remember, the quality of your ingredients directly impacts the taste and overall success of your baked goods. Invest in high-quality ingredients and experiment with different brands to find the ones that work best for your recipes.
Comparison of Different Flour Types
| Flour Type | Protein Content (%) | Best for |
|---|---|---|
| All-Purpose Flour | 10-12% | Cookies, muffins, cakes, and most baked goods |
| Cake Flour | 8-10% | Light and tender cakes, pastries, and biscuits |
| Bread Flour | 12-14% | Breads, pizza dough, and other yeast-risen products |
| Pastry Flour | 9-10% | Pie crusts, tarts, croissants, and delicate pastries |
Conclusion
In conclusion, these easy baking tips and tricks will empower you to confidently create delicious baked goods at home. By following these guidelines, you can elevate your baking skills and impress your friends and family with your delectable treats.
Ensure that you measure your ingredients properly using the spoon and level method for dry ingredients and clear cups with pour spouts for liquids. Invest in a high-quality mixer to simplify the mixing process and achieve the perfect texture in your baked goods.
Remember to use room temperature ingredients to ensure proper creaming of butter and ideal batter consistency. It’s also crucial to check your oven temperature with an oven thermometer to guarantee accurate baking. Additionally, avoid making substitutions whenever possible to maintain the integrity of your recipes.
Handle your ingredients with a light touch to prevent overmixing, which can result in tough and dense baked goods. Understand the role of leavening agents like baking powder and baking soda to achieve the desired rise and texture in your creations.
By incorporating these baking tips into your routine and using high-quality ingredients, you’ll be well on your way to becoming a master baker. So don’t hesitate, put on your apron, and get ready to create mouthwatering baked wonders. Happy baking!
FAQ
What are some easy baking tips and tricks?
Measure ingredients properly, invest in a good mixer, use room temperature ingredients, check your oven temperature, avoid making substitutions, use a light hand when mixing, understand leavening agents, add ingredients in little piles, line pans and prepare them properly, and use quality ingredients.
Why is measuring ingredients properly important in baking?
Accurate measurements ensure consistent results and prevent dry or dense baked goods.
Why is it necessary to invest in a good mixer for baking?
A good mixer makes it easier to mix ingredients properly, ensuring the best texture in your baked goods.
Why should room temperature ingredients be used in baking?
Room temperature ingredients ensure proper creaming of butter and the ideal texture of the batter.
How can I check my oven temperature?
Use an oven thermometer to ensure your oven is at the correct temperature for baking.
Is it okay to make substitutions in baking?
It is best to avoid substitutions whenever possible, as they may alter the chemistry of the recipe.
Why is it important to avoid overmixing in baking?
Overmixing can lead to tough and dense baked goods, so it’s best to stir batter just until it is uniform.
What are leavening agents and why are they important in baking?
Baking powder and baking soda are leavening agents that help baked goods rise. Understanding their roles ensures proper rise and texture.
Why should I add ingredients in little piles?
Adding ingredients in little piles to the mixing bowl helps keep track of what has been added and prevents any missed ingredients.
How should I prepare baking pans to prevent sticking?
Line your pans with parchment paper or use nonstick spray to ensure easy removal of baked goods.
Why is using quality ingredients important in baking?
High-quality ingredients can elevate your baked goods and result in better flavors and textures.
What are some final thoughts on these baking tips and tricks?
By following these easy baking techniques, you’ll be able to create delicious treats at home with confidence. Remember to measure properly, use the right tools, and handle ingredients with care. Happy baking!