Imagine the delight of peeling apart the soft, warm layers of a homemade, flaky French pastry, each bite a testament to the art of baking, each flake a whisper of buttery perfection. Creating such culinary art from scratch may seem daunting, but with the right flaky French pastry recipe, it’s an experience within reach for home bakers. There’s something truly magical about transforming simple, wholesome ingredients into a delicious pastry that’s crispy on the outside with a tender heart. By following a meticulously-crafted baking tutorial, enthusiasts can venture into the world of viennoiserie and emerge with incredible, from-scratch creations. It’s not just the taste, but the journey of mastering a technique and the pride of crafting something extraordinary that makes this homemade journey so rewarding.
Take the plunge into an artisanal world where patience turns into a flaky, golden-brown marvel. With dedication, attentiveness, and a touch of craftsmanship, achieving a delectable homemade pastry epitomizing French baking sophistication becomes more than just a fantasy. Blend tradition with innovation, learn the delicate dance of dough and butter, and soon, the aroma of freshly-baked croissants will fill your kitchen, a harbinger of the feast to come. This guide promises to elevate the home baking experience, one flaky layer at a time.
Key Takeaways:
- Mastering a flaky French pastry recipe elevates the home baking experience with a touch of artisanal elegance.
- A detailed, from-scratch process ensures bakers understand the intricacies of layering and lamination.
- The right tutorial can guide even novice bakers through the journey to create buttery, irresistible pastries.
- Patience and practice are pivotal, yielding a delicious payoff with each fresh, homemade batch.
- Comprehensive instructions help demystify the complexities of traditional French baking techniques.
- Embracing the homemade process promises not only an authentic taste but also a rewarding sense of accomplishment.
Introduction to Flaky French Pastry
The journey to creating a Flaky French Pastry Recipe is steeped in tradition and refined through technique. For those longing for the delicate crunch and buttery satisfaction of a true croissant, this guide is an essential companion. Baking tips outlined here offer a simple, easy-to-follow, step-by-step route to success, transforming an intimidating process into an approachable project that even fledgling bakers can embrace with enthusiasm.
In the quest to craft the quintessential croissant, home bakers will not only replicate the experience of sinking their teeth into a blend of crisp and tender layers but also partake in a rite that conjures the essence of a French bakery. As one progresses through this comprehensive tutorial, the mystique of flaky pastries unravels, revealing methods that are as logical as they are lyrical.
From selecting the right ingredients to mastering the crucial folds, this guide ensures that each stage is understood and executed with precision—each tip a stepping stone to achieving the treasured layers of a golden, flaky croissant. The transformative power of butter and dough resting in the hands of the baker is both a craft and a celebration of homemade artistry.
- Begin with a solid foundation of knowledge about the ingredients and methods.
- Proceed with patience and practice, understanding that perfection comes with time.
- Follow the route laid out by the tutorial, guiding you from the initial mix to the final bake.
- Embrace the process, finding joy in the manual effort and attention it demands.
- Anticipate the reward—a home filled with the aroma of freshly-baked French croissants.
Finally, remember that the path to creating these buttery marvels is not a race but a culinary passage, leading one to discover the beauty and satisfaction of home baking. With each fold and turn, confidence grows, and so does the anticipation for that first bite into a self-made piece of flaky indulgence.
Essential Ingredients for Your Pastry
The foundation of any delectable French pastry lies in the quality and combination of its essential ingredients. When baking, particularly with precision-based recipes like those for croissants or other flaky delights, the significance of each chosen ingredient cannot be overstated. This discussion will focus on the cornerstone elements that create the tender, buttery layers which are the hallmark of a masterfully executed French pastry.
Choosing the Right Type of Butter
Butter acts as the soul of a French pastry, thus determining its quality and taste. The kind of butter used in a recipe can have profound effects on the consistency and flavor of the final product. For creation of the quintessential French pastry, European butter is the star thanks to its rich taste and high fat content. Being creamier and containing less water compared to regular butters available in the market, European butter enhances the pliability and results in layers that are both sumptuous and structurally sound. Its ability to remain pliable yet firm is key to expert lamination and achieving the signature flakiness in each pastry. In the absence of European butter, it is possible to incorporate flour into regular unsalted butter to achieve a semblance of the desired lamination quality, although this alternate route may yield slightly varied results.
The Importance of Measuring Ingredients Precisely
Precision in measuring ingredients is paramount in the alchemy of pastry baking. From the flour to the yeast, each component needs to be weighed with a kitchen scale to maintain the strict ratios that ensure consistent and repeatable results. This precision extends to the often-overlooked aspect of ingredient temperatures—measuring liquids gram-by-gram can dictate the baking process’s success due to the sensitivity of the leavening process to temperature and proportion. Utilizing a kitchen scale guarantees a scientific level of accuracy that cup and spoon measurements cannot match, playing an instrumental role in advancing a novice home baker towards the lofty heights of pastry excellence.
Understanding the essential ingredients for pastry baking sets the stage for excellence. Armed with European butter and a kitchen scale, the baker is well-prepared to approach the intricacies of French pastry with the expertise required for glorious results. A combination of the best buttery base with precise scaling lays the groundwork for the creation of pastries that are not just consumed, but experienced.
The Science Behind Perfect Lamination
In the pursuit of perfect lamination, the subtle interplay between the butter block, or “tourrage,” and the dough, or “détrempe,” is foundational to the integrity of a French croissant. Aspiring bakers must understand the environmental conditions and physical responses of these two critical components to achieve the flaky, air-filled layers that are the crowning glory of classic French pastries.
At the heart of effective lamination is temperature control. Both the tourrage and détrempe should be uniformly chilled to ensure that, while pliable, they are not prone to melting into one another when rolled. This cold yet malleable state is what allows bakers to perform perfect folds and rolls without the dough tearing or the butter breaking into pieces, which would otherwise compromise the pastry’s layered structure.
The process of rolling out and folding the butter-dough ensemble is repeated several times, with each fold and turn amplifying the number of buttery strata. When subjected to the oven’s heat, these layers lead to an airy lift, manifesting as the prized flakiness of the pastry. Thus, the tightrope balance between keeping ingredients cold enough to avoid fusion yet warm enough to prevent fracturing is key to successful lamination.
| Component | Temperature | Texture | Role in Lamination |
|---|---|---|---|
| Butter Block (Tourrage) | Chilled | Pliable | Creates layers; adds flavor and moisture |
| Dough (Détrempe) | Chilled | Supple | Encases butter; traps steam during baking |
The tourrage must be composed of high-quality butter, ideally with a higher fat content—such as European style butter—to facilitate the creation of those coveted layers. It should be evenly distributed within the détrempe so that upon baking, the steam from the melting butter puffs up the dough, resulting in a palatable texture contrast between crispness and tender, butter-rich softness.
Achieving perfect lamination is not so much an exact science as it is a practiced art, requiring a thorough understanding of the impact of temperature on the malleability and behavior of the butter and dough. With this knowledge, bakers can manipulate these materials to produce pastries that virtually embody the essence of French baking tradition.
While the challenge of lamination is formidable, the payoff for the patient and meticulous baker is a batch of golden, flaky, and exquisitely layered croissants, a true testament to the art of French pastry.
Mixing the Dough: Tips for a Delicate Texture
The art of mixing dough for French pastries like croissants is a delicate balance of precision and intuition. Achieving that enviable tender crumb and delicate texture begins long before the dough enters the oven. It starts in the mixing bowl, where the temperature and development of gluten play pivotal roles in the process.
Why Temperature Matters
In the alchemy of pastry making, dough temperature is crucial for controlling yeast activation and gluten development. Using cold milk is a strategic choice, as it not only cools down the overall temperature of the dough but also delays yeast activation. This meticulously controlled process ensures that the dough remains cool enough to handle, which is essential when layering the dough with butter during lamination. The ideal direst the heat of hands and the room from affecting the dough’s consistency, preserving that delicate texture we strive for in the finished pastry.
Understanding Gluten Development
Now, let’s discuss gluten—the structural protein network that gives dough its elasticity and strength. For croissants, we want just enough gluten development to provide structure, yet not so much that the dough becomes tough or resistant to shaping. Proper mixing is integral to this; overworking the dough can trigger an excessive gluten formation, making it difficult to achieve the distinct flaky layers. On the other hand, a dough that’s mixed just to the point where it doesn’t spring back when rolled out is malleable enough to be skillfully laminated without losing its supple nature.

The goal is a harmonious balance that considers the intricacies of gluten and temperature’s effects on the dough. With these tips, home bakers will be well on their way to creating pastries with the kind of fine texture that beckons from the display cases of Parisian bakeries.
Creating the Butter Block: The Base of Flakiness
At the forefront of any discussion on flaky pastries stands the butter block, a central element in the lamination process. Crafting a butter block is much like setting the foundation for a house—it must be firm and reliable, as the flakiness of your pastries quite literally depends on it. Let’s delve into the types of butter and techniques that transform simple ingredients into pastry perfection.
European versus Regular Butter
When gauging the impact of European butter versus regular butter on the enthralling texture of French pastries, it’s clear that the former leads the race. Renowned for its creaminess, due to a higher butterfat content, European butter underpins the structure and mouthfeel of our beloved croissants. By why is this butter type more desirable?
- European butter typically boasts a butterfat content around 82%, impacting both flavor and texture.
- Its low water content is ideal for creating pliable yet firm butter blocks that laminate beautifully.
- With this choice of butter, the resulting pastry emerges with the ethereal crispiness and melt-in-the-mouth softness that pastry connoisseurs cherish.
The Role of Flour in the Butter Block
Switching to regular butter does not necessarily banish your dreams of perfect pastries, provided you can adjust for its higher water content. The key is to incorporate some flour into the butter to optimize consistency. Here are some insights on the role of flour in your butter block:
| Type of Butter | Fat Content | Adjustment with Flour | Resulting Texture |
|---|---|---|---|
| European Butter | ≥ 82% | Not required | Creamy and conducive to flakiness |
| Regular Butter | Mix with 10% flour by weight | Becomes more pliable, simulating European butter properties |
Introducing flour to regular butter helps it to attain that essential suppleness necessary for a successful laminate. While it’s a workaround that may not promise the perfection seen in European counterparts, it does come impressively close—opening up a world where lustrous, golden layers of flakiness are achievable even if the acclaimed European butter remains elusive.
Whichever butter you choose, understanding its characteristics and knowing how to handle the creation of the butter block sets the stage for a successful bake—a marvel of layers that truly encapsulates the essence of French pastries.
Mastering the Art of Rolling and Folding
Embarking on the journey of mastering the quintessential technique of rolling and folding pastry dough is to embrace the soul of French baking. It is here, amidst the whisper-thin layers of dough, that the craftsman’s skill is tried and the pastry’s destiny is shaped. For it is through lamination that the breath-taking, buttery layers find their form, ready to puff into a myriad of flaky textures in the heat of the oven.
The first step in the process is to create a uniform thickness across the entirety of the dough. Achieving consistency in thickness ensures a balanced distribution of heat during baking, fostering the formation of the dough into cohesive, layered sheets. To learn this skill, one must approach the dough not just with a rolling pin, but with a keen eye and sensitive touch. The joy of rolling lies in the transformation of butter and flour into an ever-expanding canvas, each pass of the pin an ode to tradition.
Then comes the art of folding. A precise fold is a tribute to order, ensuring that each of the resulting dough layers respects its boundaries, laying the groundwork for lamination. By mastering this key technique, the symmetry of craftsmanship converges with the science of baking. The mesmerizing dance of dough and butter, fold upon fold, turns a simple sheet into a complex labyrinth of taste and texture waiting to be discovered.
- Rolling for even expansion and ideal dough thickness
- Folding for structuring dough and butter layers
- Ensuring both components are at an optimal temperature and texture for lamination
- Careful handling to maintain the distinct, separate dough layers
With the mastery of these movements, the baker coaxes life into the croissant, anticipating its rise from dough to golden brown icon of French cuisine. The process is meditative and requires patience; each roll, each fold, needs to be imbued with purpose and careful consideration.
| Stage | Action | Objective | Outcome |
|---|---|---|---|
| Rolling Out | Evenly distribute pressure | Uniform thickness | Consistency for even baking |
| Folding Dough | Neatly create layers | Structured lamination | Defined flaky layers |
| Chilling | Rest dough as needed | Prevent butter from softening | Maintain separation of layers |
| Final Rolling | Expand to final size | Prep for cutting/shaping | Ready for next phase |
Infinite transformations await in the alchemy of dough and butter, with each layer telling a story of technique honed across numerous attempts. As bakers invest themselves in understanding the intricacies of this craft, they join a lineage of artisans dedicated to the perfection of the flaky, flavorful croissant—a testament to the art of rolling and folding.
Chilling the Dough: A Crucial Step
The practice of chilling homemade pastry dough is both a science and an art. When striving for the highest quality in baked goods, particularly those as delicate as French pastries, understanding the role of dough temperature is crucial. Precise chilling fosters proper lamination, the process by which our sought-after airy layers materialize during the bake.
It is this specific interlude of resting within a cool environment that transforms good pastries into exceptional ones. Herein lies the mastery of temperature and time control, an essential milestone on the path to flaky pastry perfection.
How Time and Temperature Can Affect Your Dough
Managing the dough temperature closely mirrors the care one might invest in nurturing a delicate plant. Too warm, and the dough becomes sticky and unmanageable; too cold, and the butter embeds in unwelcoming shards. Thus, finding that temperature sweet-spot is paramount—cool enough to keep the butter between the dough layers from melting, yet warm enough to remain malleable for rolling and folding.
| Resting Phase | Optimal Temperature | Time Duration | Impact on Lamination |
|---|---|---|---|
| Pre-Lamination | 40-50°F (4-10°C) | 20-30 minutes | Secures butter in place for initial rolling |
| Mid-Lamination | 40-50°F (4-10°C) | 30 minutes between folds | Helps maintain distinct layers |
| Prior to Baking | 38-40°F (3-4°C) | At least 1 hour | Final firming to preserve layer integrity |
When to Rest the Dough
The term ‘resting’ is not chosen lightly; in the life of a pastry, it’s a phase as restorative as sleep is to humans. Rest periods allow the gluten in the dough to relax, which makes it less elastic and easier to work with in subsequent rolling stages. Just as importantly, resting prevents the butter from warming and merging into the dough, a calamity that would lead to heavy, bread-like textures rather than the sought-after flakiness.
- After the detrempe is mixed, before the beurrage (butter) is incorporated.
- Between each fold and turn during the lamination process.
- After shaping the croissants, before the final proofing.
By following these guidelines for adequate dough chilling, you stand at the ready to unlock the full potential of your pastry, ensuring a flaky, buttery experience that competently echoes the expertise found in France’s finest pâtisseries.
Cutting and Shaping Croissants Like a Pro
Embarking on the final transformation from dough to delicate pastry, cutting and shaping croissants requires a blend of technical precision and artistic flair. The transformation of the laminated dough into the perfect triangle is more than just making cuts; it’s about maintaining the delicate layers of butter and dough that will puff into the ultimate crispy, airy croissant.
Achieving the Perfect Triangle
To achieve the perfect triangle for your croissants, precision is paramount. Begin by laying out your chilled, laminated dough onto a lightly floured surface. With a sharp chef’s knife or pastry wheel, trim any uneven edges to create a perfect rectangle. This not only enhances the aesthetics but also maximizes the dough’s yield. The following steps outline the process of creating uniform triangles:
- Measure equal intervals along the top edge of your rectangle—these will serve as the points of your triangles.
- Mark half-points along the bottom edge—these will become the midpoint of the base of your triangles.
- Connect the top points to the corresponding bottom half-points with a straight edge.
- Cut along these lines to separate the dough into triangles, each one the blueprint of a future croissant.
Cutting with assuredness is key to clean, sharp lines that ensure the dough layers remain intact, a factor that will come into play as the croissants begin to bake and expand.
The Secret to the Signature Croissant Shape
Shaping your cut triangles into croissants is an art form that once perfected, results in the signature shape we all know and appreciate. Here are the steps to shape each perfect triangle into the classic croissant:
- Gently stretch the base of the triangle to widen it slightly.
- Starting from the base, tightly roll the dough towards the point to form the crescent.
- Ensure the final point finishes underneath the croissant to keep it secure during proofing and baking.
- Curl the ends towards each other slightly to give that traditional croissant silhouette.
With each roll, the careful balancing of the layers comes to fruition, as the dough forms around itself, creating even more layers that will define the pastry’s flaky structure.

| Step | Description | Tools Needed | Resulting Shape |
|---|---|---|---|
| Measuring & Marking | Dividing the dough into measured intervals for uniform triangles. | Ruler, pastry wheel | Identical triangles |
| Cutting the Dough | Creating sharp, clean cuts without compromising the layers. | Sharp knife or pastry wheel | Triangles with well-defined edges |
| Stretching | Gently elongating the base for a wider roll up. | Hands | A wider base for shaping |
| Rolling | Tightening the triangle from base to tip to form the crescent. | Hands | The signature croissant shape |
Each stage in the cutting and shaping process builds upon the last, with the overarching aim to preserve and highlight the flaky, buttery texture that sets croissants apart from other pastries. The rolled triangle holds within it the potential to become a work of edible art, epitomizing the baker’s skill in combining precision cutting and shaping with the hallmark characteristics of croissants—the perfect triangle and the signature shape.
Proofing: The Key to Volume and Lightness
The rise of a croissant from a piece of dough to a light, airy pastry is a spectacle of culinary artistry, all made possible through proofing. This crucial phase in baking occurs just before the pastries enter the oven, where the unassuming dough transforms, revealing the promise of the French pastry experience—airy layers and a delightful volume that are simply irreplicable.
Understanding the proofing process is essential for achieving the quintessential lightness that serves as the hallmark of an authentic croissant. It’s during proofing that the shaped dough continues to ferment, allowing the yeast to produce gases that create an intricate network of bubbles within the dough. These gases expand during baking, contributing significantly to the croissant’s volume and airy layers.
For optimal results, the proofing environment must be delicately managed to ensure uniformity in both rise and texture. A steady, warm temperature enables the dough to soften and rise consistently, setting the stage for those well-defined, buttery layers. One must also be careful to not overproof the dough, as this could lead to a collapse in structure and a loss of those distinctive layers. Conversely, under-proofing can prevent the pastries from achieving their full potential, resulting in a dense, insufficiently aerated croissant.
With this in mind, let’s explore the variables that play a pivotal role during proofing:
| Proofing Factor | Optimal Condition | Effect on Croissant |
|---|---|---|
| Temperature | 75-80°F (24-27°C) | Promotes even expansion and light texture |
| Humidity | High | Keeps the dough surface flexible for expansion |
| Duration | 1.5-2 hours | Allows sufficient rise without overproofing |
The goal of proofing is clear—aim for a delicate ballooning of the dough, a precursor to the oven’s alchemy where lightness and airy layers become the sensory delight in each bite of the baked croissant. Patience is vital, as bakers must allow the dough to rise naturally, gently ushering the process forward until just the right moment.
- Recognize that proofing is not just a step, but a craft that impacts the eating experience.
- Proofing paves the way for the creation of a layered, voluminous pastry, the essence of French baking.
- By mastering this process, bakers imbue each batch with the potential for perfection.
When done correctly, proofing is the unspoken hero behind each flaky layer—the invisible, yet essential ingredient that imbues croissants with their characteristic lightness and volume. This key to airy layers is indeed a craft within itself, one that every home baker can achieve through careful attention to time, temperature, and technique.
Egg Wash: For That Golden Brown Finish
As home bakers approach the culmination of their pastry endeavors, one finishing touch remains that will elevate their creations to professional echelons – the application of egg wash. This significant yet simple step is crucial for achieving that irresistible golden brown finish emblematic of the finest French patisseries. Beyond the visual allure, a well-applied egg wash contributes a layer of taste and a pastry shine that sets apart good baking from great baking.
Understanding the pivotal role of egg wash in pastry making can be elucidated by considering its effects on both flavor and texture:
- Egg wash acts as a glaze, imparting a savory hint that complements the buttery layers beneath.
- It serves as an agent of color transformation, as the proteins bond and brown in the oven’s heat, creating the golden brown patina desired by connoisseurs.
- The lustrous sheen that an egg wash provides is the pastry shine that signifies careful handiwork and attention to detail.
Applying egg wash is not just a matter of aesthetics; it’s a celebration of baking as an art form. This step is a nod to tradition, lending a depth of color and finishing touches that entice the senses before the culinary experience even begins.
| Component | Role in Egg Wash | Benefit to Pastry |
|---|---|---|
| Egg Yolk | Mains source of color | Enriches the hue for a deep golden brown |
| Egg White | Contributes to texture | Adds a crisp finish |
| Milk or Water | Thins the egg wash; aids in spreading | Enhances shine without weighing down |
For those who strive for nothing short of perfection, the act of brushing their pastries with an egg wash is the final, almost ceremonial step that completes the transformative journey from dough to delicacy. It is the cherry on top of an already rich and complex process that underscores a baker’s prowess. So, whether it’s a batch of croissants, brioche, or any other fine viennoiserie, never underestimate the power of the golden glow imparted by a simple egg wash—it is the hallmark of finishing touches done right.
Baking Techniques for Crisp and Airy Pastries
To achieve the zenith of pastry perfection in the form of crisp, flaky croissants with airy interiors, one must master a few quintessential baking techniques. These techniques, which revolve around the manipulation of oven temperature and the clever utilization of steam, are pivotal in turning a humble piece of dough into an emblem of culinary artistry. In this section, we’ll delve into how subtle differences in baking conditions can have a profound impact on your pastries.
Finding the Right Oven Temperature
One key factor in the baking process is determining the optimal oven temperature. Striking the right balance in heat is essential for croissants to develop a crisp golden-brown exterior without sacrificing their tender core. Typically, a hot oven is preferred to kick-start the rising of the dough, allowing the cold butter to release steam rapidly, which contributes to creating distinct, airy layers.
However, the quest for the right temperature doesn’t end with just cranking up the heat. It’s finding the sweet spot—typically between 375°F (190°C) and 425°F (220°C)—where the pastries puff gracefully, turning into the flaky wonders that pastry connoisseurs rave about. To ensure consistency in results, it’s advisable to use an oven thermometer to verify your appliance’s accuracy, as internal temperatures can sometimes differ from what’s indicated.
Why Steam Is Your Friend in the Oven
Introducing steam into the oven environment is another vital element of our baking techniques. Unlike drier baking conditions, steam plays a catalytic role not only in achieving a uniformly crisp crust but also in helping the pastry layers separate and expand, creating that signature flakiness. When steam hits the dough, it delays crust formation, allowing the croissants to reach their full volumetric potential before setting in their final airy form.
So how does one create steam in a home oven? The answer lies in employing simple methods such as placing a shallow pan of water on the bottom rack of the oven or spritzing the walls with water just before baking. These techniques generate enough steam to envelop the pastries, providing an ideal baking habitat for the croissants to thrive.
With these considerations in mind, here is a table summarizing the impact of oven temperature and steam on your pastry-making venture:
| Aspect | Role | Desired Outcome |
|---|---|---|
| Oven Temperature | Facilitates rapid rising and browning | Crisp, golden exterior |
| Steam Introduction | Delays crust setting; promotes expansion | Flaky layers; even browning |
It’s the alchemy of mastering oven temperature and harnessing the power of steam that leads to pastries worthy of a baker’s pride. Undoubtedly, attention to these factors is what turns the home oven into the crucible where the magic of airy, flaky croissants comes to life.
Storing and Reheating Instructions
After indulging in the labor of love that is baking croissants, ensuring their freshness for later enjoyment is essential. Proper storing and reheating methods are the pillar for preserving the delicate taste and texture of your pastries. In this section, we’ll explore the techniques for keeping croissants fresh overnight and best practices for freezing and thawing, guaranteeing that every croissant offers the same satisfaction as when first pulled from the oven.
Keeping Croissants Fresh Overnight
To keep croissants fresh overnight, focus must be centered around maintaining their intrinsic crispness. A common misconception is that the refrigerator serves as an ideal storage space; however, cold temperatures can actually cause the croissants to become stale more rapidly. Instead, opt for storing them at room temperature. The croissants should be wrapped individually in a soft cloth or paper to absorb any excess moisture and then placed in a plastic bag, leaving a slight opening to prevent condensation. This method minimizes exposure to air, keeping them fresh until the next day.

Best Practices for Freezing and Thawing
For longer-term storage, freezing croissants is the most effective way to lock in their freshness. When freezing, ensure the croissants are completely cool to prevent ice crystals from forming. Wrap each croissant individually in plastic wrap, followed by aluminum foil to protect the flaky layers from freezer burn. Stored this way in the freezer, croissants can maintain their quality for up to two months.
When the time comes to thaw, patience is key. Remove the croissants from the freezer and unwrap them—at this point, resist the urge to heat them immediately. Allowing croissants to thaw on the countertop gradually restores their texture. Once they’re at room temperature, place them in an oven preheated to 365°F for about three minutes. This short burst of heat revives the croissants, ensuring they recapture their original airy quality and buttery crispness.
| Action | Description | Duration | Result |
|---|---|---|---|
| Wrapping for Room Temperature | Croissants wrapped in cloth/paper inside a slightly open plastic bag | Overnight | Keeps croissants crisp and fresh |
| Freezing | Individually wrap in plastic, then foil | Up to 2 months | Preserves flavor and texture for long-term storage |
| Thawing | Unwrap and let come to room temperature | Depends on room temperature | Restores croissant’s texture without sogginess |
| Reheating | Warm in preheated oven at 365°F | 3 minutes | Brings back the croissant’s crispiness and warmth |
By adhering to these storing and reheating instructions, not only is the freshness of your croissants safeguarded, but their inviting aromas and delicious tastes are also perfectly recaptured, allowing for an enduring baking triumph.
Common Mistakes to Avoid in Pastry Making
When it comes to crafting exquisite French pastries, the devil is often in the details. Novice bakers and seasoned professionals alike find that some of the most frustrating setbacks arise from a few basic, yet impactful, pitfalls. Awareness of common mistakes in pastry making can mean the difference between a heavenly batch of croissants and a lackluster attempt. Appreciating these nuances is crucial for achieving the delicate balance required for perfect pastry creation.
Overworking the Dough
One of the cardinal sins in the realm of viennoiserie is overworking dough. The pursuit of perfection might tempt bakers to keep kneading with the hope of obtaining a smoother and more cohesive mass. However, when it comes to flaky pastries such as croissants, less is often more. Over-kneading is counterproductive as it develops an excessive gluten network, leading to pastries that are tough and chewy rather than tender and flaky. To preserve the dough’s delicate structure, minimal handling is key.
Ignoring Dough Temperature
The success of pastries also heavily relies on dough temperature, a factor that influences the consistency and behavior of the dough throughout the baking process. It can be tempting to overlook this detail, but in pastry baking, akin to a scientific experiment, precision can make all the difference. The dough needs to be cool enough to prevent the butter from melting into it, yet warm enough so that it’s still pliable. This balance is achieved by mindful temperature control—from the ingredients used to the ambient room temperature, securing the ideal temperature of the dough is a step that cannot be omitted.
Ensuring the pastry dough remains cool not only prevents the butter from seeping into the dough layers but also allows for the sharp delineations required for optimal lamination. Without this, the croissants lose their signature flakiness. Here’s a quick reference guide for optimal dough management:
| Mistake | Impact on Pastry | Tips to Avoid |
|---|---|---|
| Overworking the Dough | Tough texture, lack of flakiness | Mix until just combined and handle gently |
| Incorrect Dough Temperature | Lamination issues, butter leakage | Keep ingredients and environment cool |
Addressing these common mistakes in pastry making not only simplifies the process but also enhances the quality of the final product. By being mindful of the dough’s texture and temperature, bakers can ensure their pastries come out of the oven boasting the coveted combination of a crisp exterior and a soft, airy interior that pastry lovers cherish.
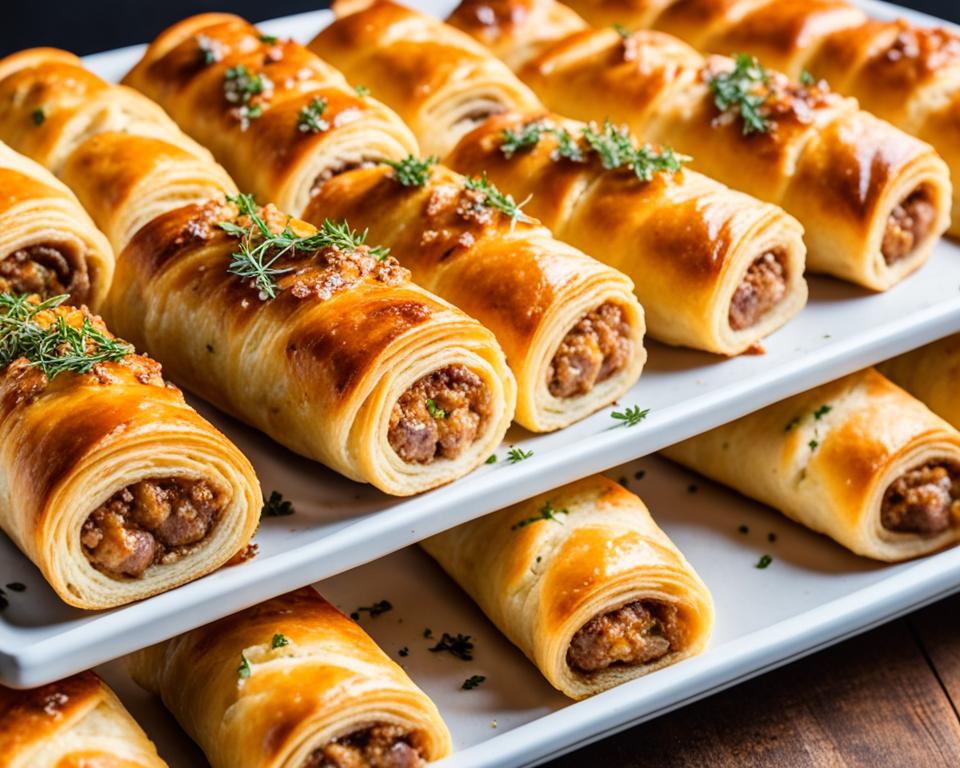
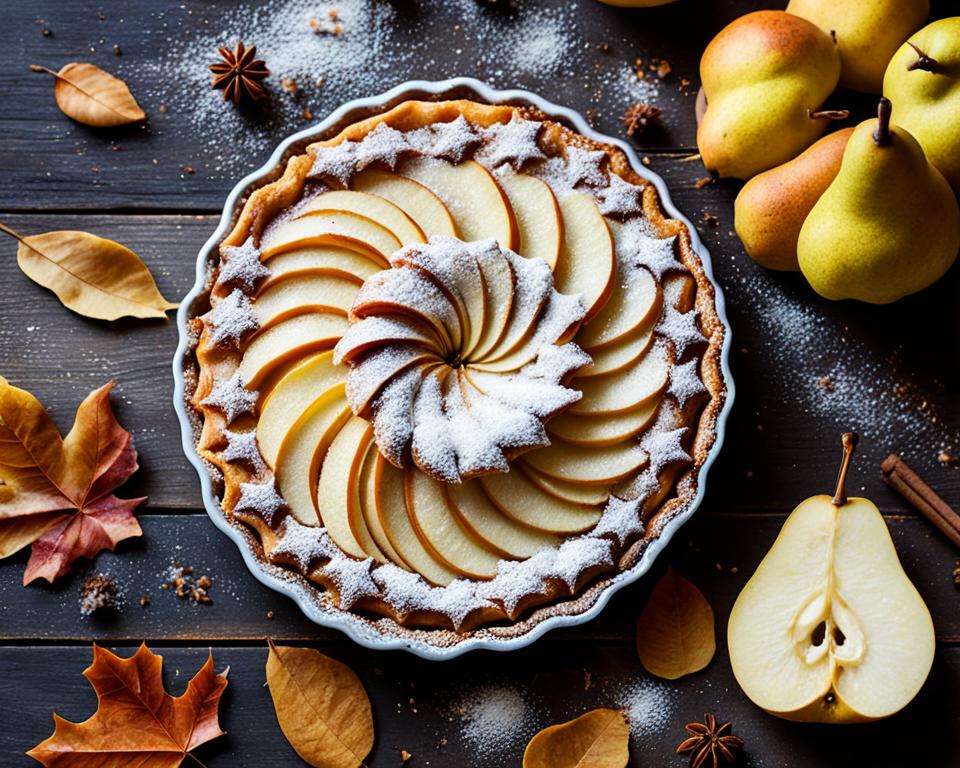
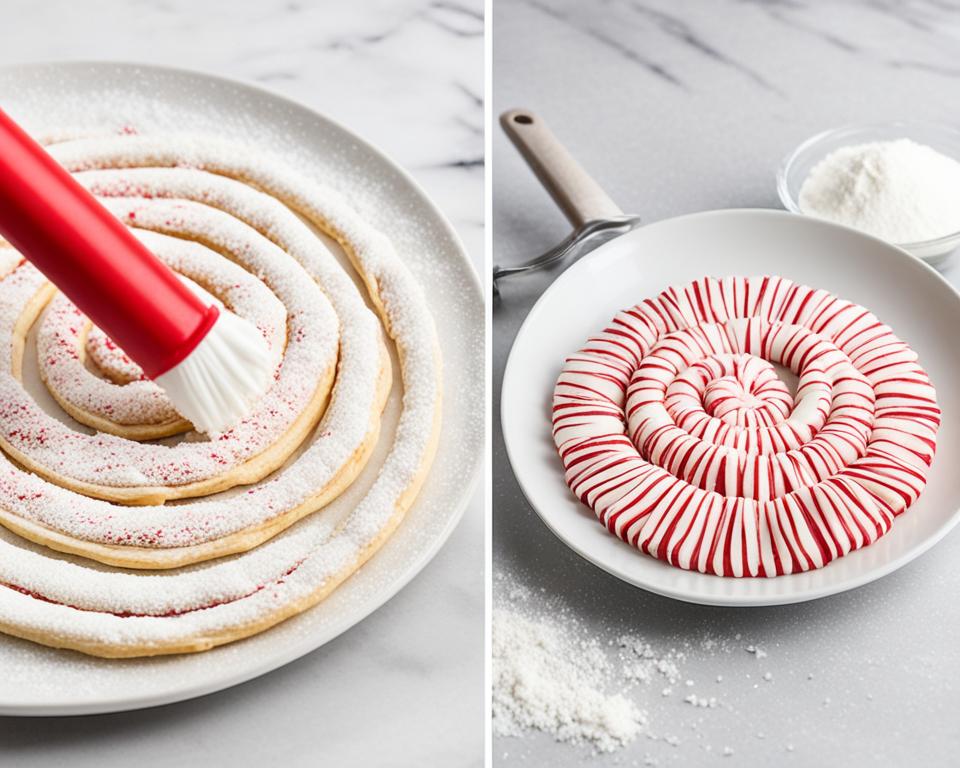
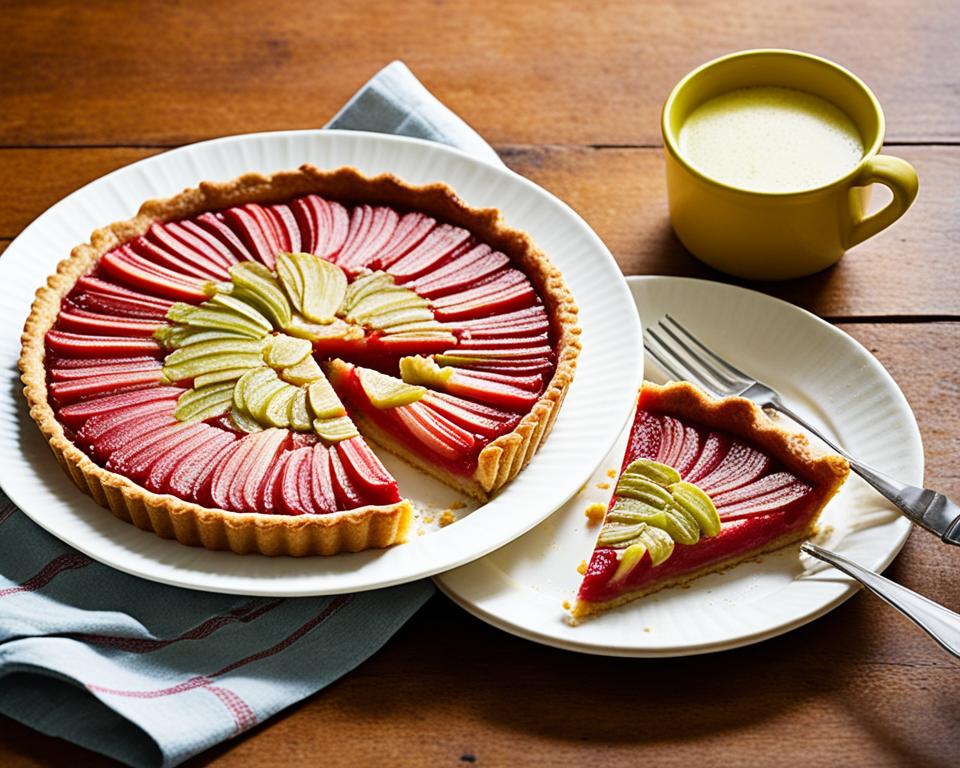
Decorating and Serving Ideas for Elegant Presentation
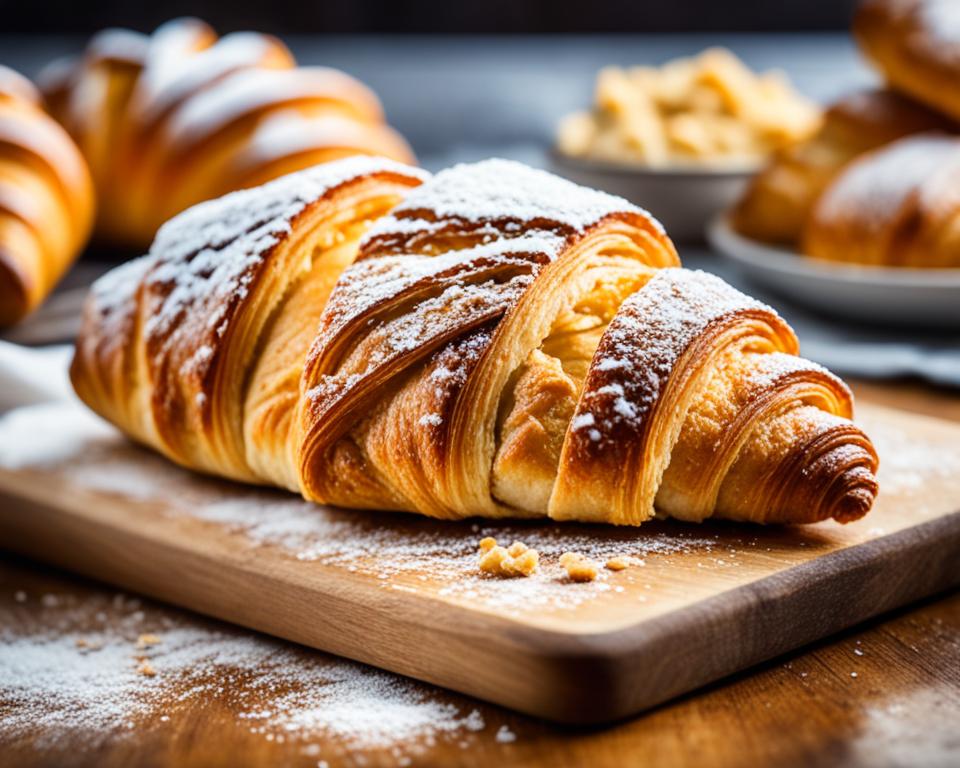
When it comes to serving up freshly baked croissants, an elegant presentation can transform this classic pastry into a visually stunning centerpiece at your table. Decorating and serving ideas are plentiful, allowing for personalization that caters to various taste preferences and occasions. From simple dustings of powdered sugar to elaborate arrangements on a platter, creativity in presentation can significantly enhance the enjoyment of these indulgent creations.
Croissants are not merely a dish but a canvas for culinary artistry. With each adornment, they tell a story of taste and sophistication.
For those inclined towards the sweet, a drizzle of honey or a light sprinkling of powdered sugar might be all that’s needed. More elaborate options can include a dollop of chocolatier-quality ganache or a ribbon of fruit compote, incorporating vibrant color and rich flavors.
- Consider a brunch spread that pairs the croissants with an array of fresh seasonal fruits, creating a colorful and healthful display.
- For a savory twist, serve croissants with a selection of fine cheeses and charcuterie, perfect for a chic appetizer or a delightful addition to a wine tasting event.
- When filling croissants, options abound from almond cream to herbed cream cheese, adding both texture and depth to the flaky layers.
Enhancing the presentation does not stop at what accompanies the croissant but extends to the serving dishes themselves. Utilize plates and platters that complement the aesthetic of the croissants, and don’t be afraid to add elements of table decor that resonate with the theme of the meal or gathering.
Consider these additional decorative flourishes for an inviting and stylish serving suggestion:
- Dust with a snowy layer of confectioners’ sugar for a classic, wintry look.
- Garnish with fresh mint leaves or citrus zest to add a pop of color and fragrance.
- Create a croissant tower by carefully stacking them, akin to a French croquembouche, for a show-stopping brunch centerpiece.
- For a communal serving, lay out the croissants in a basket woven with fabric matching the overall decor, inviting guests to help themselves.
The versatility of croissants makes them the ideal canvas for decorating and experimenting with various serving ideas. Whether opting for elegance or a whimsical approach, ensure that the presentation complements the flavors within, promising a cohesive and delightful experience for all the senses.
| Decoration Idea | Recommended For |
|---|---|
| Light sugar dusting | Simple, classic presentations |
| Fruit compote ribbon | Sweet and colorful serving options |
| Herbed cream cheese | Savory and rich fillings |
In conclusion, the art of decorating and presenting croissants is an opportunity to showcase creativity and elegance. Each choice in serving and presentation contributes to the gastronomic pleasure and the visual charm of the dining experience, solidifying the role of the humble croissant as not just a pastry, but a piece of art to be savored.
Advanced Variations of the Classic Croissant
Exploring advanced variations of the classic croissant brings a refreshing twist to the traditional French viennoiserie. By incorporating novel fillings and flavorings, or integrating alternative flours into the mix, bakers can elevate the humble croissant from a beloved staple to a canvas of culinary innovation. These imaginative adaptations not only introduce a spectrum of tastes and textures but also cater to diverse dietary preferences and health-conscious choices—proving the time-honored croissant is ripe for reinvention.
Incorporating Fillings and Flavorings
The act of infusing classic croissants with fillings and flavorings is an art form that balances the integrity of the traditional pastry with the excitement of new tastes. Fillings complement and contrast the buttery flakes with creamy, fruity, or nutty elements. From the richness of ganache to the tanginess of berry compotes, each addition transforms the pastry experience. As for flavorings, infusing the dough with zests or spices like vanilla, cinnamon, or even savory herbs, introduces aromatic notes that make each bite more dynamic and memorable.
Creating Croissants with Alternative Flours
The use of alternative flours in croissant-making addresses both a desire for nutritional variety and a need for dietary adaptations. Flours such as spelt, whole wheat, or gluten-free blends can revamp the classic formula to offer different health benefits and textures. A spelt croissant yields a nuttier flavor and a tender crumb, while a blend of gluten-free flours would ensure that even those on a gluten-sensitive diet can partake in the joy of a fresh, home-baked croissant.
| Flour Type | Texture | Flavor Profile | Dietary Consideration |
|---|---|---|---|
| Spelt Flour | Tender Crumb | Nutty | High in Fiber |
| Whole Wheat Flour | Hearty & Dense | Earthier Taste | Whole Grain |
| Gluten-Free Blend | Varied Texture | Dependent on Blend | Gluten-Free Diet |
Apart from individual health benefits, these alternative flours invite experimentation, bridging the gap between classic croissant-making techniques and modern dietary trends. The advanced variations of this pastry classic reflect an ever-evolving culinary landscape where traditional delights are reimagined to embrace new flavors, textures, and inclusive choices.
Conclusion
Achieving the perfect flaky French pastry recipe at home is not just a dream but an attainable reality for dedicated bakers. The artisanal experience of crafting a buttery, layered croissant from scratch fulfills the longing for authentic French baking within the comfort of one’s kitchen. Success lies in the details, with precision in measurements, patience during the process, and attention to the nuances of temperature and technique. Such an endeavor elevates home baking from a simple task to a celebratory craftsmanship that ends with the satisfaction of creating something sublime.
Home bakers can indeed find home baking success, as they marvel at the rise and golden hue of their fresh-out-the-oven pastries. The journey from dough to a baked delicacy encompasses the artistry and passion that are the hallmarks of traditional French bakeries. With a mindset focused on perfection at every fold and turn, they uncover a haven of delicate textures and decadent flavors that exemplify the artisanal experience they crave and cherish.
Embracing this journey to a perfect flaky French pastry recipe at home, bakers become artisans of their craft, bringing the essence of French baking culture into their daily lives. They discover that the true reward lies not just in the finished pastry, but in the joy found in each step of the process—an experience that only further deepens their love and appreciation for the art of baking.
FAQ
What type of butter is best for creating a flaky French pastry?
For best results, use European butter due to its high fat content and pliability, which are essential for creating the flaky layers in pastries. Unsalted butter is preferable to avoid oversalting the dough.
How precise do ingredient measurements need to be?
Measurements need to be very precise. It is recommended to use a kitchen scale for all ingredients, including liquids, to ensure accuracy and consistency in your pastry dough.
What is the significance of lamination in a pastry recipe?
Lamination is the process of creating alternating layers of butter and dough. It is crucial for developing the characteristic flaky texture in French pastries, such as croissants.
Why is the temperature of the dough important when mixing?
The temperature of the dough affects gluten development and yeast activation. Keeping the dough cold helps with handling and preserves the distinct layers needed for a tender, flaky pastry.
Can regular butter be used instead of European butter for the butter block?
Yes, regular butter can be used, but it’s recommended to mix it with a bit of flour to reduce its water content and make it more pliable, which is necessary for successful lamination.
What is the key to perfect dough rolling and folding?
Uniform thickness and precise measurements are crucial when rolling and folding dough. Consistency in technique ensures the integrity of the layers and contributes to the flaky texture of the baked pastry.
How does chilling the dough contribute to lamination?
Chilling the dough is crucial as it allows the gluten to relax and prevents the butter from warming and integrating with the dough layers. This step is imperative for achieving perfect lamination.
What is the best way to shape a croissant?
Cut the laminated dough into precise triangles and roll them up starting from the base to form the croissant. Proper technique ensures a consistent shape and size while maintaining the dough’s layered structure.
What is the purpose of proofing croissants?
Proofing allows the shaped croissants to rise and develop their structure. It’s essential for creating the light and airy texture that is the hallmark of a good French pastry.
Why use an egg wash on pastries before baking?
An egg wash gives pastries a rich, golden brown finish and provides a beautiful sheen, enhancing the visual appeal and adding a subtle depth of flavor.
How do you achieve a crispy exterior when baking croissants?
Bake croissants at the right temperature with the introduction of steam. This helps the layers to separate properly, ensuring the crisp and flaky texture desired.
What are the best practices for storing and reheating croissants?
To keep croissants fresh, store them in an airtight container overnight. For longer storage, freeze and thaw them properly. To reheat, warm in an oven to recapture the pastry’s crispness.
What are some common pastry-making mistakes to avoid?
Avoid overworking the dough, which can make it tough, and pay close attention to dough temperature – which is crucial for successful lamination and to prevent the finished product from becoming too dense.
How can croissants be decorated or served for presentation?
Garnish with a dusting of powdered sugar, pair with jams, or slice in half to serve with savory fillings for an elegant presentation that enhances their appeal.
What are some advanced variations of croissants that bakers can try?
Bakers can explore a range of fillings and flavorings such as chocolate, cheese, or herbs. They can also try alternative flours like spelt for a different texture and taste experience.