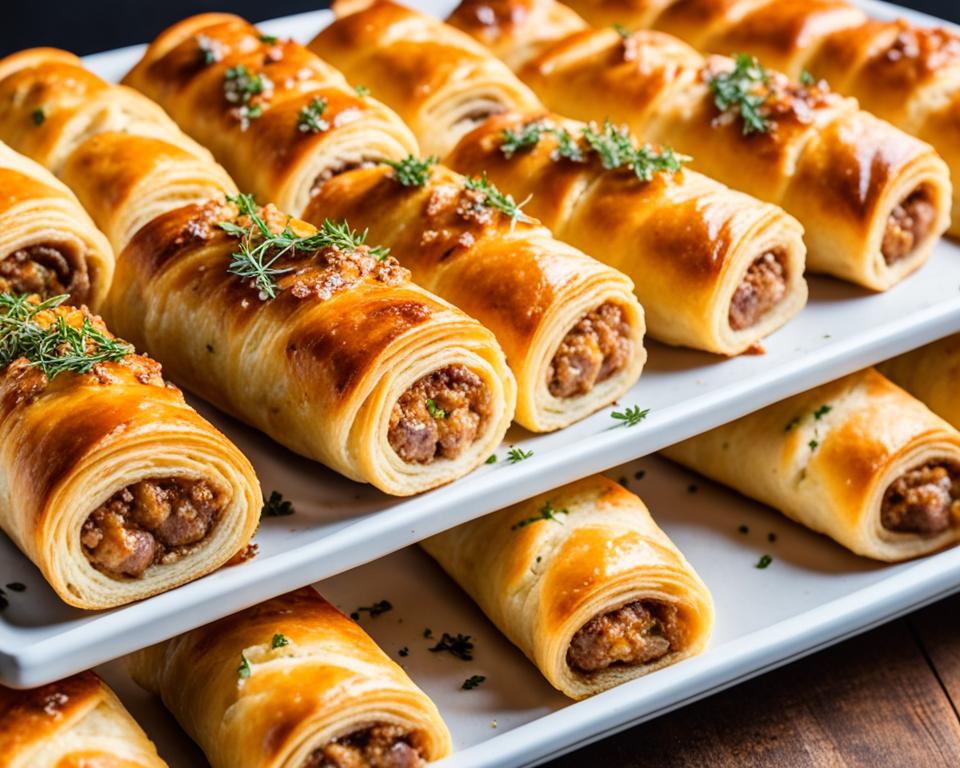
Welcome to our guide on crafting delectable Flaky Puff pastry danishes right in the comfort of your own kitchen. Imagine pulling a tray of golden, aromatic pastries out of the oven, the kind that you usually find displayed in the windows of high-end bakeries. Our easy danish recipe is designed for home chefs looking to replicate that experience with a minimal fuss and maximum flavor. For this homemade delight, you don’t need a culinary degree or hours in the kitchen. Instead, we have simplified the process, making bake-at-home pastries more accessible than ever.
With our guidance, you’ll learn how to utilize frozen puff pastry—the baker’s secret weapon to achieving that sought-after flaky crust without the work of making dough from scratch. When it’s about impressing guests at brunch or treating the family to something sweet and special, nothing beats a homemade danish pastry that boasts a buttery, flaky base, paired harmoniously with a creamy and tart red fruit filling. Get ready to turn your kitchen into a pastry chef’s dream, and let the delicious journey begin.
Key Takeaways
- Perfect for home bakers, our recipe simplifies homemade danish pastry making.
- Using frozen puff pastry cuts down prep time while ensuring flaky, buttery results.
- Discover the balance of sweet cream cheese with tart red fruit filling.
- Ideal for serving fresh and adding a wow factor to any brunch occassion.
- The guide offers a straightforward approach, making this a go-to easy danish recipe.
Introduction to Homemade Danish Pastry
There’s something undeniably luxurious about a Sunday morning began with the rich aroma of homemade danish pastry wafting through the air. We’re here to guide you through the delightfully simple process of creating these sweet breakfast treats that embody the essence of cozy mornings and leisurely brunches. Imagine delicate layers of buttery puff pastry, combined with the vibrant flavors of sweet fillings, transporting you to a quaint European café with every bite.
Whether you’re a novice baker or a seasoned pro, mastering the art of the perfect danish is within reach. We’ve honed down the steps, removing any complexity, because we believe that everyone deserves the joy of biting into a flaky, buttery delight without spending hours in the kitchen. So, gather your apron and rolling pin, and let’s embark on a baking adventure that promises to impress your loved ones and add a sprinkle of indulgence to your diet of breakfast pastry ideas.
Danishes have long been a staple in bakeries across the globe, but there’s something special about crafting your own. Your kitchen becomes a place of creation, a space where flour, butter, and sugar blend into an expression of your affection for those you’re serving. With our easy danish recipe, you’ll transform simple ingredients into a pastry that’s anything but ordinary—perfect for holidays, celebrations, or just because you deserve a treat.
Join us as we dive into a world where the sweet scent of pastry meets the satisfaction of self-made success. We assure you, the journey to creating the quintessential homemade danish pastry is as delightful as the destination. Keep reading to uncover our secrets to a morning spread that’s sure to include your new signature danish, a sure-fire way to warm hearts and bellies.
Choosing the Right Puff Pastry for Your Danishes
Embarking on the journey to create delectable Flaky Puff pastry danishes begins with selecting the ideal base. For us, it’s paramount to use high-quality frozen puff pastry. Its convenience and ability to puff to perfection make it a staple in our baking arsenal. We’ll divulge our process for transforming this time-saving ingredient into artisanal delicious breakfast pastries that rival any bakery’s offering.
Benefits of Using Frozen Puff Pastry
Why choose frozen puff pastry? Because quality matters. This ready-made pastry captures our hearts with its ease and unfailing results. The appeal also lies in its practicality; it’s a dream for planners and spontaneous bakers alike. You can keep a stash in your freezer, ready to thaw whenever the craving for a buttery, flaky pastry strikes.
Working with Thawed Puff Pastry
Once thawed, frozen puff pastry requires a delicate touch. The secret to Flaky Puff pastry danishes that bake up beautifully lies in keeping the dough cold. Here’s our method: we gently roll out the pastry on a well-floured surface, just enough to merge any seams. Patience is key — careful handling ensures pastry that rises gloriously in the oven, resulting in those coveted airy layers in each bite of your delicious breakfast pastries.
Creating the Perfect Cream Cheese Filling
At the heart of our homemade danish pastry lies the irresistibly smooth cream cheese filling – a key player among sweet breakfast treats. We take pride in crafting a filling that balances sweetness with a subtle tang, achieving a symphony of flavors that’s both comforting and exciting to the palate. A good cream cheese filling doesn’t overshadow the pastry; instead, it complements the flakiness with its creamy richness. Let us walk you through the simple yet refined process of creating this essential component.
To begin, the cream cheese must be at room temperature. This simple step is crucial for creating a filling that’s free from lumps, offering the velvety texture that danish aficionados cherish. We blend cream cheese with just the right amount of granulated sugar, a dash of pure vanilla extract, and a squeeze of fresh lemon juice. It’s this careful melding of ingredients that defines our cream cheese filling, turning each pastry into a homemade masterpiece.
- Room-temperature cream cheese: Ensures a smooth mixture with no clumps.
- Granulated sugar: Adds just the right level of sweetness without overwhelming the senses.
- Vanilla extract: Offers a warm, classic flavor that pairs beautifully with the creaminess of the cheese.
- Fresh lemon juice: Provides a bright note to cut through the richness, subtly elevating the filling’s flavor.
Assembling this creamy heart of our pastries is not about complexity; it’s about honoring the simplicity of good ingredients. By avoiding overmixing, we retain the light, fluffy consistency that makes our homemade danish pastry so delightful. It’s a nod to tradition made possible with modern ease, ensuring every batch we create is as enchanting as the last.
Whether you’re preparing this filling for a special occasion brunch or a simple family breakfast, the outcome is always a luxurious treat. Our home kitchens are transformed into bastions of baking where each danish offers an expression of love, care, and homestyle craftsmanship. So, let’s continue to celebrate the joy of baking together, weaving our culinary tales with each delectable pastry we bring to life.
The Art of Adding Fruit Fillings and Preserves
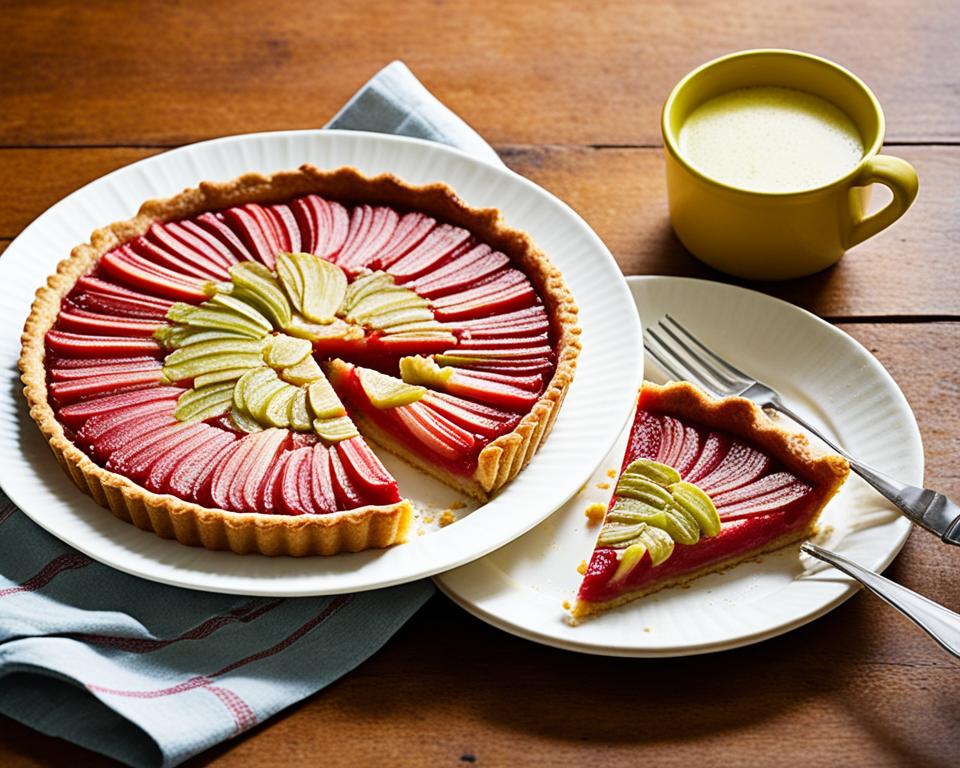
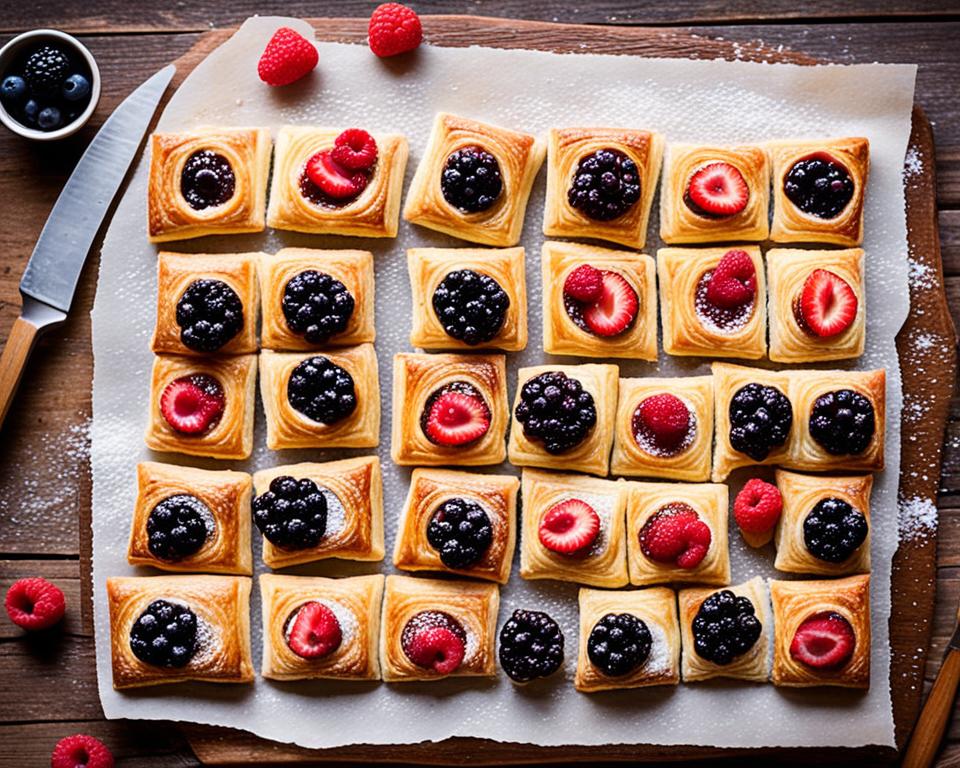
Transforming our Flaky Puff pastry danishes into fruit-filled pastries is nothing short of culinary art. The act of incorporating a rich fruit layer is about more than just adding sweetness; it’s about creating a burst of flavor with every bite. We favor Bonne Maman INTENSE Red Fruits Fruit Spread for its vibrant taste and the sincerity of its ingredients which, when mingled with fresh strawberries and raspberries, yields a filling that is undeniably gourmet and yet so fittingly homely.
In the spirit of true bakers, we don’t shy away from giving our pastries that special attention they deserve. Here’s where the balance comes into play: We blend the luscious Bonne Maman spread with our chosen fresh fruits, creating a harmonious dance between the intense jammy flavors and the natural sweetness of the berries. A sprinkle of cornstarch ensures that as our danishes puff and golden in the oven, the filling remains beautifully contained and evenly textured.
| Ingredient | Function | Result in Pastry |
|---|---|---|
| Bonne Maman INTENSE Red Fruits Fruit Spread | Adds rich fruit flavor and natural sweetness | Jammy, bursting with berry notes |
| Fresh Strawberries and Raspberries | Provide texture and freshness | Authentic, home-kitchen feel to each bite |
| Cornstarch | Thickens and binds the fruit mixture | Evenly distributed, structured filling |
The real artistry lies in how these components come together to form a masterpiece within the flaky layers of our puff pastry. We thread the narrative of quality and care through each step of preparation, ensuring that from the first glance to the last bite, these fruit-filled pastries captivate and delight. As the oven door closes, the magic truly begins, with flavors and textures marinating under the golden crust, drawing eager eyes and appetites to what promises to be the star of the brunch table.
Essential Tips for Assembling Your Danishes
As we delve into the world of creating the perfect Flaky Puff pastry danishes, let’s focus on the essential steps that will ensure your success. Assembling these delicious breakfast pastries with care will produce impressive results that could easily become the highlight of your brunch spread. Below, we provide you with tried-and-true tips that we’ve honed through our own baking experiences.
Rolling and Cutting Pastry Sheets
Let us begin with the foundation of our danishes—the puff pastry itself. First, take your thawed pastry and gently roll it out, ensuring to press just hard enough to smooth out any creases. This creates a uniform canvas that’s essential for evenly assembling danishes. Then, with a sharp tool, cleanly cut the pastry into rectangles. The size can vary depending on your preference, but we find that a smaller size often provides that ideal bite that pastry enthusiasts crave.
Scoring and Egg Washing for a Golden Finish
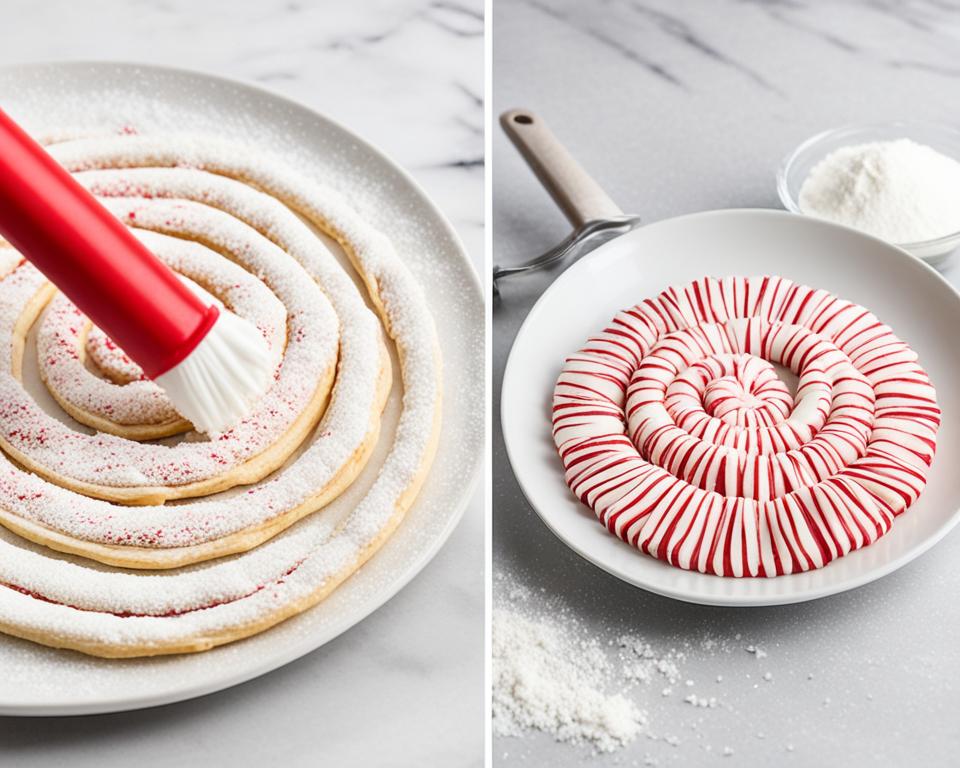
Scoring isn’t simply about aesthetics; it’s a strategic technique that encourages the pastry to rise properly, creating distinct layers that define Flaky Puff pastry danishes. Gently score a border around the edge of each cut pastry sheet, taking care not to cut through. This delicate touch allows for the dough to envelop the filling as it bakes, providing a finished edge that is both functional and visually appealing.
Following the scoring, it’s time for the egg wash—our little secret for achieving that enviable golden sheen on the pastry. Lightly brush the beaten egg over the scored edges; trust us, this step gives the pastry that professional, glossy finish as it bakes to perfection.
| Step | Instruction | Purpose | Outcome |
|---|---|---|---|
| 1 | Roll out the thawed puff pastry | Creates an even surface | A smooth base ready for filling |
| 2 | Cut into rectangles | Allocates individual servings | Unformed danishes prepared for assembly |
| 3 | Score a border | Allows the dough to rise at the edges | Visually distinctive pastry with raised edges |
| 4 | Apply egg wash | Gives gloss and enhances browning | A golden finish that entices the eye |
We’re thrilled to share these techniques that ensure your danishes not only taste fantastic but look the part too. Remember, the key is to approach each step with patience and care, as the finesse in your handling will be reflected in the final, flaky layers that make up these delicious breakfast pastries.
Mastering the Baking Process for Flaky Puff Pastry Danishes
As we delve into the essential steps of baking Flaky Puff pastry danishes, we must emphasize the crucial role of oven temperature. To achieve that airy, layered quality in our bake-at-home pastries, we begin by preheating the oven to a hot, precise temperature. This high heat works its magic on the pastry, ensuring a rapid rise and creating pockets that define flakiness. To master this part of our easy danish recipe, constant vigilance is key to spotting the telltale signs of perfection: an evenly puffed pastry with a deep golden-brown hue.
Apart from just the bake, what sets our danishes apart is the final touch, a post-bake glaze or a dollop of jam that we lavish over the warm pastries. This step is not mere embellishment; it serves to amplify the inherent flavors within our Flaky Puff pastry danishes and adds a glossy sheen that beckons the eye.
-
Preheat your oven to the high heat necessary for puff pastry delight.
-
Place your danishes in the oven, ensuring they’re properly spaced for heat circulation.
-
Monitor the baking process for signs of even puffing and coloration.
-
Prepare for the finishing touch while your danishes are still in the oven.
-
Enhance the baked danishes with a glaze or jam to add a lustrous shine and a burst of flavor.
Below is a table that outlines the nuances that we must consider while our danishes transform into golden treasures in the oven:
| Baking Stage | Temperature | Time | Visual Cues | Post-Bake Enhancement |
|---|---|---|---|---|
| Preheating | 400°F (204°C) | — | Oven ready | — |
| Baking | Maintain high heat | 20-25 minutes | Golden brown and puffed | — |
| Cooling | — | 5-10 minutes | Settled structure | Brush with jam or apply glaze |
In our kitchen, we know the importance of bringing together technique and patience. Following these guidelines, we ensure that each batch of Flaky Puff pastry danishes we bake is not only a sight to behold but a symphony of taste and texture that only homemade pastries can provide. So, don your aprons, preheat your ovens, and let’s begin the beautiful process of transforming dough into a flaky, indulgent treat that will elevate any table it graces.
From Oven to Brunch Table: Serving Your Homemade Danishes
As we transition from baking to presentation, there’s an array of options to heighten the allure of our freshly baked danishes. To serve homemade danishes that captivate the senses, we employ a few confectionary tricks. Whether it’s a glaze that adds a gleaming sweetness or a dusting for a touch of elegance, we know these final flourishes make our sweet breakfast treats unforgettable. Let’s indulge in the ritual that transforms our breakfast pastry ideas into the centerpiece of an indulgent brunch.
Adding a Glaze or Dusting for Extra Sweetness
To complement the flaky layers and the rich filling of our danishes, a simple glaze can be drizzled atop each piece for a moist sheen that invites the first bite. The glaze, easily whisked together with powdered sugar and a touch of water, lemon juice or milk, provides not just flavor but also a desirable sticky texture. If a subtle finish is more in line with your brunch theme, a light dusting of powdered sugar may suffice, creating a snow-capped look that’s elegant and restrained.
Best Practices for Serving Danishes Fresh
Nothing surpasses the delight of enjoying a danish fresh out of the oven. Their flaky, buttery exterior complemented by a soft, melt-in-your-mouth center defines the essence of quality homemade pastries. Serving them promptly ensures guests experience this peak of texture and flavor. However, should the need arise to keep them for a short while, rest assured that room temperature storage in an airtight container will maintain their crispness for later enjoyment. When it’s time to gather at the table, our danishes will stand as a testament to the craft of baking and the joy of sharing these with family and friends at an indulgent brunch.
Storing and Reheating Tips to Keep Pastries Fresh
So you’ve mastered the art of making Flaky Puff pastry danishes, and your kitchen has been filled with the delightful scents of your success. It’s equally important to know how to preserve the delectable texture and taste of your creations for those moments when you have leftovers or want to prepare in advance. We have some essential tips for storing breakfast pastries and reheating danishes to maintain their fresh-from-the-oven appeal.
Firstly, let’s talk about storage. If you’re not planning to devour all your danishes immediately, storing them properly is crucial. To keep the pastries crispy and flaky, place them in an airtight container once they’ve completely cooled down. They’ll retain their texture at room temperature for up to two days. It’s tempting to pop them in the fridge, but this can actually make the pastry soggy, which is not what your breakfast dreams are made of.
When it comes to reheating danishes, whether it’s the next day or after a brief storage, a toaster oven is your best friend. It circulates heat around the pastry, restoring the crispness without drying it out. If you don’t have a toaster oven, a conventional oven preheated to 300°F works wonders, too. Just a few minutes should bring back that delightful flakiness as if they were baked mere moments ago.
| Method | Temperature | Time | Outcome |
|---|---|---|---|
| Storing | Room Temperature | Up to 2 days | Preserved flakiness and taste |
| Reheating (Toaster Oven) | — | Few minutes until warm | Restored crispness and warmth |
| Reheating (Oven) | 300°F | Few minutes until warm | Revived flaky texture |
Now, if you’re planning a brunch or gathering and would love to serve freshly baked pastries without the morning rush, consider pre-assembling your danishes the night before. Place them on a baking tray, cover with plastic wrap, and store in the refrigerator overnight. The next day, all you have to do is preheat the oven and bake as usual. It’s a time-saver that ensures you can indulge in warm, flaky pastries alongside your morning coffee.
These storage and reheating strategies are not just about maintaining deliciousness; they’re about embracing the baked comforts of home any day of the week. With these tips, you’ll ensure your Flaky Puff pastry danishes are just as scrumptious as when they first emerged from the oven, making every breakfast a memorable culinary event.
Incorporating Variations to Suit Any Taste
Our foray into the world of homemade danishes is marked by versatility, allowing us to craft customized breakfast pastries that appeal to every palate. From the traditional fruit-filled pastries to innovative creations that include a medley of various danish toppings, the possibilities are endless. Delight in the exploration of different flavor combinations and add that personal touch that transforms a good danish into a great one, tailored to individual tastes.
Exploring Different Fruit and Cream Cheese Combinations
We encourage you to play with flavors to create danishes that are uniquely yours. Begin with a foundation of smooth, tangy cream cheese and layer it with your favorite fruits for that perfect balance of creamy and fruity. Try mixing tart cherries with rich, velvety cream cheese, or go for a tropical twist with chunks of pineapple. The beauty lies in the interplay of textures and tastes, resulting in fruit-filled pastries that are as diverse as they are delightful.
- Classic Berry: A combination of blueberries, raspberries, and blackberries with classic cream cheese.
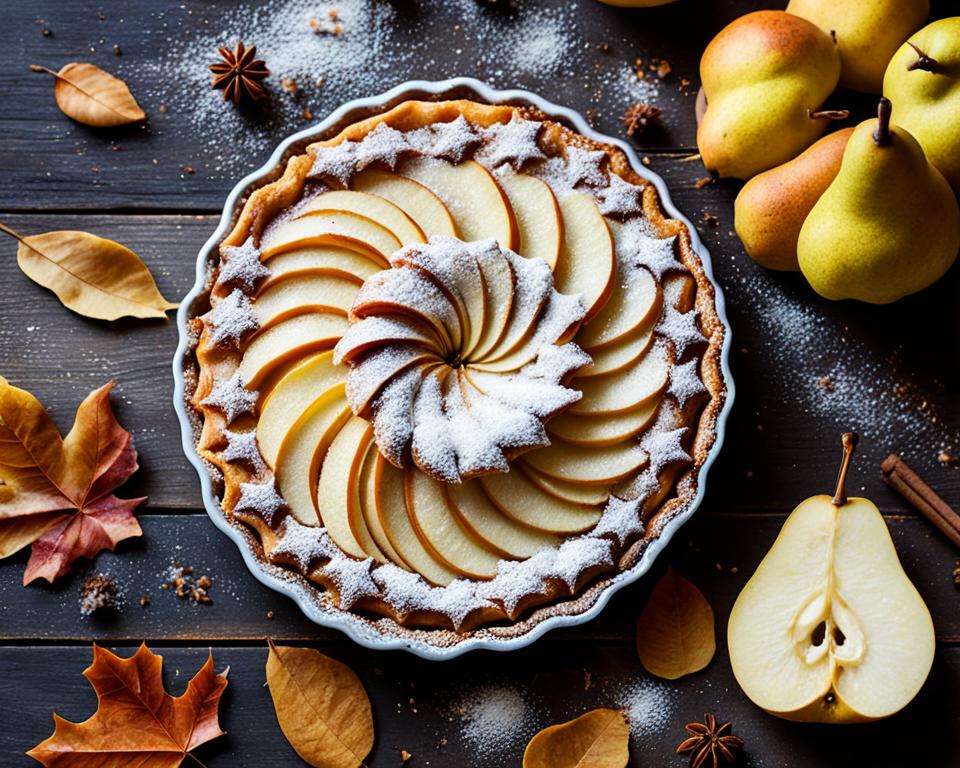
- Orchard Harvest: Pair spiced apples or pears with a hint of cinnamon in your cream cheese.
- Citrus Burst: Infuse your cream cheese with lemon or orange zest, topped with corresponding citrus segments.
Additional Topping Ideas: Chocolate Chips, Nuts, and More
Why not take your danishes a step further? Beyond fruits and cream cheese, the realm of various danish toppings invites you to sprinkle, drizzle, or dollop your way to pastry perfection. Scatter chocolate chips for a sweet surprise, or add toasted nuts for a satisfying crunch. These extra touches not only enhance flavor but also make each pastry a visual treat, beckoning you to dig in.
| Topping | Description | Pairing Suggestion |
|---|---|---|
| Chocolate Chips | Rich and melty | Excellent with raspberry or banana cream cheese fillings |
| Toasted Almonds | Crunchy with a nutty depth | Complements cherry or apricot fillings |
| Coconut Flakes | Sweet and tropical | A delightful finishing touch to mango or pineapple danishes |
Whether you’re serving them at a large family brunch or enjoying a quiet morning at home, these customized breakfast pastries are sure to impress. We invite you to unleash your creativity, experiment with your favorite flavors, and watch as the simple danish is elevated to an exquisite, personalized treat. After all, the best dishes are those made with love and a dash of imagination.
Flaky Puff pastry danishes: Your New Homemade Specialty
Embarking on the journey of crafting homemade danish pastry fosters not just a new hobby, but a celebration of culinary expression in our very own kitchens. We have come to cherish the process, finding solace and excitement in the creation of our Flaky Puff pastry danishes. This easy danish recipe is more than a mere blend of ingredients; it is the alchemy of home baking that transforms them into a household treasure.
We’re proud to share the steps that make these pastries a highlight of any brunch. The delicate work of folding and baking becomes second nature, with each layer adding to the authentic, homemade charm. As we perfect our technique, the kitchen transforms into a realm of possibility, where every batch is a new opportunity to impress and indulge.

In our collective baking adventures, the well-loved danish emerges as a symbol of shared experiences. Whether for a lazy Sunday morning or a celebratory brunch festivity, our danishes promise to bring smiles and contentment. And so, without further ado, we invite you to roll up your sleeves, preheat your ovens, and enter the rewarding world of homemade pastries.
Assembling our danishes carries the same joy as painting on a blank canvas. Each dab of cream cheese filling and every spoonful of fruity preserve is an artistic stroke that brings us closer to realizing our culinary masterpiece. And the process is so delightfully easy, it feels less like work and more like play.
But the true magic happens in the oven, where heat and dough dance together and rise in a choreographed spectacle of flaky layers. Our eyes watch with anticipation as the pastries bloom and take on that signature golden color—a sign that soon, we’ll be savoring not just a baked good, but the fruits of our labor crafted with love and care.
The final reward is in the serving: presenting our golden, flaky confections to the table. The aroma alone is inviting, but it’s the taste—the perfect marriage of buttery pastry and sweet filling—that cements the Flaky Puff pastry danishes as our new homemade specialty.
So, friends, let us proceed with confidence. Our homes are about to get a little sweeter and our brunch tables a whole lot brighter, as our easy danish recipe becomes a newfound specialty, one flaky layer at a time.
Conclusion
In wrapping up our culinary journey, we can proudly say that the creation of homemade Flaky Puff pastry danishes embodies the spirit of accessible gourmet baking. Our excursion into the realm of these delicious breakfast pastries affirms that with a few curated ingredients and manageable steps, anyone can produce sweet breakfast treats bursting with homemade goodness.
Each flake of our puff pastry whispers stories of tradition and craftsmanship, achieving the kind of authenticity usually reserved for artisanal bakeries. Thanks to our careful guidance on the entire process, we’ve ensured that your home kitchen could echo with the same richness of flavors and textures that have long defined quality pastries.
We take great pleasure in sharing these recipes, crafted not just to feed but to deliver moments of joy and indulgence right from your oven. So, let us celebrate the finesse of our homemade delicacies, proof that the art of baking, especially when it comes to homemade Flaky Puff pastry danishes, is alive and well in the heart of home kitchens across the United States.
FAQ
What are some key features of Flaky Puff pastry danishes?
Some key features of Flaky Puff pastry danishes include their buttery and layered texture, the rich cream cheese filling, and the tart red fruit filling that provides a delicious contrast. They are a classic choice for sweet breakfast treats or indulgent brunch offerings.
Can I use store-bought frozen puff pastry for homemade danish pastries?
Absolutely! Using store-bought frozen puff pastry is a convenient option for making homemade danish pastries. It saves time and ensures consistent, buttery layers in your bake-at-home pastries.
How do I work with thawed puff pastry when making danishes?
When working with thawed puff pastry, keep it chilled to ensure flakiness. Gently roll it on a floured surface to integrate the seams and handle it carefully to maintain its temperature, which is crucial for a proper rise and texture.
What ingredients go into the cream cheese filling for danishes?
To make the cream cheese filling for danishes, you’ll need room-temperature cream cheese, granulated sugar, vanilla extract, and a touch of fresh lemon juice. This combination results in a smooth and flavorful filling.
What makes the fruit filling in Flaky Puff pastry danishes special?
The fruit filling in these pastries is made special by combining homemade fruit filling with high-quality preserves such as Bonne Maman INTENSE Red Fruits Fruit Spread. This ensures an intense, jammy flavor with balanced sweetness.
How should I assemble my danishes to achieve the best result?
For the best result, roll out the pastry to eliminate creases and cut it into uniform rectangles. Create a border and apply an egg wash for a golden finish. Be sure to place the cream cheese and fruit filling centrally and sparingly to avoid spillage and achieve the right pastry-to-filling ratio.
What is the ideal baking temperature for Flaky Puff pastry danishes?
The ideal baking temperature for these danishes is high heat, which facilitates rapid pastry expansion and results in a flaky texture. Keep an eye on the pastries to ensure an even puff and a rich golden brown color.
How should I serve and present homemade danishes?
Homemade danishes are best served fresh. For extra sweetness and visual appeal, you can add a glaze made of powdered sugar and water, lemon juice, or milk. Alternatively, a dusting of powdered sugar adds a decorative touch. Serve them as part of your breakfast or brunch for a delightful treat.
What are the best ways to store and reheat Flaky Puff pastry danishes to preserve freshness?
To store the danishes, keep them at room temperature in an airtight container for up to two days. For reheating, use a toaster oven or an oven preheated to 300°F to partially restore the flaky texture.
How can I customize my homemade danishes?
Customizing homemade danishes is easy. Try out different fruit and cream cheese fillings or add toppings like chocolate chips or nuts. This allows for personalized breakfast pastries that cater to your taste preferences and make for a visually appealing assortment.