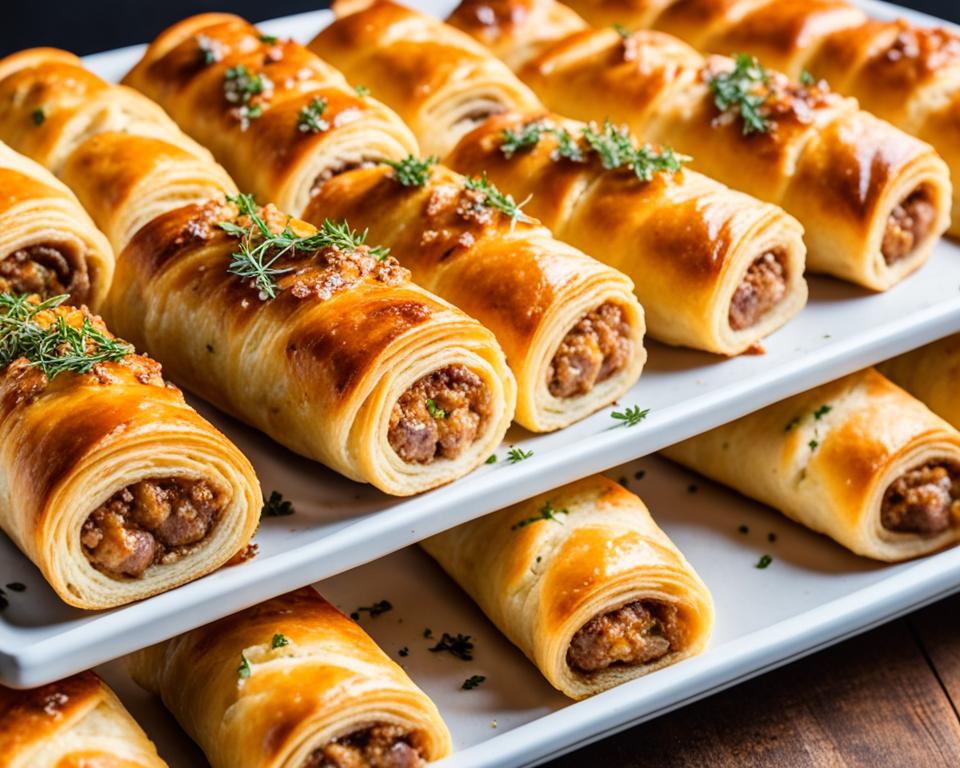
There’s something undeniably enchanting about pulling a homemade pie from the oven, its buttery crust a golden brown testament to the baker’s skill. The pursuit of the perfect flaky baked pie is one filled with precision and tradition, where every fold of dough holds the potential for that sought-after, flaky texture. As we approach pie season, it seems fitting to delve into the artistry behind a delicious pastry that’s both rewarding and a delight to share. Crafting a pie with that beautiful layering of flaky pastry isn’t just about following a dessert recipe; it’s about embracing a baking technique that stands the test of time.
Whether you’re aspiring to perfect grandma’s apple pie or venturing into the realm of fruit fillings, the homemade pie offers a canvas for culinary creativity. The Flaky Baked Pie isn’t only a dessert; it’s a labor of love—from the cold, unsalted butter diced and laid out with precision to the meticulous rolling that transforms simple ingredients into a flaky masterpiece.
Key Takeaways
- Understanding the importance of temperature ensures a buttery crust and the perfect rise of flaky layers.
- Flaky pastry requires a delicate balance of ingredients to create delicious pastry ideal for a fruit filling.
- Baking technique is essential for achieving that golden brown finish that’s synonymous with a well-crafted homemade pie.
- A Flaky Baked Pie is a culmination of attention to detail and the joy of creating something truly magnificent from scratch.
- The secret to a flaky texture lies in the intersection of chilled ingredients and the light, skillful touch of the baker.
- Homemade pie embodies more than a dessert recipe; it encapsulates a shared tradition in every delicious bite.
- Seasoned and novice bakers alike can conquer the flaky baked pie, making it a versatile approach to creating irresistible pastries at home.
The Essence of Flaky Baked Pie
The creation of a delicious pastry with delectable flaky layers and a buttery crust hinges upon methods that have been refined over generations. Culinary enthusiasts and seasoned bakers alike strive to master these methods, aiming to produce pies that host an array of fruit fillings within their tender enclosures. Let’s explore the basics of what makes a pie crust transform from mere dough into a transcendent experience.
Understanding the Basics of Flaky Pastry
For a pastry to be categorized as ‘flaky’, it must possess an airy texture and a crispy exterior. The journey to such texture begins with starting ratios and practice, much like that of a careful alchemy, which consists of combining the right portions of flour and fat. A flaky pastry is discerned not just by taste, but by the visible layers that crunch delicately at each bite, revealing the intricate nature of its preparation.
The Role of Butter in Achieving Flakiness
Butter’s role in pastry cannot be overstated—it is the maestro behind the curtain, conducting the transformation of dough into flaky artwork. The size of butter pieces and their distribution throughout the flour define the end texture of the crust. Large, cold chunks of butter melt when subjected to the heat of baking, creating pockets of steam that lift the dough into numerous, airy layers. This phenomenon makes the pie crust delightfully crisp, providing the buttery vehicle that carries a luscious fruit filling to perfection.
Recognizing the Difference Between Biscuity and Flaky Pastry
Contrary to the biscuity pastry, whose hallmark is the uniform amalgamation of butter into flour, flaky pastry cheers the presence of irregular butter pieces nested within the flour mix. Biscuity pastries, such as those made using pate sucree, offer a dense texture suitable for tarts and bases designed to be filled. Flaky pastries, on the other hand, invite the butter to stand out, and in the calm heat of the oven, it performs its duty: to create steam-filled layers signaling the perfect flakiness of a golden-brown crust.
In the pursuit of baking excellence, one must remember that the flaky layers of a pie crust are not only pleasing to the eye but are indicators of the meticulous care that went into the preparation of what can only be described as a luscious, buttery embodiment of a delicious pastry.
Selecting the Right Ingredients
The bedrock of a mouthwatering, golden brown, Flaky Baked Pie begins with the selection of the right ingredients. For the best homemade pie, one must pay attention to the fundamental elements: the flour, the fats, the salt, and the water. Each of these components plays a significant role in creating the flaky layers and the exquisite taste essential for pie-making excellence.
A proper homemade pie crust calls for a low-protein flour such as all-purpose or even better, pastry flour. This choice ensures less gluten development, paving the way for a crust that is delicate and tender, rather than chewy or tough. Such consistency is crucial for nesting lush fruit fillings that are the hallmark of a classic pie.
- Cold, solid fats, particularly butter, are non-negotiable. The water content in the butter will transform under heat into steam, creating those heavenly flaky layers we so deeply cherish. How cold? Cold enough that the butter should firm, preventing it from mixing too much with the flour and losing its ability to help your pie achieve that perfect puffiness.
- The delicate balance of water is next—too much, and you risk a tough pastry; too little, and crumbliness may mar your culinary creation. But not just any water – icy water is the secret to keeping your fats from falling apart under the warmth of your hands.
- Salt is more than just a flavor enhancer. It acts as a binder between gluten and fat, a subtle but crucial force that contributes to the texture and taste of your pie crust.
Remember, without the right balance of ingredients, even the most promising dessert recipe can fall flat. Precision in measurement and attention to quality will set your Flaky Baked Pie on the path to golden-brown perfection.
In sum, the dream of pulling a Flaky Baked Pie from the oven that’s both golden brown and invigorated with a rich fruit filling begins with the simple yet profound steps of picking the right ingredients. It is these choices that establish the foundation on which your homemade pie will stand, proudly satisfying the eager palates of those who gather around your table.
Crafting the Perfect Pie Dough
Every handmade Flaky Baked Pie starts with a foundation known for its rich, buttery crust and delicate texture. Achieving such artistry in a dessert recipe involves precise practices and the selection of quality ingredients, which come together to create the iconic delicious pastry that pie lovers covet. Below, we break down the fundamental steps to ensure your pie dough reaches the highest standards of flaky perfection.

Mixing Dry Ingredients for Maximum Flavor
It all begins with the basics: flour, sugar, and a pinch of salt. These dry ingredients may seem simple, yet they are the cornerstone of flavor and, when combined, set the stage for the magic to unfold. Here’s a quick guide on getting this essential step just right:
- Use all-purpose flour for its versatility and its ability to create the perfect structure.
- Sugar is not just a sweetener—it contributes to the golden brown color and assists in the caramelization.
- Salt enhances the flavors, merging with the fats and carbohydrates to heighten the pastry’s taste.
Incorporating these components uniformly ensures that each bite of your pie delivers the satisfaction and quality one expects from a time-honored dessert recipe.
Mastering the Art of Butter Incorporation
Cold, unsalted butter, chunked into considerable pieces, is the secret weapon that infiltrates the dry mix to pave the way for flakiness. The skill lies in leaving the butter just dispersed enough for steam to create those sought-after layers during baking. Look for patterns in your dough that resemble tiny pebbles—this means you’re on the right track.
Ever notice the buttery layers in a bakery’s pastry? Similarly, your dough should hint at its future flakiness, with fat pieces visible and ready to do their duty.
Manipulating Temperature for the Best Dough Consistency
Maintaining a cool ambiance as you craft your pie dough is crucial in preventing the fat from melting into the flour, as this can lead to a greasy, heavy texture. Consider chilling your mixing bowls and even the flour before starting. If the kitchen temperature rises or your hands impart too much warmth, don’t hesitate to give the dough a relaxing break in the refrigerator. A cool touch is a gentle touch, and it will show in the lightness of your baked pie.
| Ingredient | Temperature | Texture Impact |
|---|---|---|
| Butter | Cold/Frozen | Creates flaky layers |
| Flour | Chilled | Prevents gluten overdevelopment |
| Water | Ice-cold | Aids in dough cohesion |
These steps, though seemingly mundane, are the alchemy behind the perfect dough for your delightful Flaky Baked Pie. The ultimate reward is a dessert that boasts a buttery crust with flakes so tender, they almost whisper the tales of pies past and present.
The Science Behind Water and Alcohol in Pie Dough
Every baker chases the dream of creating that perfect homemade pie, with a buttery crust so flaky and tender that it becomes the talk of the dinner table. A key baking technique that separates the novice from the knowledgeable is the proper hydration of pie dough. This isn’t just a matter of measurement but understanding the scientific rationale that governs the interaction between liquid and flour.
Water is an agent of transformation in the world of pastry, particularly for creating the perfect dough for a delicious pastry. When water mixes with flour, gluten begins to form—a necessary process for elasticity and structure. However, this is a delicate balance, as too much gluten can lead to a dough that is tough and unyielding in the bake, potentially robbing the homemade pie of its signature flaky layers.
To resolve this, ingenious bakers have adopted a fascinating baking technique: substituting a precise portion of water with high-proof alcohol, such as vodka. Vodka, being 40% alcohol and 60% water, has a lesser hydrating power compared to water alone. This allows the dough to bind and become malleable without extensive gluten formation. The result is a dough that is easier to roll and less prone to shrinking during its transformation into a buttery crust when introduced to the heat of the oven.
The reduced gluten formation means that, with careful rolling and baking, the crust will tenderly cradle any dessert recipe’s fruit filling without overpowering it with chewiness. More than just a culinary hack, incorporating vodka into dough serves as a testament to the fascinating intersection between the science of cooking and the art of a delightful dessert.
To further illustrate the difference proper hydration can make, here’s a comparative glance:
| Ingredient | Effect on Gluten | Resultant Texture |
|---|---|---|
| Water Only | Activates gluten formation | Potentially tough crust |
| Vodka (40% Alcohol) | Limits gluten formation | More tender, flaky crust |
Yes, the quest for that impeccable buttery crust has led us down many paths, but it’s the science and understanding of each component in the baking technique that brings a homemade pie to life. With this knowledge in hand, pie enthusiasts are better equipped to produce a delightful dessert that bears the hallmark of a recipe not only tried and true but also thoroughly understood and mastered.
Rolling and Laminating the Dough
Embarking on the journey to create a pie with a buttery crust and flaky layers requires more than just mixing and chilling—you enter the delicate stage of rolling and laminating. This step is where patience and precision can cause the alchemy of a delicious pastry to truly unfold. One must not rush, but instead, embrace the technique of ‘lazy lamination’, which fortifies those distinct, flaky layers integral to a golden brown finale.
To commence, ensure that your dough has been thoroughly chilled. The cooling solidifies the fat within, preventing it from integrating into the flour too soon—a cardinal sin when yearning for layers of flakiness. Any heat exposure can sabotage your efforts, melding layers into a more homogenous mass, a detriment to your dough’s desired texture. Keep your ingredients and tools – the rolling pin, the work surface, and even your hands – as cool as possible throughout this process.
Roll out your dough onto a floured surface, aiming for a thickness that mirrors the delicate balance between sturdiness for fillings and the feather-light touch that defines a great pie. Adjust the dough into a large rectangle, around 6 to 8 millimeters in height, and carefully cut it into quarters. This individual attention to pieces primes them for stacking. Now, perform the stacking maneuver—layer one piece over another, akin to building a flaky fortress destined to rise splendidly.
Through the stacking and subsequent chilling, you are enabling the ‘lazy lamination’, which thrusts additional air into the textures that will puff under the oven’s heat, transitioning from the bench to be the crowning glory of your pie.
After the initial roll and stack, wrap your dough in cling film and place it back in the refrigerator. Patience is your closest ally, as the dough benefits from a brief sojourn in the cold. About 15 minutes later, retrieve your dough, and with a roll to meld the layers gently, you’re ready to repeat the process. This cycle of rolling, stacking, and chilling should be repeated several times to achieve the layers that denote a top-tier Flaky Baked Pie.
Adhering to these careful steps not only ensures a phenomenal textural experience but also exhibits the reverence given to time-honored techniques. Rest assured, your efforts will witness their reward when that first slice reveals the multitude of flaky layers, and the room fills with the aroma of a buttery crust baked to a golden brown perfection—a testament to the meticulous craft of pie making.
Steps to Prevent a Soggy Pie Bottom
One of the greatest challenges when baking a homemade pie is ensuring that the pastry base remains crisp and flaky, rather than succumbing to the dreaded soggy bottom. This culinary misstep can overshadow the luscious fruit filling and turn an otherwise delicious pastry into a disappointment. However, with a few strategic baking techniques, you can easily avoid this predicament and ensure that your pie has the perfect foundation. Here we will delve into the preventative measures that safeguard the integrity of your crust’s bottom, making it as memorable as the filling it cradles.

Pre-Baking Techniques and Tricks
The method known as ‘blind baking’ is a surefire technique to pre-empt a soggy crust. This process involves baking the crust partially before adding the filling. Doing so sets the crust, making it less permeable to the moisture from the filling. To blind bake, simply line your pastry with parchment paper, fill it with pie weights or dried beans, and bake until the edges are lightly golden. Remove the weights and parchment, then allow the crust to cool slightly before introducing your fruit mixture.
Creating Barriers to Lock Out Moisture
Beyond pre-baking, creating a barrier between the pie crust and filling ensures that the fruit’s juiciness doesn’t compromise the crust’s texture. Egg whites brushed onto the surface of the crust form a protective seal, while a layer of melted butter enriches flavor and adds to the crispiness once baked. Applying these barriers and then briefly baking them until set, will fortify your crust against the potential sogginess caused by the fruit filling’s moisture, ensuring a delicious pastry that stands firm to the last bite.
- Before adding the filling, brush the pre-baked crust with a thin layer of beaten egg white and bake for an additional few minutes until it appears glossy and set.
- Alternatively, brush the surface with melted butter, taking care to create an even coating, and bake until it solidifies, forming a moisture-resistant layer.
With these tactics in your baking arsenal, achieving the perfect balance of flaky crust and rich filling in your homemade pie becomes a joyful and successful endeavor. Follow these steps and watch as your pies become the highlight of any meal, where every crisp bite is a tribute to your masterful baking technique.
Chilling: The Secret Weapon of Pie Baking
In the wide world of pastries, the quest for the perfect buttery crust and delicate flaky layers hinges on a simple, often overlooked aspect of the baking technique: temperature control. From the experienced patissier to the home kitchen novice, those who have mastered the art of the homemade pie know this to be true. Chilling is not just a step; it’s a fundamental strategy for creating that impeccable delicious pastry every baker strives for.
When it comes to pie dough that will encase a sumptuous fruit filling, how one manages the cold can make all the difference. This isn’t about finding the coldest refrigerator settings—it’s about understanding how and why to chill throughout each step of your dessert recipe. The transformative power of cold not only impacts texture but also the flavor, structure, and ultimately, the success of the final product.
Never underestimate the power of patience when it comes to preparing your pie crust. Those willing to give their dough the gift of time, chilling in the precise moments needed, will reap the rewards of exquisite flakiness and taste.
Let’s break down the reasons why chilling is so vital:
- Gluten Relaxation: When water is added to flour, gluten networks begin to form. While gluten provides structure, too much of it yields a tough crust. Resting the dough in the cold not only keeps the gluten at bay but also maintains the integrity of the butter, ensuring that upon baking, it melts at just the right moment, creating those coveted flaky layers.
- Preserving Fat: The key to a buttery crust is solid fat. Keeping butter or lard cool prevents it from coating the flour too early, which would otherwise result in a more homogenous dough that lacks crispiness.
- Controlling the Rise: The signature puff in a pie crust relies on steam from water present within the fats. If these fats begin to melt before entering the oven, they’ll integrate with the dough and can’t do their job in creating layers within the crust.
- Better Handling: As anyone who’s wrestled with sticky, room-temperature pie dough knows, cooler dough is much easier to work with, less prone to tearing, and affords the baker a much more precise degree of control.
So, how do you effectively utilize chilling in your baking technique? Here’s a guide to ensure each stage contributes to the pinnacle of pie perfection:
| Stage of Preparation | Chilling Method | Benefit |
|---|---|---|
| Incorporating Butter into Flour | Chill butter prior; optionally freeze flour and bowl | Ensures distinct butter pieces for flakiness |
| After Forming Dough | Refrigerate dough for at least 30 minutes | Relaxes gluten, solidifies fat |
| Before Rolling | If warmed, refrigerate again before proceeding | Maintains firm butter for easy rolling |
| After Shaping Pie | Chill shaped dough in pan before filling | Secures shape, prevents a soggy bottom |
To wrap it all up, chilling is the unsung hero in the orchestration of a buttery crust wrapped around a rich, flavorful fruit filling. It’s a dance of cold interludes, each one an integral move towards the grand finale: a Flaky Baked Pie that resonates with each and every bite. So, in your next dessert endeavor, remember to keep it cool, and watch as patience paints a masterpiece within your pie dish.
Timely Tips for Baking the Perfect Golden Brown Crust
As the heart of any homemade pie, the crust commands attention. Achieving that desirable golden brown finish on a buttery crust can seem like a culinary coup, but it’s fully attainable with the proper baking technique. Through understanding and applying a few critical steps, your pies will not only embody that delicious pastry allure but also present a picture-worthy aesthetic of a well-baked, flaky delight.
Starting High: The Initial Temperature Spike
When it comes to perfecting pie crusts, initial heat plays a pivotal role. Beginning your bake with a high temperature achieves two primary objectives: it helps to set the crust’s structure promptly and activates rapid steam generation, puffing up those flaky layers that are the hallmark of a delicious pastry. This swift heat enables the crust to establish itself, reducing the potential for slumpage and ensuring the fruit filling will be enveloped by picture-perfect dough.
The Importance of Even Baking and Heat Distribution
Once you’ve given your pie that initial heat treatment, it’s crucial to reduce the oven temperature. This allows the pie to bake thoroughly without the risk of burning, ensuring that each portion of your buttery crust reaches the same lustrous golden brown shade. To aid in this process, consider the placement of your pie within the oven. Center placement typically yields uniform distribution of heat, crucial for achieving countenance in baking.
Additionally, employing a baking technique such as tenting with aluminum foil can protect areas of the crust that have achieved the desired color from becoming too dark. By shielding these regions judiciously, you exert more control over the baking process, leading to that flawless golden hue without overexposure.
Completing your pie with an even and sumptuous golden brown crust requires more than just intuition; it combines precise temperature control and the application of protective measures for a uniform bake. Follow these tips, and your next Flaky Baked Pie will boast the kind of beautifully baked, buttery crust that tastes as sublime as it looks.
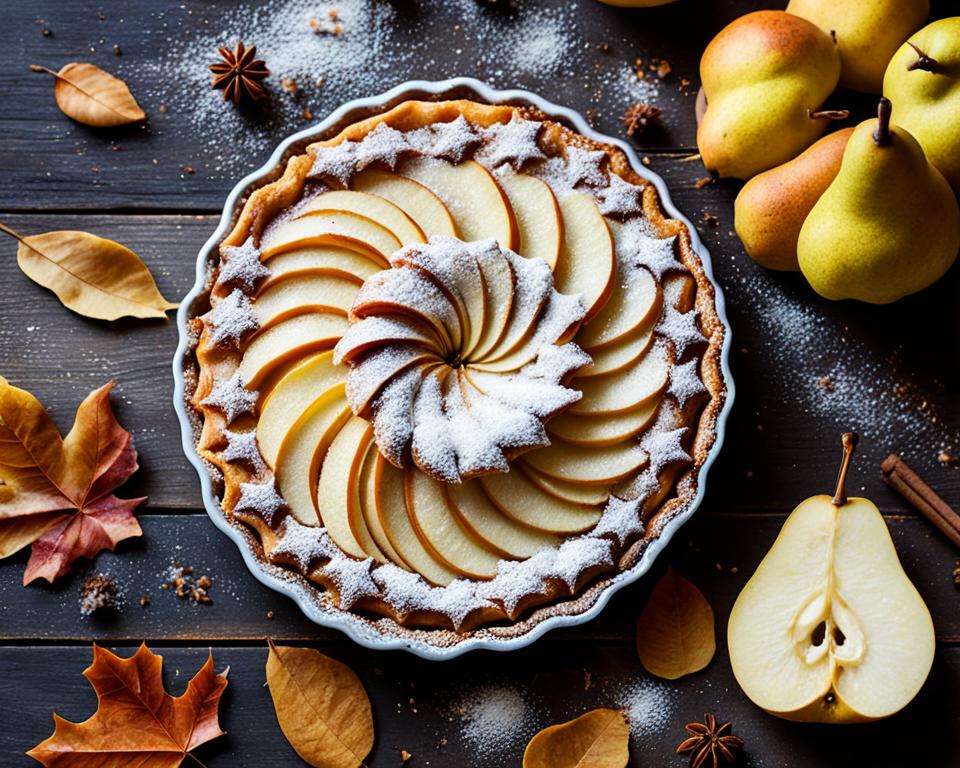
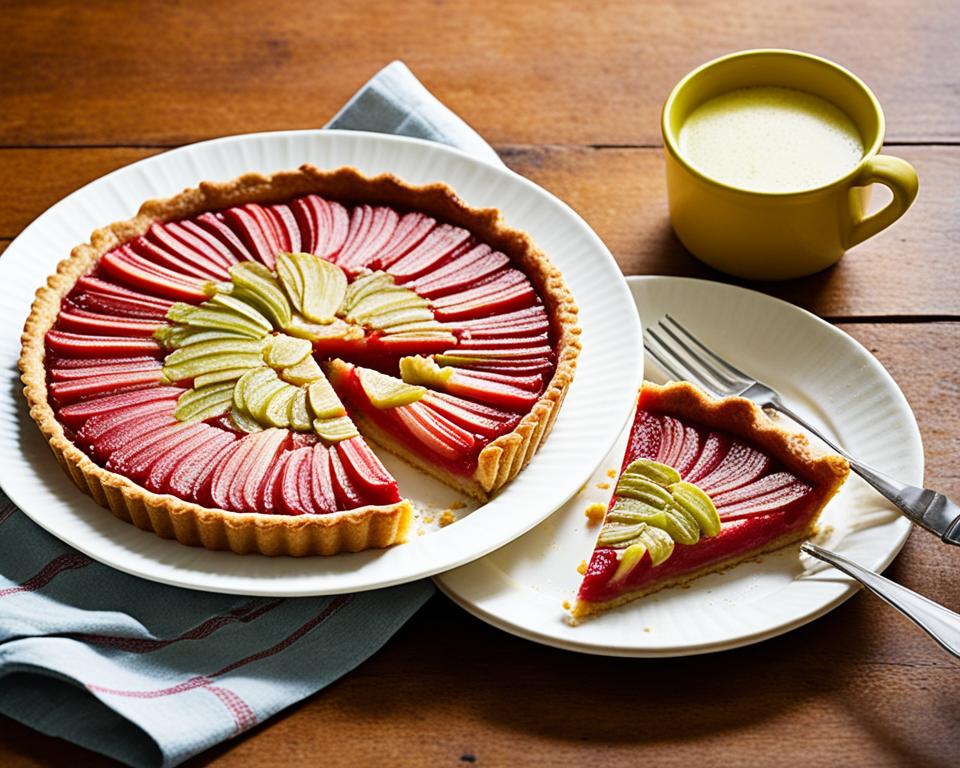
Pairing Your Pastry with the Right Filling
In pursuit of the ultimate Flaky Baked Pie, the joy is not only in crafting the buttery crust and flaky layers themselves but also in artfully harmonizing these elements with a complementing filling. The secret to a memorable dessert recipe does not lie simply in the individual components, but in their synergy. To invite a harmonious marriage between crust and filling, one must thoughtfully pair the pie dough’s characteristics with the natural qualities of the filling chosen, be it vibrant fruit or smooth custard.
Choosing Fruit Fillings for Flakiness
When picking a fruit filling, consider the moisture content and how it will interact with the flaky layers of your dough. A dough that boasts buttery flakes is particularly well-suited to fruit fillings, as it provides both a contrasting texture and a structure capable of encasing juices without becoming soggy.
The choice of fruit can greatly impact the final result of your homemade pie. For instance, apples tend to release less juice when baked, while berries can create a more moist environment within your pie. The drier fruit complements a flakier crust as it allows the buttery layers to maintain their structure, highlighting the textural contrast between the tender fruit and the crisp pastry.
In assessing your fruit filling choices, these should guide you:
- Acidity: Balances the richness of the dough with sharpness, as in the case of cherries or citrus fruits.
- Sugar Content: Affects the caramelization and contributes to the firmness of the filling.
- Pectin Content: Fruits higher in natural pectin, such as apples and pears, help to thicken the filling naturally, reducing the chance of a wet, undercooked crust.
Seeking Synergy Between Crust and Custard
For pies that require a less delicate touch, such as those filled with rich custards or dense chocolate fillings, a mealy crust provides the durability needed. However, when the star of your dessert recipe is a fruit filling, the flaky, multi-layered crust plays an essential role in the pie’s texture profile, complementing the luscious and often tangy fruit contained within. This is where the careful crafting of flaky layers finds its purpose, allowing the vibrant flavors of the filling to shine through without overwhelming the palate.
A comparative look at different fillings and their effects on the crust:
| Filling Type | Moisture Content | Desired Crust Texture |
|---|---|---|
| Apple | Low | Extra Flaky |
| Berry Mix | High | Flaky, but more robust |
| Chocolate Custard | Varies | Mealy to withstand moisture |
| Lemon Meringue | Medium (high acidity) | Flaky to contrast meringue |
As a baker, when you select a fruit filling for your pie, you’re not just choosing a flavor—you’re curating an experience that starts with the eye, transitions to the texture, and culminates in taste. The flaky layers of your buttery crust should align with the character of the fruit, elevating the essence of traditional pie to a sensorial delight. Let this guide be your muse as you inspire your homemade pie creations with the timeless interplay of crust and filling.
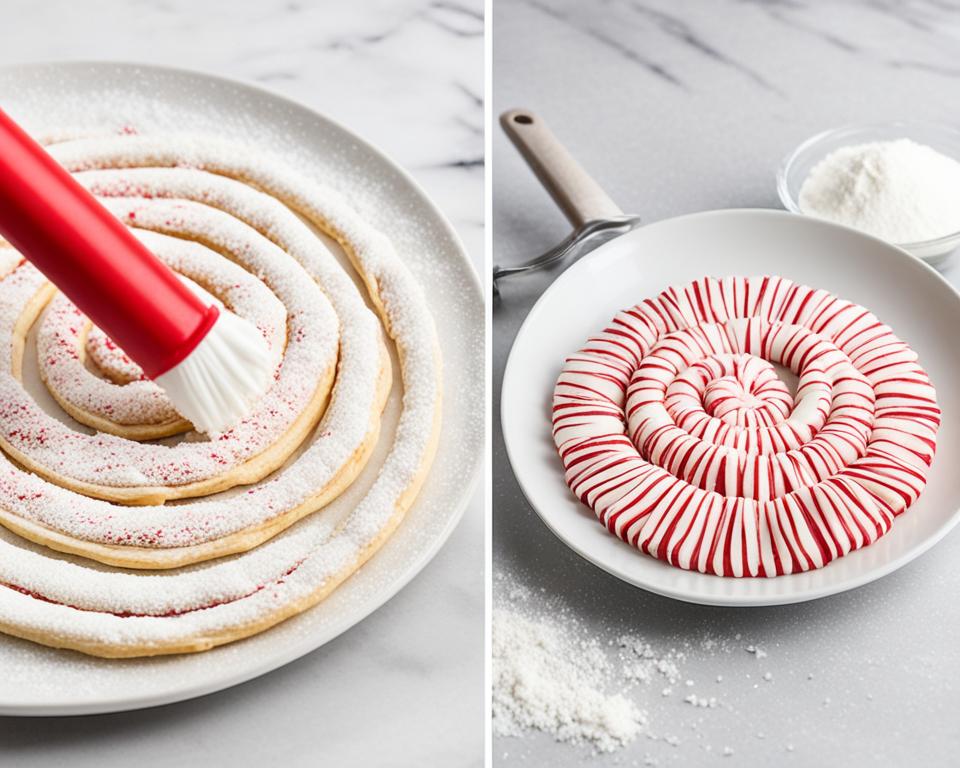
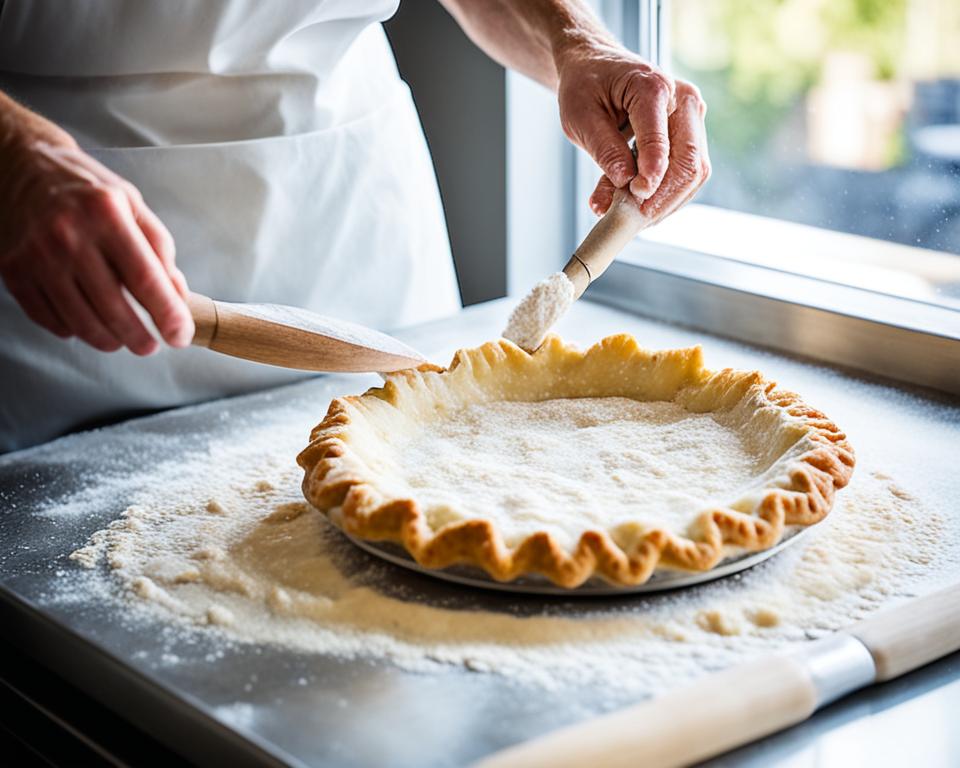
Decorating Your Pie with Style and Precision
As you transition from the careful construction of your Flaky Baked Pie to the final stage of decoration, remember that the aesthetics of your pie are just as vital as its taste and texture. A beautiful, golden brown pie is not merely a dessert recipe; it is a visual celebration of your baking technique. From delicate lattices draping over fragrant fruit fillings to meticulously crimped edges, every decorative touch can transform your pie into a centerpiece.
Begin with assessing the span of dough available—extra is beneficial for both repair and ornamentation. Experiment with decorative edges like fluting, braiding, or simply pressing with a fork for a classic look. Even a rustic galette, free from the confines of a pie dish, provides an opportunity to flaunt the flakiness of your pie crust, inviting admiration before the first slice is even cut.
Consider a lattice crust for double crust pies. This timeless technique not only adds an element of elegance but also allows steam to escape, which is essential in preserving the flaky texture you’ve worked so tirelessly to achieve. Here’s a quick guide to perfecting your lattice:
- Roll out your top crust and slice it into even strips.
- Weave the strips over and under on top of the filling, pressing the edges to seal.
- Chill the pie once more before baking—this helps maintain the definitions of your design.
The key to decorating with élan is understanding that less is often more. Overworking the dough can lead to a loss of those flaky layers that are the hallmark of a great pie. Exercise a light touch and embrace simplicity in design for the best results.
When planning your pie’s presentation, consider the following table for suggestions on design elements that complement your chosen filling:
| Filling | Suggested Decoration | Benefits |
|---|---|---|
| Apple | Lattice Crust | Allows steam to escape, highlighting the filling’s fragrance |
| Peach | Criss-Cross Pattern | Adds texture to the smooth filling, visually appetizing |
| Berry | Leaf Cut-outs | Offers a playful touch that complements the berries’ natural beauty |
| Pumpkin | Braided Edge | Gives a more refined look to this traditionally smooth pie |
Your pie should be a reflection of your mastery over Flaky Baked Pies, where every slice is a medley of deliciously golden, crispy layers. So, as the final touches grace your pie, remember to balance visual artistry with the structural integrity of your pastry. The result will be as pleasing to the eye as it is indulgent to the taste.
Adapting Traditional Techniques for Modern Kitchens
The rich traditions of pie-making have long been cherished in kitchens worldwide, producing countless dessert recipes and techniques for homemade pies. The baking method for a delicious pastry is often passed down through generations, imbibing a sense of heritage in every crumbly bite. However, as culinary arts innovate, modern technology offers novel approaches that honor the old while embracing the new.
Among the advancements appreciated by both professional chefs and home bakers alike is the adaptation of the food processor in pie crust preparation. This contemporary appliance provides consistency and efficiency, particularly when creating a buttery crust. Employing a food processor can streamline the butter-cutting process, achieving the perfect size of butter bits necessary for the fluffy layers of a well-baked pie—crucial in the balance act of customizable homemade pie crusts.
While the meticulousness of cutting butter into flour has commonly been done by hand, leaving room for a warming touch, the swift and cool action of a food processor blade can prevent butter from prematurely melting. The temperature, a significant factor in pastry making, is therefore managed with more certainty, preserving the integrity of those flaky layers every delicious pastry admirer seeks.
Don’t let tradition bind you. The essence of a homemade Flaky Baked Pie doesn’t lay solely in the process but also in the result—a sumptuous dessert that tantalizes the palate and warms the spirit.
By integrating modern appliances with time-honored baking techniques, today’s pie makers are empowered to innovate within the bounds of authenticity. Thus, the soul of your homemade pie remains intact, its story merely enhanced by the innovations of present-day tools. The following table outlines the comparative benefits of using traditional methods versus a food processor when preparing pie dough.
| Method | Time Efficiency | Temperature Control | Consistency | User-Friendliness |
|---|---|---|---|---|
| Traditional by Hand | Extended Preparation Time | Varies by Ambient and Body Heat | Subject to Individual Skill | Valuable Sensory Feedback |
| Modern Food Processor | Quick and Efficient | Cool and Controlled | Uniform Butter Distribution | Accessible to Beginners |
As we continue to cherish the homemade pie, it remains essential to praise progress. Each baker, equipped with the humility to learn from the past and the willingness to adopt the conveniences of the present, discovers their path within the art of pie-making. It’s not solely about holding fast to what once was; it’s about blending respect for tradition with the practicalities and advancements of modern kitchens. Embrace the machines designed to facilitate our creativity without forsaking the love and care that no machine can replicate—this is the way of the contemporary baker.
Flaky Baked Pie: Troubleshooting Common Issues
Even the most diligent bakers can encounter setbacks when on the quest for that perfect homemade pie with a buttery crust. Dry, crumbly dough or dough that is too wet and sticky can befall anyone learning the essential baking technique to create that delicious pastry. But fear not, as these common issues can be resolved with a few simple adjustments. Let’s discuss effective solutions to guide you back to the path of baking bliss.
Dry, Crumbly Crust: If the dough feels dry and isn’t holding together, it’s likely lacking enough moisture. The resolution is rather straightforward:
- Add a small amount of ice-cold water, one teaspoon at a time, and gently work it into the dough until it reaches the desired consistency.
- Avoid overworking the dough as this can lead to toughness – stop once the dough just comes together in a cohesive ball.
Wet, Sticky Dough: On the flip side, if the dough is too sticky or wet, which can occur from overhydration or warm environments, take these steps:
- Generously flour your work surface, rolling pin, and hands to help manage stickiness during rolling.
- If stickiness persists, wrap the dough in plastic wrap and chill in the refrigerator for 30 minutes. This will firm up the fat in the dough, making it easier to work with.

Along with these tips, remember that every ingredient should be kept as cold as possible – the secret ingredient to that acclaimed buttery crust is temperature control. If your kitchen is warm, take breaks to chill the dough, and don’t be afraid to let it rest.
Patience in pastry is a virtue. Rest assured that your persistence will be rewarded with a homemade pie worthy of praise – and more importantly, enjoyment.
If you’re still finding your dough a conundrum, consider these guidelines:
| Issue | Possible Cause | Remedy |
|---|---|---|
| Crust Shrinking | Overworked gluten | Gentle handling and adequate chilling |
| Greasy Dough | Over-melted butter | Work quickly and chill dough frequently |
| Tough Texture | Too much water or overmixing | Measure liquids carefully and mix just until combined |
Armed with these troubleshooting measures, you’re well on your way to ensuring that each pie you bake is as flaky, tender, and delectable as can be. Embrace these strategies to overcome common issues, and take pride as you master the art of the perfect homemade pie.
Preservation and Storage of Flaky Pies
After investing time and passion into creating the perfect homemade pie, complete with a delicious pastry and fruit filling, it’s essential to preserve its freshness and maintain that irresistible texture. Understanding the best practices for storing your dessert recipe helps ensure that the flaky layers and buttery crust remain as delectable as when they first emerged from the oven.
For those delightful pies waiting to be savored, adhering to proper storage methods can sustain the homemade appeal and extend the pie’s lifespan. Here’s a guide to preserving both your baked and unbaked homemade pies, ensuring they keep that Flaky Baked Pie marvel everyone adores.
Proper preservation is key to maintaining the signature crispiness and freshness of your Flaky Baked Pie, guaranteeing that each slice is as enjoyable as the first.
For unbaked pies, freezing is a fantastic option. Protect your dough from freezer burn by tightly wrapping the pie in plastic wrap, followed by a layer of aluminum foil. Freeze your pie on a flat surface to maintain its shape. When you’re ready to bake, there’s no need to thaw; simply adjust your cooking time to account for the pie starting from a frozen state.
Baked pies, on the other hand, can stay fresh in the refrigerator for up to four days. Before refrigerating, make sure your pie has completely cooled to room temperature to avoid condensation, which can lead to a soggy crust. Cover loosely with plastic wrap or aluminum foil to protect it from absorbing other flavors in your fridge.
Chilling is equally important prior to serving your dessert—this practice assures the delectable contrast between the warm, luscious fruit filling and a cold, crispy pastry that transcends mere indulgence into a sensory delight.
| Pie Type | Preservation Method | Expected Shelf Life |
|---|---|---|
| Unbaked Pies | Wrap tightly, freeze on level surface | Up to 3 months |
| Baked Pies | Refrigerate loosely covered, after cooling | 3-4 days |
For long-term storage, a well-wrapped homemade pie can hibernate happily in your freezer for up to three months. For both short-term and extended storage, it’s important to remember:
- Keep pies level during freezing to maintain shape and filling distribution.
- Label your pies with the date of storage to keep track of freshness.
- When ready to serve, bake directly from frozen or allow refrigerated pies to come to temperature under protective covering to prevent moisture loss.
In summary, the key to preserving your homemade pie—a delicious pastry worthy of any table—is as much about the baking as it is about the storing and serving. By observing these guidelines, you ensure the fruits of your labor reach their full potential, bite after perfect bite.
Conclusion
The aroma of a freshly baked homemade pie, tenderly cradled within a golden-brown, Flaky Baked Pie crust, is a vivid sensory delight that signals the fruition of an artful baking journey. The path to achieving this quintessential dessert recipe is marked by the satisfaction of working with butter-laden dough and the anticipation of unveiling a mouth-watering fruit filling to friends and family. This guide has traversed the masterful techniques and keen science behind perfecting the pie, imparting valuable insights intended to inspire and bolster the confidence of bakers at any level of expertise.
Final Thoughts on Crafting the Quintessential Flaky Baked Pie
It’s in the gentle layering of butter, the meticulous chill of the ingredients, and the patient rolling of the dough where the spirit of homemade pie-making truly resides. These collaborative components align in sweet harmony, yielding the cherished Flaky Baked Pie. Each step, from selecting fine ingredients to the intricate rolling and baking, attests to the transformative power of combining patience with practice in the pursuit of baking excellence. Whether it’s the buttery crunch of the crust or the sweet succulence of the fruit filling, every homemade pie narrates the loving investment of its creator—a tale of tradition reborn in every slice.
Encouragement for Aspiring Bakers to Experiment and Enjoy the Process
In the warm embrace of the kitchen, aspiring bakers are urged to unleash their curiosity and embrace the craft of pie-making with a spirit of adventure. Take pride in the creation of a Flaky Baked Pie, knowing that each roll, fold, and crimp imbues your dessert with a touch of personal flair. With the essence of fruit filling melding into the tender layers of dough, allow each homemade pie to reflect your journey of learning and the joy derived from each attempt. The beauty of baking lies not only in the delectable end product, but in the shared experiences and lasting memories that culminate in the timeless tradition of pie-making.
FAQ
What is the secret to a flaky pie crust?
The secret to a flaky pie crust is maintaining all components cold, cutting in sizable butter chunks, and following proper lamination techniques to create layers that will expand into flaky goodness as the pie bakes.
How does butter affect pastry flakiness?
Butter is fundamental in achieving flakiness in pastry. Large, cold butter chunks in the dough melt as the pie bakes, releasing steam that separates the dough into numerous flaky layers. Additionally, butter’s water content helps to enhance this effect.
What’s the difference between biscuity and flaky pastry?
Biscuity pastry involves fully incorporating butter into the flour for a uniform, tender dough. In contrast, flaky pastry requires keeping the butter in larger pieces within the dough to create steam and flaky layers during baking.
Why is the choice of flour important for pie crust?
Choosing the right type of flour, like all-purpose or pastry flour, is essential as these have lower protein content, resulting in less gluten development and, thereby, contributing to a tender, lighter crust.
How do you incorporate butter into pie dough?
Incorporate cold butter into pie dough by cutting it into the dry ingredients until the pieces are adequately sized. This can be done using a pastry cutter, two knives, or even a food processor to ensure that the butter remains cold and distinct, which is crucial for later flakiness.
What’s the purpose of using both water and alcohol in pie dough?
A mixture of water and alcohol hydrates the dough while minimizing gluten development. Since alcohol does not activate gluten as much as water does, it allows for easier rolling and reduced shrinkage during baking, contributing to an ideal pie consistency.
Can you explain ‘lazy lamination’ and its benefits?
‘Lazy lamination’ refers to a technique used to create flaky layers in pie dough by folding and stacking the rolled-out dough several times. This method creates additional layers, enhancing the pastry’s flakiness without the extensive process traditional lamination requires.
How do you avoid a soggy pie bottom?
To avoid a soggy bottom, employ pre-baking techniques, brush the crust with egg whites or melted butter to create a barrier, or sprinkle a layer of crumbs or a mixture that will absorb excess moisture before adding the filling.
How important is chilling in pie baking?
Chilling is a vital step in pie baking. It relaxes gluten for a tender texture, solidifies fats for optimum flakiness, and overall, contributes to the structure and final quality of the pie crust.
What are the best practices for baking a golden brown pie crust?
For a golden brown crust, start by baking the pie at a high temperature to set the structure and initiate puffing, then lower the temperature to cook it through evenly. Use techniques like tenting with foil to avoid over-browning in case it’s cooking too quickly.
How should you match your pie filling to the crust?
The filling should align with the crust’s characteristics — flaky crusts are typically great with fruit fillings, while a more mealy or sturdy crust can support heavier custards. The balance creates not only aesthetic but also textural harmony in your homemade pie.
What are some tips for decorating pies?
For pie decorations, approach with style but also mindfulness of the pie’s structure. Employ accents like a lattice top, fluting for the edges, or cut-outs from extra dough. Remember not to overwork the dough to retain the delicate, flaky texture.
How have modern kitchen appliances impacted traditional pie baking?
Appliances like food processors have made pie baking more accessible and consistent by quickly combining fats and flour while keeping temperatures cool, which is important for achieving flakiness. They allow for modern adaptability without compromising traditional quality.
How do you address common pie dough issues during preparation?
When pie dough is too dry, add small increments of cold water. If it’s too wet and sticky, refrigerate it to firm up the fats and make the dough easier to handle. Quick adjustments like these prevent common dough issues from ruining your Flaky Baked Pie.
What is the best way to store pies to maintain their texture and freshness?
For freshness and texture preservation, wrap baked or unbaked pies properly to prevent freezer burn for extended storage. Chilling pies before serving is crucial in maintaining their texture, especially for those with a flaky, buttery crust.