There’s a special kind of joy that comes from crafting homemade Danish pastries—those buttery, layered creations that dance between the lines of pastry and art. Across the United States, enthusiasts of delicious Danish pastries are embracing the challenge of creating these indulgent treats from scratch. Armed with a step-by-step Danish pastries recipe, even those new to the world of baking can produce pastries that not only satisfy the palate but also the heart.
Folding flaky puff pastry around sweet creamy filling, and finishing with a zesty lemon glaze, these Danish pastries evolve into a delight for all senses. Perfect for a luxurious brunch or a comforting snack, there is a recipe for every occasion and taste. Whether you’re a seasoned pastry chef or a beginner, there’s the irresistible allure in the authenticity of crafting Danish pastries from scratch that beckons one into the kitchen.
For those ready to embark on a flavor-filled journey, creating homemade Danish pastries promises a reward far beyond the last bite—it’s an act of love, patience, and creativity that brings unsurpassed satisfaction to both the baker and their fortunate guests.
Key Takeaways
- Stellar homemade Danish pastries can be achieved by following detailed step-by-step recipes.
- The perfect pastry combines flaky puff pastry with creamy fillings and an inviting lemon glaze.
- Creating Danish pastries from scratch offers a fulfilling and indulgent experience beyond store-bought alternatives.
- With patience and creativity, even novice bakers can craft delicious delicacies to the delight of any brunch table.
- True joy in Danish pastry making is found in the process and the personal touches one can add to each recipe.
The Art of Perfect Danish Pastries
The journey to creating traditional Danish pastries honors a storied past. The quest for authentic Danish pastries is a delicate balance of respect for tradition and delight in flavor. This love affair with pastry making is about more than mixing ingredients; it’s about evoking the warm comfort found in the flaky layers of buttery Danish pastries.
For connoisseurs and new bakers alike, the mastery of Danish pastries lies in understanding the nuances of craft—from selecting the finest ingredients to fine-tuning the careful methods that give rise to their characteristic texture and richness. Within this guide, we’ll underscore crucial elements to elevate your pastries to a visual and gastronomic masterpiece, ensuring appeal that is universal in its allure and sophistication.
Perfection in pastry craft is fashioned not only in the quality of the butter or the freshness of the filling but equally in the precise layering and shaping techniques that define a well-made Danish pastry. Below, we present a table of elements to consider when setting out to create these traditional delights:
| Ingredient | Selection Criterion | Impact on Pastry |
|---|---|---|
| Butter | Opt for high-fat content, European-style butter | Richer flavor, superior flakiness |
| Flour | High-quality, unbleached all-purpose flour | Better gluten formation for layers |
| Filling | Fresh, high-quality fruit preserves or creamy fillings | Authentic flavor and moist texture |
| Yeast | Fresh or active dry yeast for leavening | Essential for the rise and lightness of the dough |
With patience and a perceptive touch, Danish pastry enthusiasts transform simple, humble ingredients into grand showcases of flavor. The joy one finds in layering butter and dough is akin to an artist bringing their canvas to life—a true testament to the art of baking and the satisfaction derived from indulging in homemade, traditional Danish pastries.
In folding and shaping the dough, remember to treat it gently, allowing the cold dabs of butter to work their magic, leaving behind air pockets that puff proudly in the oven’s heat. This process is not just making food; it’s creating an experience that beckons to be shared.
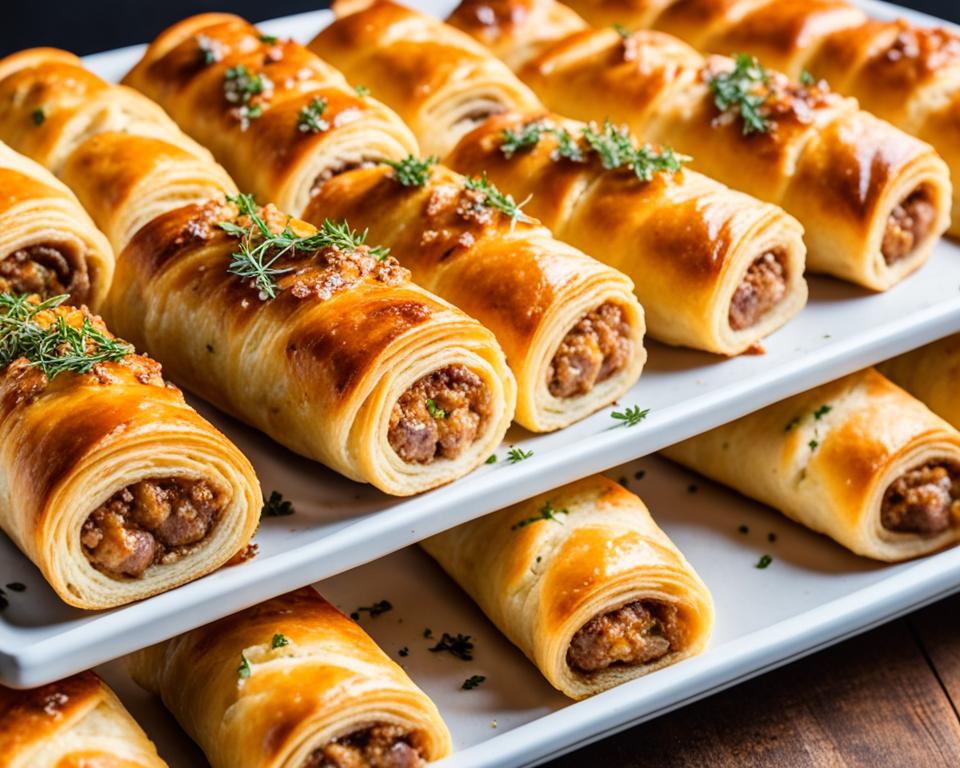
To perfect the iconic Danish pastry look, your craft requires special attention to the final touches. Think of egg wash for a glossy finish, embellishments of pearl sugar, or delicate slivers of almonds. It’s the meticulous details that capture the eyes and the palates of those who taste your masterpieces—rendering them beautifully golden, invitingly sweet, and impossibly flaky.
- Brush the pastries with a gentle coat of egg wash to achieve the perfect golden hue.
- Don’t underestimate the significance of resting time—patience is rewarded with better flavor and structure.
- Chill the dough adequately between folds; this not only simplifies handling but also ensures the pastry’s legendary layers.
- Embrace the versatility of the Danish pastry by experimenting with sweet or savory fillings.
In the symphony that is Danish pastry making, each ingredient and each step composes a note in the harmony of flavors and textures. By heeding tradition and exerting finesse, one can create buttery Danish pastries that speak to the soul, transporting the taster to the cobbled streets of Copenhagen with every bite. The art of perfect Danish pastries is much more than a recipe—it’s heritage, craft, and pure enjoyment rolled into one delicious experience.
Sourcing Ingredients for Authentic Danish Pastries
For aspiring bakers looking to indulge in the creation of easy Danish pastries, the importance of sourcing the right ingredients cannot be overstated. Key to mastering the authentic Danish pastries is beginning with high-quality components. Here you’ll learn the nuances of selecting the ideal ingredients that form the foundation of every step-by-step Danish pastries recipe.
Finding the Best Puff Pastry
The flaky layers that typify Danish pastries begin with selecting excellent puff pastry. If crafting it from scratch isn’t an option, choosing a pre-made puff pastry is critical. Numerous brands offer options that forgo hydrogenated oils, ensuring a lighter, health-conscious base without sacrificing that desirable buttery quality crucial for authentic Danish pastries.
Choosing the Right Cream Cheese Blend
The richness of a Danish pastry’s filling often hinges on the quality of cream cheese used. Regular or low-fat variants provide the creamy texture and tangy essence desirable in a cheese blend, while fat-free options tend to fall short on flavor and consistency. This component is essential to achieve the richness and balance necessary for easy Danish pastries that feel indulgent and taste heavenly.
The Importance of Fresh Lemons in Danish Glaze
A Danish pastry’s allure is often capped off with a glaze that introduces refreshing brightness in contrast to the richness of the pastry. Fresh lemons, both zest and juice, are paramount to creating a perfectly tart glaze that elevates the final product. The vibrancy of fresh citrus is non-negotiable in achieving the harmonious blend of flavors that complete authentic Danish pastries.
| Ingredient | Role in Pastry | Preferred Options |
|---|---|---|
| Puff Pastry | Base of the pastry | No hydrogenated oils, high butter content |
| Cream Cheese | Main filling component | Regular or low-fat (not fat-free) |
| Lemons | Flavor enhancement for glaze | Fresh, with zest and juice used |
Flaky Danish Pastries Recipes
Nothing encapsulates the essence of home baking quite like the aroma of freshly made homemade Danish pastries. With just a few quality ingredients and some store-bought flaky puff pastry, you can create pastries that rival any gourmet bakery. The beauty of these recipes lies in their simplicity and the deeply satisfying experience of baking something truly delicious from scratch.
To ensure your homemade pastries truly shine, focus on the key elements that elevate them: texture, flavor, and appearance. By starting out with pre-made puff pastry, you can spend more time perfecting the filling and glaze — elements critical to the overall flavor profile of your Danish pastries. Let’s delve into a selection of fillings and techniques that will turn your kitchen into a Danish delight.

- The Puff Pastry: Store-bought puff pastry provides a shortcut to intricate layers of flakey dough, ensuring that every bite of your homemade Danish pastry is both tender and delightfully crisp.
- Cream Cheese Filling: A smooth blend of cream cheese, sugar, lemon zest, and egg yolk guarantees a rich and balanced heart to your pastry—a middle layer of creamy indulgence.
- Lemon Glaze: Crown your creation with a zesty lemon glaze for a lustrous finish and tart sweetness that cuts through the richness of the dough and filling.
- Selecting the finest store-bought puff pastry: ensure it’s fresh and, if frozen, properly thawed.
- Blending a rich, sweetened cream cheese filling that’s smooth and free of lumps.
- Glazing your pastries post-baking for that appealing shine and a pop of bright lemon flavor.
Remember, the best homemade Danish pastries are those imbued with care and personalized touches. From the addition of fruit to nuts or chocolate, you can transform a simple roll of puff pastry into an array of delicious Danish pastries that are sure to impress at any gathering.
| Ingredient | Role in the Pastry | Choice and Outcome | Substitutions |
|---|---|---|---|
| Puff Pastry | Structure and Flakiness | Pre-made, store-bought for convenience | Homemade dough for the experienced baker |
| Cream Cheese | Filling | Full-fat for richness, mixed with sugar and lemon | Low-fat cream cheese for a lighter version |
| Lemon Glaze | Topping | Fresh lemon zest and juice for the perfect tartness | Orange zest for a different citrus note |
The crux of crafting homemade Danish pastries isn’t just about following a recipe; it’s about the journey of taking straightforward components and marrying them into a pastry that tells a story. That tale is one of tradition, of care, and ultimately, immense satisfaction. So, roll out that flaky puff pastry and let your home fill with the scent of baking — it’s time to craft your own delicious Danish pastries.
Mastering the Cheese Danish with Puff Pastry
The allure of homemade Danish pastries lies not only in their buttery, flaky excellence but also in the ease with which they can be crafted. By starting with a store-bought puff pastry, these easy Danish pastries offer a straightforward path to achieving professional-quality results in your home kitchen. As we delve into the intricacies of the cheese Danish, we encounter the harmonious blend of textures and flavors that have made this pastry a beloved classic.
Creating the Rich Cream Cheese Filling
At the heart of every cheese Danish is its rich and luscious cream cheese filling, a decadent contrast to the crisp layers encasing it. The secret to its irresistible nature lies in a combination of softened cream cheese blended with powdered sugar, lending the filling its signature sweetness. The addition of fresh lemon zest and a splash of lemon juice brightens the mixture, offering a subtle tartness that cuts through the richness. Integrating an egg yolk ensures a silky consistency, crucial for that lavish mouthfeel one anticipates in a handcrafted Danish pastry.
Braiding Techniques for an Attractive Finish
While the filling forms the soul of the pastry, presentation is equally pivotal, as the eyes feast before the palate. A beautifully braided puff pastry, a simple skill to master, adds an undeniable charm to these easy Danish pastries that’s visually appealing. Skillfully cut diagonal strips line the edges of the pastry, alternating over the rich cream filling, resulting in an attractive pattern that resembles the craft of an artisan baker. This traditional braiding technique not only enhances the homemade feel of these buttery Danish pastries but also secures the lush cream cheese within, promising a delightful experience in each bite.
Flavor Varieties: From Chocolate to Lemon Curd
The versatility of delicious Danish pastries lies in their ability to adopt a spectrum of flavors, catering to an array of taste preferences and occasions. Connoisseurs of these easy Danish pastries have the luxury of embellishing their creations with a wide variety of toppings and fillings, each one adding a unique twist to the classic pastry.
Exploring the different flavors is like charting a map through a confectionery wonderland, where each stop introduces a new dimension of taste. Let’s delve into some of the most popular and delectable additions that can transform a simple recipe into a cornucopia of easy Danish pastries.
| Flavor | Description | Suggested Usage |
|---|---|---|
| Chocolate Chips | Sweet and Melty | Sprinkle atop cream cheese filling before baking |
| Blueberry Jam | Burst of Berry Goodness | Dollop over the filling for a fruity note |
| Raspberry Preserves | Tart and Tangy | Layer over cream cheese for depth of flavor |
| Lemon Curd | Citrusy Zing | Combine with cream cheese mixture for zestiness |
| Strawberry Jam | Sweetly Fragrant | Swirl into the pastry for a summer taste |
| Cherry Pie Filling | Cherries and Comfort | Spoon onto Danish for a classic pie experience |
Customization doesn’t end with these options; bakers are encouraged to experiment and discover their own favorite pairings. Whether it’s a morning treat or a sophisticated dessert, these flavor varieties ensure every delicious Danish pastry is a unique work of culinary art.
- For a special occasion, try pairing two complementary flavors such as raspberry and chocolate for a balanced profile.
- Those desiring a subtler sweetness might opt for the classic combination of blueberry and lemon.
- Experiment by combining jams with fresh fruit to enhance the pastries with both texture and taste.
Infusing each pastry with personal flair guarantees that every bite is an expression of the baker’s creativity, culminating in a joyful symphony of flavors. Thus, even those new to the craft can delight in the process of concocting their rendition of delicious Danish pastries, an adventure as rewarding as the final product is tantalizing.
Creating Pastries with a Homemade Touch
Embracing the tradition of homemade Danish pastries, one finds the pleasure of artisan baking within the folds of buttery Danish pastries. The secret to these delightful treats lies in the balance of convenience and customization. Using a pre-made puff pastry as a foundation, the homemade experience is elevated through the intricate layer of a rich, lemon-kissed cream cheese filling, carefully curated by your own hand. Accentuating the textures and flavors further, a handmade lemon glaze adds an artisanal finish to this step-by-step Danish pastries recipe.

In a world where time is treasured, the ability to create pastry masterpieces that emulate the warmth and comfort of homemade treats provides an invaluable blend of practicality and personal touch. The result is a confection that embodies the essence of home baking, melding the efficiency of store-bought materials with the characteristic heart of a pastry made from scratch.
- Gather your ingredients, ensuring the cream cheese is at room temperature for smooth blending.
- Mix the cream cheese with powdered sugar, a dash of vanilla extract, fresh lemon juice, and zest for the filling.
- Roll out the thawed puff pastry and spread the cream cheese mixture down its center.
- Cut diagonal strips along both sides of the pastry for braiding, then weave them over the filling.
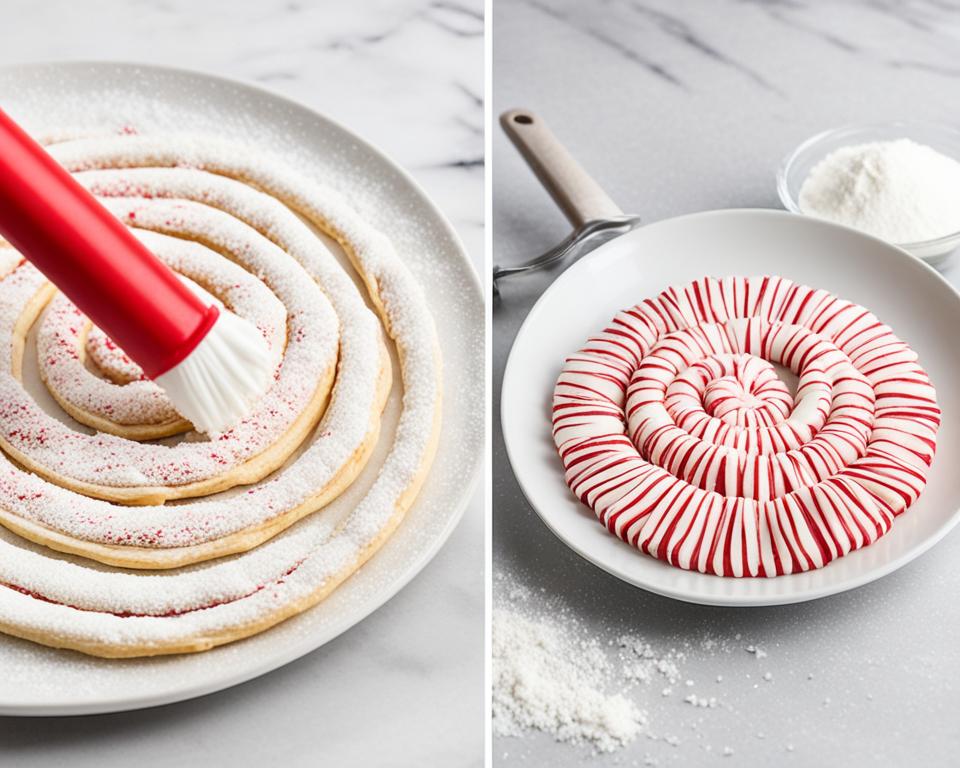
After constructing your pastry, an alluring glaze awaits to crown your Danish masterpiece:
- Mix powdered sugar with just enough lemon juice to achieve a drizzling consistency.
- Once the pastries have cooled, drizzle the lemon glaze over the top for a luscious finish.
The joy embedded within this culinary endeavor stems not only from the delicious outcome but also from the craftsmanship that goes into creating buttery Danish pastries with a distinct touch of home. Revel in the process, leaving guests enchanted by the tastes and stories woven into each bite of your homemade Danish pastries.
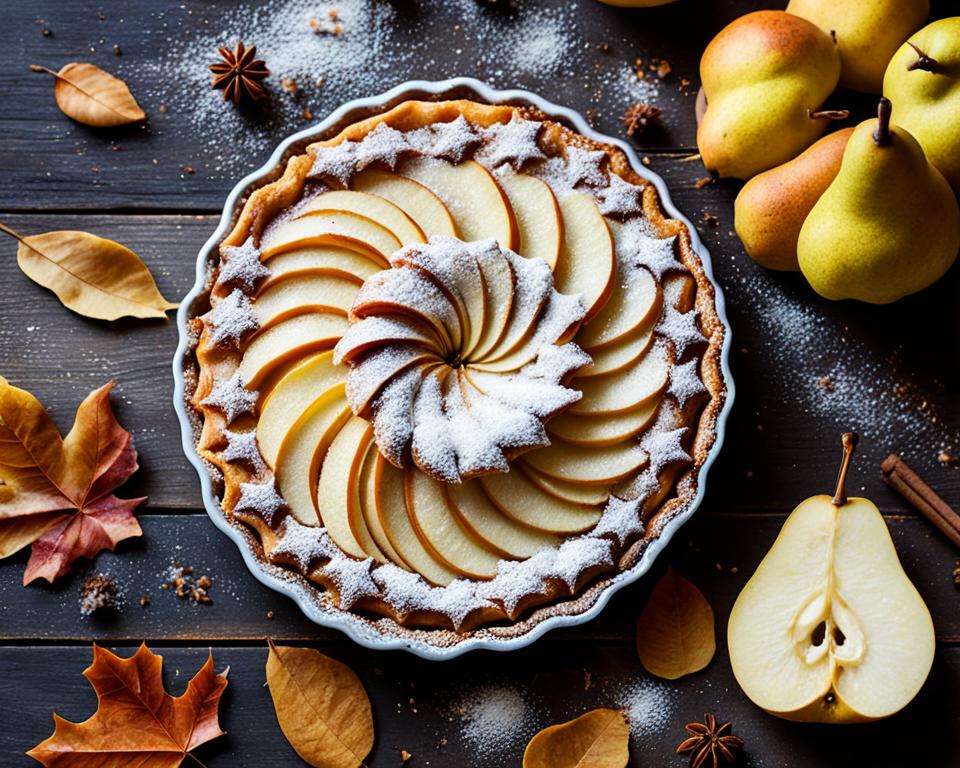
Irresistible Apple Denmark Slices
When craving the warmth and nostalgia of homemade Danish pastries without spending hours in the kitchen, these quick and easy Apple Denmark Slices become the perfect solution. Employing a clever baking shortcut, these slices retain the iconic flaky tenderness and rich filling that Danish pastry lovers adore. This simplified approach ensures anyone can enjoy a homemade treat with less effort and time, but equal enjoyment.
Utilizing Pancake Mix for an Easy Base
For those seeking a step-by-step Danish pastries recipe that cuts down on complexity, the Apple Denmark Slices are a revelation. By substituting traditional pastry dough with pancake mix, this recipe redefines convenience without compromising on the quality of the final pastry. The resulting base achieves a light and flaky texture that forms the perfect canvas for the sumptuous apple pie filling it envelopes.
Concocting Your Own Apple Pie Filling
The heart of these delectable slices is the homemade apple pie filling, which brings a cozy, comforting echo of homemade Danish pastries to life. Stewed to the right consistency and sweetened to perfection, the apple pie filling is as satisfying to make as it is to taste. Whether served at a brunch or as a treat alongside your afternoon coffee, these Apple Denmark Slices promise a delightful experience that’s both easy and gratifying to create.
- Preparing the apple pie filling enriches the slices with the homemade essence.
- Combining the pancake mix with just the right amount of butter and milk results in a pastry base that’s surprisingly similar to a traditional flaky Danish, but far easier to prepare.
- The application of an egg wash before baking gives each slice a beautiful, golden sheen that invites the first bite.
In every layer of apple and dough, there’s a story of simplicity meeting splendor, proving that with smart ingredient choices like pancake mix and homemade fillings, easy Danish pastries can be created in a fraction of the time. The Apple Denmark Slices stand as proof that a step-by-step Danish pastries recipe need not be complex to yield results that warm the soul and pleasure the palate.
Traditional Vs. Modern Danish Pastry Techniques
The realm of Danish pastries is one where the reverence for time-honored traditions meets the convenience of modern innovation. In the delicate layers of these sumptuous treats, a merger of the old and the new unfolds, giving rise to an array of techniques suitable for bakers at all skill levels. Baking enthusiasts revel in the meticulous process of creating traditional Danish pastries that boast the distinct buttery flakiness, while also appreciating the ease and speed bestowed by modern Danish pastry techniques.
Nothing exemplifies this blend better than the use of high-quality butter, essential in achieving the layered structure that traditional Danish pastries are famed for. It’s a nod to the craftsmanship of Danish bakermasters, where hands fold and roll with precision. On the flip side, innovations such as ready-made pancake mix bases offer an alternative route, allowing contemporary twists and an accessible experience for those less inclined to start from scratch.
The complexity of modern lifestyles often calls for time-saving approaches without sacrificing quality. Hence, home bakers and professionals alike are adopting new methods that may use unconventional ingredients, like the aforementioned pancake mix, to simulate the flaky texture in a fraction of the time. Such modernizations open the door for many to embark on the once-daunting journey of pastry-making.
| Technique | Traditional Approach | Modern Adaptation |
|---|---|---|
| Creating Layers | Manual folding and rolling of butter and dough | Use of pre-made mixes for a quick, reliable texture |
| Lamination Process | Time-intensive chilling and layering | Store-bought pastry sheets ready to use |
| Filling Preparation | Homemade jams and custards from scratch | High-quality, commercial filling products |
| Baking and Presentation | Custom-shaped by hand for individuality | Uniform silicone molds for consistency |
The pursuit of creating perfect Danish pastries, rich in history and flavor, need not be confined to classic routes. With the array of modern Danish pastry techniques available today, there is a newfound freedom in baking that nods respectfully to the past while embracing the efficiency and inventiveness the present offers. It’s this synergy that enables the evolution of pastry-making, ensuring the cherished experience of enjoying a Danish pastry remains unchanged in its pleasure.
Whether one’s preferences lean towards the spiritual experience of crafting dough by hand or the immediate gratification of modern conveniences, the inclusiveness of the Danish pastry domain is confirmed. It stands as a testament to the adaptability of culinary arts, celebrating both the storied legacy of traditional Danish pastries and the dynamic breadth of contemporary practice.
- Engage in the art of traditional butter incorporation for a tribute to Danish heritage.
- Utilize modern enhancements like quality pre-made bases for efficiency.
- Balancing the rich flavors through the integration of seasoned and innovative methods.
- Experiment with techniques across the spectrum to find your unique preference.
In essence, the confluence of traditional and modern baking methods within the realm of Danish pastries reflects an enduring love for these beloved treats. It is this intermingling of past and present, of devotion to craft and adaptation to change, that continues to endear Danish pastries to the hearts and tables of pastry aficionados worldwide.
The Secret to Buttery, Layered Danish Dough
The heart and soul of buttery Danish pastries rests within the meticulous method of creating its dough. Widely revered for its rich texture and opulent flavor profile, the flawless execution of traditional techniques is essential when aspiring to master the art of traditional Danish pastries. It’s a craft where attention to detail and patience are as vital as the ingredients themselves. Let’s explore the essential steps that lead to the creation of these delectable pastries.
The foundation of the famed Danish pastry begins with the use of high-fat content butter. This is not merely for flavor—although the quality of the butter greatly influences the taste—it also impacts the structural layers of the pastry. When cold butter is incorporated into the dough, then systematically rolled and folded, it creates the distinctive airy pockets associated with a supreme Danish pastry experience.
- Step One: Begin with chilled, quality butter, cut into small pieces. This will ensure the butter maintains its form during the initial blending process.
- Step Two: Layer the butter over the dough, rolling it out, and folding it repeatedly. This is a process known as lamination, which directly leads to those ubiquitous flaky layers.
- Step Three: With each fold and turn, allow the dough to rest and chill. This not only prevents the butter from melting but also gives the yeast time to work its rising magic.
One must not underestimate the importance of chilling periods during this process, as they are pivotal in achieving the pastry’s signature flakiness. Below is a recommended timeline to guide bakers in producing the ultimate buttery Danish dough.
- Combine dry ingredients and mix with diced butter until crumbly.
- Roll out the dough and perform the first fold, then refrigerate for 30 minutes.
- Complete the second fold, followed by another 30-minute refrigeration period.
- Perform the final fold, then let the dough rest in the fridge for an additional 30 minutes before shaping.
Emphasizing the process of precise layering and periodic chilling will yield a dough that bakes into those captivating light and buttery Danish pastries that enthusiasts adore. By following these cardinal steps scrupulously, bakers will infuse their creations with the distinguished character and divine taste that can compete with the authentic pastries of Danish bakeries.
| Task | Description | Chill Time |
|---|---|---|
| Initial Dough Mixing | Incorporate diced butter until crumbly | – |
| First Fold | Roll and fold dough to create layers | 30 minutes |
| Second Fold | Repeat rolling and folding process | 30 minutes after first |
| Final Fold | Complete final set of folds | 30 minutes after second |
| Shaping and Final Rest | Shape pastries and prepare for baking | Overnight or minimum of 2 hours |
While mastering these steps can elevate the quality of your homemade Danish pastries, remember that the journey is as delightful as the destination. Crafting traditional Danish pastries is not just about the end product; it’s an engaging process that invites bakers into a world of culinary expression, bridging the heritage of old-world delicacies with the modern-day joy of baking.
Preparing Danish Pastries for Large Gatherings
Entertaining a crowd can be a delightful experience, especially when traditional Danish pastries are on the menu. However, preparing these treats for large gatherings can seem daunting. Fortunately, with some strategic advance preparation and storage tips, hosts can present a spread of delicious Danish pastries that look as if they came straight from the bakery. Below, discover how to prepare step-by-step Danish pastries recipes, ensuring that every pastry remains as tempting and flaky as intended.
Advance Prep Tips for Stress-Free Hosting
To make hosting a breeze, starting the pastry preparation well before the event is key. Many components of a traditional Danish pastry can be crafted ahead of time. The dough, for instance, can be laminated, shaped, and then frozen, capturing its intricate layers until it’s ready to be finished and baked. By mastering these steps in advance, the pastries will not only maintain their buttery flakiness but also allow the host to enjoy the festivities without last-minute baking frenzy.
- Freeze shaped pastries before the final egg wash to save time on the day of your event.
- Prepare cream cheese fillings and fruit toppings in advance, storing them in the refrigerator.
- Assemble and arrange pastry shapes on baking trays to streamline the final baking process.
How to Keep Your Pastries Flaky and Fresh
One of the hallmarks of delicious Danish pastries is their flaky texture. To ensure your pastries are optimally flaky, it’s crucial to handle them properly during both the preparation and baking stages. Using quality ingredients and sticking closely to time-tested step-by-step Danish pastries recipes are just the start—properly freezing and thawing also play a significant role in maintaining the integrity of each pastry’s layers.
- Avoid condensation build-up by wrapping individual pastries loosely before freezing to keep them crisp.
- Thaw frozen pastries in the refrigerator to prevent the dough from becoming too soft or soggy before baking.
- Bake pastries straight from the fridge while they are still cold to ensure layers puff properly in the oven, creating that signature flaky texture.
With the right planning and techniques, preparing traditional Danish pastries for a large crowd can be a fulfilling and stress-free experience. By implementing these advance preparation and baking tips, hosts are guaranteed to serve up an array of irresistibly flaky and delicious Danish pastries, filled with the warm flavors and joy of homemade baking, without the stress of last-minute kitchen chaos. Not only will your guests be impressed, but they’ll also appreciate the traditional flavors and homemade quality of every bite.
Transforming Simple Ingredients Into Gourmet Desserts
The journey of creating homemade Danish pastries begins with simple ingredients that many may already have in their kitchen. With the right step-by-step Danish pastries recipes, these basic components can be elevated into gourmet delights that rival those found in the finest of bakeries. Through patience, precision, and the appreciation of nuanced baking techniques, bakers can unveil the potential of their pantry essentials, turning flour, butter, and a handful of other items into delicious Danish pastries.
The alchemy of Danish pastry making is an intricate dance between temperature, timing, and texture. When these elements align under the watchful eye of a dedicated baker, the result is an enchanting array of beautifully layered pastries that make any occasion feel extraordinary. Below, find a detailed guide to understanding how each ingredient contributes to creating the luscious layers and deep flavors of traditional Danish delights.
| Ingredient | Function | Result in Pastry |
|---|---|---|
| Flour | Structural foundation | Provides the necessary gluten for butter to create layers of flakiness |
| Butter | Creates tenderness and layers | Results in the signature flaky, golden crust |
| Filling Ingredients | Enhances flavor | Contributes to the rich, varied taste of Danish pastries |
- Achieving flakiness requires keeping ingredients, particularly butter, cold to maintain its shape during baking.
- Proper lamination—the folding of dough and butter—plays a pivotal role in developing distinct pastry layers.
- Infusions of vanilla, citrus, or spices within the filling lend complexity to the overall flavor profile.
- Even simple fillings, when incorporated with care, can redefine the essence of the pastry.
In the scope of dessert making, Danish pastries present a magical conversion of ordinary staples into extraordinary experiences. Learning the subtleties of dough lamination or the artistry of creating a balanced filling may seem challenging at first, but these skills can be honed over time through careful practice. It’s this dedication to the craft that transforms a baker from novice to connoisseur, capable of materializing indulgences that captivate both the eye and the palate.
- Study the role of each ingredient and their interactions within the recipe.
- Follow step-by-step Danish pastries recipes meticulously, refining techniques with each iteration.
- Experiment with different fillings to customize the pastries to your taste.
Ultimately, the secret to those buttery, flaky, and delicious Danish pastries lies not just in the ingredients themselves, but in the transformation those ingredients undergo in the hands of the baker. Embrace the process, and the spellbinding aromas of fresh Danish pastries will soon fill your kitchen, enchanting everyone fortunate enough to enjoy them.
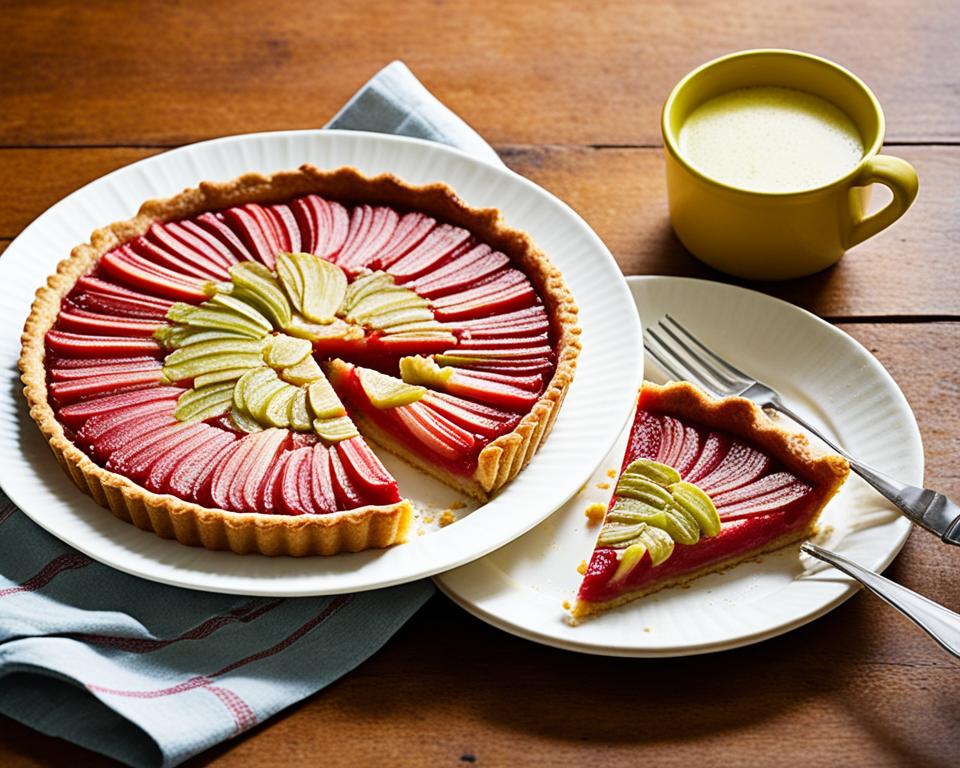
Classic Roll Recipe – A Nostalgic Treat Revived
There’s something timelessly appealing about the classic roll recipe infused with the essence of traditional Danish pastries. This beloved rendition blends a sweet, creamy core with the textural delight of raisins, evoking a sense of nostalgia heightened by the contemporary push for simplicity. Those who adore easy Danish pastries will appreciate the accessibility of this revised favorite, highlighting that nostalgic treats can evolve while retaining their essence of comfort and taste.
Cream Cheese and Raisin Fillings
Delving into the heart of the roll reveals a generous serving of cream cheese filling, its rich texture punctuated by the sweet yet tart presence of raisins. This combination creates a harmonious filling, melding the velvety smoothness of the cheese with the chewy textures of the dried fruit. Not only does the filling honor the classic profile of traditional Danish pastries, but it also manifests a balance of flavor that resonates with the modern palate—sophisticated yet soothing.
The Glaze: Final Touch for Perfection
The crowning glory of this revived recipe is undoubtedly the glaze. In its simplicity lies its perfection—a glistening coat that confers a lustrous sheen and intensifies the flavor profile. The application of the glaze is the final step in transforming good pastries into great ones. It’s a transformative touch that complements the sweetness within and elevates the homemade roll into the realm of artisanal pastries, fostering an iconic finish to these easy Danish pastries.

Indeed, when combined, these elements—creamy cheese filling, tender raisins, and a luxuriant glaze—create a Danish pastry that rivets the attention and captivates the taste buds. The result is a dessert that serves not just as a conclusion to a meal but as a highlight—a talking point, a memorable treat that lingers in both memory and appetite, beckoning for another slice.
Conclusion
The tapestry of baking homemade Danish pastries is rich with texture and tradition, showcasing buttery layers that speak to the tenacious spirit of home bakers. Throughout the United States, those who have embarked on the journey to creating their own easy Danish pastries have found that the true essence of satisfaction lies not in the confection itself but in the intimate act of creation. Authentic Danish pastries are more than just a blend of dough and filling; they are an act of homage to culinary heritage and a tribute to personal craftsmanship.
The allure of traditional Danish pastries cannot be understated. Each roll, braid, and fold carries with it the fingerprints of its creator, cementing a bond between baker and pastry that transcends the simple act of eating. The artistry involved in these pastries is evident in their flaky texture and indulgent flavors, inviting one to take pride in the pursuit of baking excellence. Easy Danish pastries, with their approachable methods and nuanced flavors, offer an invitation to all, from nimble novices to seasoned chefs, to forge their path in the pastry world.
In the end, the heart of Danish pastry making pulses within the walls of the home kitchen, where bakers of all backgrounds can share a slice of their story through each tender crumb. As we wrap up this exploration of homemade Danish pastries, we’re left with an indisputable truth: the beauty of baking is found not just in the dough’s rise but in the fusion of every individual’s unique touch—a gastronomic tapestry woven with care, embracing both tradition and innovation in every bite.
FAQ
What are the key ingredients needed for homemade Danish pastries?
To make delicious Danish pastries from scratch, you’ll typically need buttery puff pastry, cream cheese for the filling, and fresh lemon for zesty glaze. Additional ingredients can include powdered sugar, egg yolk, and various toppings like fruit preserves or chocolate chips, depending on the recipe.
How do you achieve the perfect flaky texture in a Danish pastry?
For traditional Danish pastries with that signature buttery flakiness, use high-quality puff pastry and ensure your dough remains cold during preparation. Techniques such as folding and layering will also contribute to creating those distinct, airy layers in the pastry.
Can I use store-bought puff pastry to make authentic Danish pastries?
Absolutely! Opt for a store-bought puff pastry that contains real butter and no hydrogenated oils to save time without compromising on the quality of your easy Danish pastries. This allows you to focus on the fillings and glazes to create a homemade experience.
What’s the secret to a rich cream cheese filling in a Danish pastry?
To master the cheese Danish cream cheese filling, beat together softened cream cheese with powdered sugar, fresh lemon zest, and egg yolk until smooth. This will create a rich, creamy consistency that pairs perfectly with the buttery pastry.
Are there different techniques for braiding Danish pastries?
Yes, there are several braiding techniques for Danish pastries that can give your pastry an attractive finish. A simple three-strand braid or a twist can add sophistication to your homemade creation. Each technique has a step-by-step Danish pastries recipe that is easy to follow for beautiful results.
How can I personalize my Danish pastries with different flavors?
Danish pastries are incredibly versatile and can be topped with a variety of flavors. You can adorn them with chocolate chips, blueberry jam, raspberry preserves, lemon curd, strawberry jam, or cherry pie filling, to name a few. Toppings are an easy way to customize and enhance the flavor profile of your delicious Danish pastries.
Can Danish pastries be prepared ahead of time for an event?
Definitely. Danish pastries can be prepared in advance, shaped, and then frozen until ready to use. When it’s time to serve, apply an egg wash and bake them. This allows for stress-free hosting and ensures your pastries are flaky, fresh, and delicious for any large gathering.
What is a simple twist on a traditional Danish pastry recipe?
For an easy twist on homemade Danish pastries, try making Apple Denmark Slices using pancake mix for the pastry base. Fill them with homemade apple pie filling for a step-by-step Danish pastries recipe that maintains traditional flavors with modern convenience.
Is it possible to make gourmet Danish desserts using basic ingredients?
Yes, even simple ingredients can be transformed into gourmet Danish desserts. By carefully following recipes and mastering baking techniques, like proper ingredient layering and temperature control, anyone can create a homemade Danish pastry that tastes like an artisanal treat.
What’s the final touch to make a classic roll recipe stand out?
A classic roll recipe can be elevated by adding a simple glaze on top after baking. A mixture of powdered sugar, milk, and perhaps vanilla extract or lemon juice, drizzled over your finished Danish rolls, adds a sweet and glossy finish that perfects the overall dessert presentation.