Are you a baking enthusiast looking to improve your skills in the kitchen? Look no further! In this article, we will delve into the art of foolproof baking techniques, providing you with valuable baking tips and easy baking hacks to elevate your home baking game.
Whether you’re a beginner or an experienced baker, mastering these foolproof techniques will guarantee successful results every time. From the creaming method to the rubbing method, each technique has its unique benefits and can be applied to different types of baked goods.
Key Takeaways:
- Learn foolproof baking techniques to ensure successful results every time.
- Explore the creaming method, all-in-one method, melting method, whisking method, and rubbing method.
- Experiment with different flours to understand their unique characteristics.
- Take care of your dough and batter for better results.
- With practice and experimentation, you can become a master baker!
The Creaming Method
The creaming method is a classic baking technique that plays a crucial role in creating light and fluffy cakes. By combining sugar and fat, usually butter, and whisking them together, air bubbles are formed. These air bubbles contribute to the softness and height of the cake, resulting in a delightful treat.
To master the creaming method, it’s important to beat the sugar and fat until the mixture pales in color and swells in volume. This process aerates the batter, ensuring a light and airy texture in the final product. The use of an electric mixer is highly recommended for optimal results.
A key aspect of the creaming method is the duration of beating. It’s essential to beat the mixture for about eight minutes to achieve the desired consistency. Be patient and continue beating until the batter has noticeably increased in volume.
Alongside proper mixing, ensuring the right oven temperature is equally vital. Preheating the oven to the recommended temperature allows for even baking and proper rising of the cake.
One delightful recipe that showcases the creaming method is the raspberry sponge cake. This moist and flavorful cake combines the sweetness of raspberries with the lightness of the creamed batter. Here’s a recipe to get you started:
Raspberry Sponge Cake Recipe
- Ingredients:
- 1 cup unsalted butter, softened
- 1 ½ cups granulated sugar
- 4 large eggs
- 2 teaspoons vanilla extract
- 2 cups all-purpose flour
- 2 teaspoons baking powder
- ½ cup milk
- 1 cup fresh raspberries
- Instructions:
- Preheat the oven to 350°F (180°C) and line a 9-inch round cake pan with parchment paper.
- In a mixing bowl, cream together the softened butter and granulated sugar until light and fluffy.
- Add the eggs one at a time, beating well after each addition. Stir in the vanilla extract.
- In a separate bowl, whisk together the all-purpose flour and baking powder. Gradually add the dry ingredients to the creamed mixture alternately with the milk, beginning and ending with the dry mixture.
- Gently fold in the fresh raspberries, being careful not to overmix.
- Pour the batter into the prepared cake pan and smooth the top with a spatula.
- Bake for 30-35 minutes or until a toothpick inserted into the center comes out clean.
- Allow the cake to cool in the pan for 10 minutes, then transfer it to a wire rack to cool completely.
- Serve the raspberry sponge cake as is or dust with powdered sugar for an extra touch.
By practicing the creaming method with this raspberry sponge cake recipe, you’ll become well-versed in this foolproof baking technique. The light and airy texture combined with the burst of raspberry flavor will surely impress anyone who takes a bite.
The All-in-One Method
The all-in-one method is a simple baking technique that involves mixing all the cake ingredients together in one bowl, saving time and reducing dishwashing. This method is perfect for those who want a quick and easy baking experience without compromising on taste and texture. Whether you’re a beginner baker or someone in a rush, the all-in-one method is a convenient option.
To achieve a light and fluffy cake using the all-in-one method, it’s important not to overbeat the ingredients. Gently and slowly combine the wet and dry ingredients until they are just incorporated. Overmixing can lead to a dense and tough cake. Remember, a light hand is key.
A delicious example of the all-in-one method is the lemon blueberry slab cake. This mouthwatering dessert combines the zesty freshness of lemons with the sweetness of blueberries. The main ingredients, including lemon juice, butter, sugar, and blueberries, are whisked together on the stovetop until well combined. Then, eggs, flour, and lemon rind are added to the mixture, creating a smooth and flavorful batter.
Ingredients for Lemon Blueberry Slab Cake:
| Ingredients | Quantity |
|---|---|
| Lemon juice | 1/4 cup |
| Butter | 1/2 cup |
| Sugar | 1 cup |
| Blueberries | 1 cup |
| Eggs | 2 |
| All-purpose flour | 1 3/4 cups |
| Lemon rind | 1 tablespoon |
Instructions:
- In a saucepan, combine the lemon juice, butter, and sugar. Heat over medium heat until the mixture is melted and smooth.
- Add the blueberries to the saucepan and cook for a few minutes until the berries start to burst and release their juices.
- Remove the saucepan from the heat and let it cool for a few minutes.
- Preheat your oven to 350°F (175°C) and grease a 9×13-inch baking dish.
- In a mixing bowl, whisk together the eggs, flour, and lemon rind.
- Pour the cooled blueberry mixture into the bowl with the egg mixture and gently fold everything together until just combined.
- Pour the batter into the prepared baking dish and spread it evenly.
- Bake for 30-35 minutes or until a toothpick inserted into the center comes out clean.
- Allow the cake to cool completely before cutting into slices.
- Serve and enjoy!
The lemon blueberry slab cake is a delightful treat that you can enjoy on its own or paired with a scoop of vanilla ice cream. The burst of citrusy lemon combined with the burst of juicy blueberries makes this cake a refreshing and satisfying dessert option for any occasion.
The Melting Method
The melting method is another foolproof baking technique loved by home chefs. This method involves melting the fat and sugar together slowly to prevent splitting. Once melted, allow the mixture to cool to room temperature before adding the eggs and dry ingredients. The result is a beautifully moist cake that is sure to delight your taste buds.
One delicious example of the melting method is the mud cake recipe. This decadent dessert is known for its rich and chocolatey flavor. The melting technique ensures that the cake is incredibly moist, with a fudgy texture that practically melts in your mouth.
Try your hand at making a mouthwatering mud cake using the melting method. You’ll be amazed at how simple and foolproof this technique can be. Let’s take a look at the recipe:
Mud Cake Recipe
- Ingredients:
- 1 cup unsalted butter
- 1 cup granulated sugar
- 4 large eggs
- 1 and 1/2 cups all-purpose flour
- 1/2 cup cocoa powder
- 1/2 teaspoon baking powder
- 1/4 teaspoon salt
- 1 teaspoon vanilla extract
- 1/2 cup milk
- Instructions:
- Preheat your oven to 350°F (175°C) and grease a round cake pan.
- In a saucepan, melt the butter and sugar together over low heat, stirring occasionally until smooth. Remove from heat and let it cool to room temperature.
- In a separate bowl, whisk the eggs until well beaten.
- Add the melted butter and sugar mixture to the whisked eggs, stirring until combined.
- In another bowl, sift together the flour, cocoa powder, baking powder, and salt.
- Add the dry ingredients to the wet mixture, alternating with the milk. Stir until just combined.
- Finally, mix in the vanilla extract.
- Pour the batter into the prepared cake pan and smooth the top.
- Bake for approximately 35-40 minutes, or until a toothpick inserted into the center of the cake comes out with a few moist crumbs.
- Allow the cake to cool in the pan for 10 minutes, then transfer it to a wire rack to cool completely.
- Once cooled, frost the cake with your favorite chocolate ganache or buttercream frosting.
- Slice, serve, and enjoy!
Indulge in the rich and luxurious flavors of a homemade mud cake created using the melting method. This foolproof technique guarantees a moist, chocolatey cake that will impress all who taste it.
The Whisking Method
The whisking method is a popular baking technique used to create cakes with an airy texture. It involves vigorously whisking wet ingredients, typically eggs and sugar, until well combined.
To achieve the desired texture, it’s important to whisk the ingredients until they are light and fluffy. An electric mixer can make this process easier and more efficient.
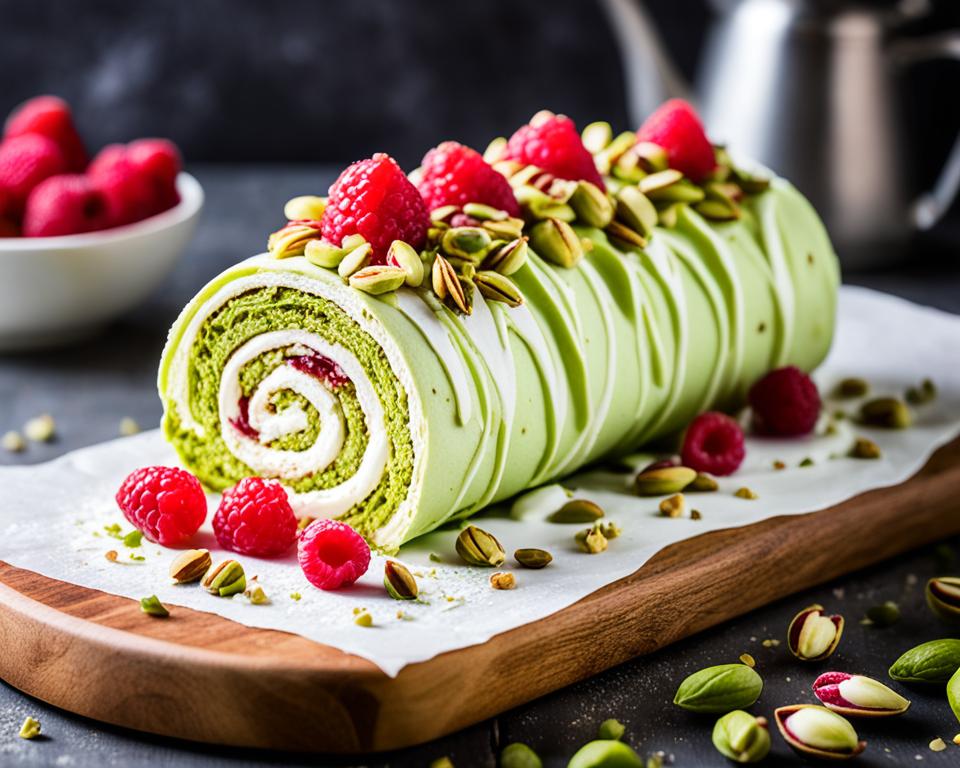
An excellent example of a dessert made using the whisking method is the pistachio pavlova roll. The meringue is whisked to perfection, resulting in a light and delicate base. It is then rolled with a luscious rosewater-infused fruit mixture, creating a delightful combination of flavors and textures.
Try your hand at this impressive pistachio pavlova roll recipe and experience the magic of the whisking method.
“The whisking method is a fantastic technique to create cakes with a light and airy crumb. It’s all about creating volume in the batter through vigorous whisking. Incorporating this method in the pistachio pavlova roll results in a stunning dessert that is both visually appealing and delicious.”
Ingredients:
- 6 large eggs
- 1 cup granulated sugar
- 1 cup all-purpose flour
- 1 teaspoon vanilla extract
- 1/2 teaspoon cream of tartar
- 1/4 teaspoon salt
- 1 cup whipped cream
- 1/2 cup chopped pistachios
- 1 cup mixed berries (strawberries, raspberries, blueberries)
- 1 tablespoon rosewater
Instructions:
- Preheat the oven to 350°F (175°C) and line a baking sheet with parchment paper.
- In a large bowl, whisk together the eggs and sugar until light and fluffy.
- Sift in the flour, vanilla extract, cream of tartar, and salt. Gently fold the dry ingredients into the egg mixture until well combined.
- Spread the batter evenly onto the prepared baking sheet.
- Bake for 15-18 minutes, or until the cake is golden brown and springs back when gently touched.
- Meanwhile, prepare the filling by mixing the whipped cream, chopped pistachios, mixed berries, and rosewater in a bowl.
- Remove the cake from the oven and let it cool slightly.
- Carefully loosen the edges of the cake from the parchment paper, then invert it onto a clean kitchen towel.
- Remove the parchment paper and roll the cake tightly along with the kitchen towel. Let it cool completely.
- Unroll the cooled cake and spread the filling evenly over the surface.
- Roll the cake back up, this time without the towel, and place it on a serving platter.
- Refrigerate for at least 1 hour before serving to allow the filling to set.
- Slice and serve the pistachio pavlova roll, garnished with additional whipped cream and pistachios if desired.
The Rubbing Method
The rubbing method is a classic technique used in baking to create deliciously light and flaky treats. It involves rubbing flour into fat, typically butter, until the mixture resembles fine or coarse breadcrumbs. This method is all about achieving the perfect consistency and incorporating as much air as possible.
When using the rubbing method, it’s important to work quickly to prevent the fat from melting and ensure an even distribution throughout the flour. By doing so, you create small pockets of fat within the dough, resulting in a tender and flaky texture.
To demonstrate the fantastic results that can be achieved with the rubbing method, let’s take a look at a classic recipe for traditional scones. These British favorites are perfect for breakfast or afternoon tea, paired with clotted cream and jam.
Follow these simple steps to make your own batch of delicious scones:
- Preheat your oven to 425°F (220°C). Line a baking sheet with parchment paper.
- In a large mixing bowl, combine 2 cups (250g) of all-purpose flour, 1/4 cup (50g) of granulated sugar, 2 teaspoons of baking powder, and a pinch of salt. Mix well.
- Add 1/4 cup (56g) of cold unsalted butter, cut into small cubes.
- Using your fingertips, rub the butter into the dry ingredients until the mixture resembles coarse breadcrumbs.
- In a separate bowl, whisk together 1/2 cup (120ml) of milk and 1 large egg. Pour the wet ingredients into the dry mixture and stir until just combined.
- Gently knead the dough a few times in the bowl until it comes together. Be careful not to overwork the dough.
- Transfer the dough onto a lightly floured surface and pat it into a 1-inch (2.5cm) thick round. Use a round cookie cutter to cut out scones and place them on the prepared baking sheet.
- Brush the tops of the scones with a little milk or beaten egg for a golden crust.
- Bake for 12-15 minutes, or until the scones are golden brown and cooked through.
- Remove from the oven and let cool on a wire rack before serving.
Enjoy your freshly baked traditional scones with a cup of tea or coffee. The rub-in method used in this recipe ensures that the scones are light and tender, perfect for any occasion.
Experimenting with Different Flours
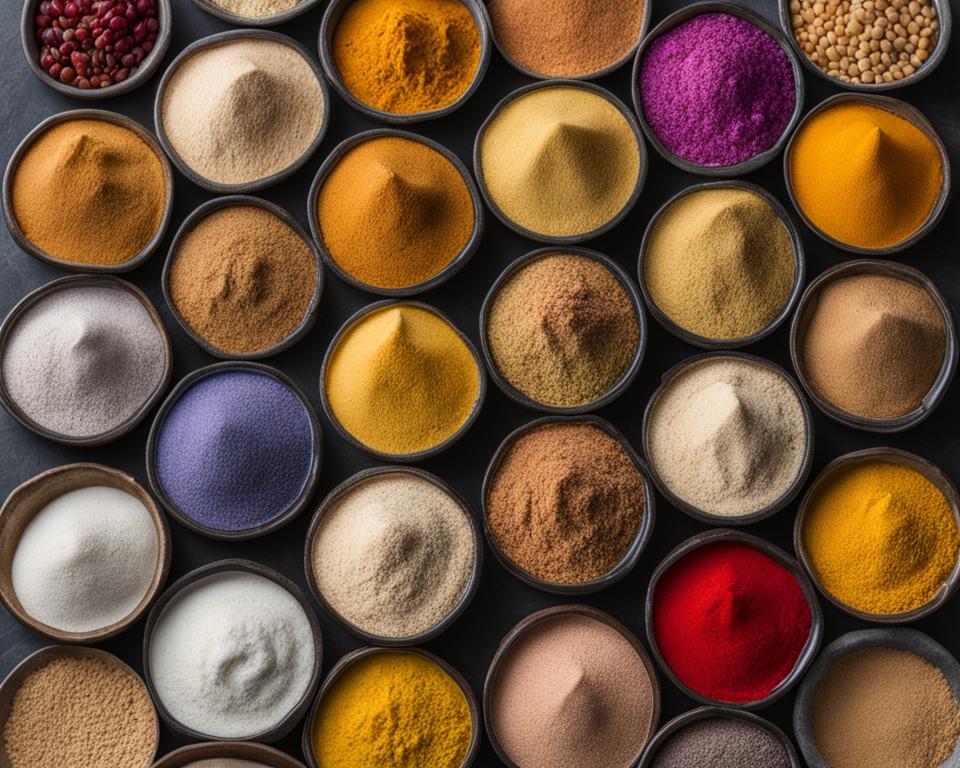
When it comes to baking, understanding that not all flours are alike is crucial. Each flour has a unique flavor and density, which can greatly influence the taste and texture of your baked goods. By experimenting with different brands and types of flour, you can unlock a world of possibilities in your recipes. Whether you’re looking for a lighter cake, a chewier cookie, or a crusty bread, choosing the right flour is essential.
So, how can you effectively experiment with different flours in your baking? Here are some tips to get you started:
1. Start with All-Purpose Flour
All-purpose flour is a versatile option that works well in a variety of recipes. It strikes a balance between protein content and versatility, making it a great starting point for experimenting with different flours. By substituting a portion of all-purpose flour with other flours, such as whole wheat or almond flour, you can add unique flavors and textures to your baked goods.
2. Consider Protein Content
Flours with higher protein content, like bread flour, are ideal for recipes that require structure and a chewy texture, such as artisan bread and pizza dough. On the other hand, flours with lower protein content, like cake flour, result in delicate and tender baked goods. Understanding the protein content of different flours can help you achieve the desired outcome in your recipes.
3. Explore Alternative Flours
Don’t be afraid to step outside the traditional wheat flour box and explore alternative flours. Flours like spelt, rye, and buckwheat offer unique flavors and textures that can elevate your baking. Additionally, gluten-free flours, such as rice flour or tapioca flour, are great options for those with gluten sensitivities.
4. Use Weight-Based Recipes
When experimenting with different flours, it’s crucial to use weight-based recipes rather than relying solely on volume measurements. The weight of flour can vary significantly from brand to brand, and even slight variations in measurements can affect the outcome of your baked goods. Investing in a kitchen scale will ensure precision and accuracy in your baking.
5. Keep Notes
As you experiment with different flours, it’s helpful to keep a baking journal or notes on each variation you try. Record details such as the type of flour, the ratio used, any adjustments made to the recipe, and the resulting texture and flavor. This will allow you to track your experiments and create a reference guide for future baking endeavors.
“Experimenting with different flours in baking opens up a world of flavors and textures. Don’t be afraid to get creative in the kitchen!”
Remember, baking is both an art and a science. Embrace the process of experimenting with different flours, and enjoy the unique and delicious results that come from your culinary adventures.
| Flour Type | Flavor | Density | Best Use |
|---|---|---|---|
| All-Purpose Flour | Neutral | Medium | Versatile, works well in a variety of recipes |
| Whole Wheat Flour | Nutty | Dense | Breads, muffins, and pancakes |
| Cake Flour | Delicate | Low | Tender cakes and pastries |
| Bread Flour | Strong | High | Artisan bread, pizza dough |
| Almond Flour | Nutty | Medium | Gluten-free baking, macarons |
Perfecting Dough and Batter
Taking care of your dough and batter is essential for achieving great results in baking. Whether you’re making cookies, cakes, or pastries, the techniques you use when mixing and handling your dough can make a significant difference in the final outcome. Here are some baking tips to help you perfect your dough and batter:
- Avoid overmixing: When mixing your dough, avoid overmixing as it can result in a tough consistency. Overmixing develops the gluten in the flour, resulting in a dense and chewy texture. Mix until the ingredients are just combined to maintain a light and tender crumb.
- Rest and refrigerate: Resting and refrigerating the dough before baking can improve the tenderness and flavor of cookies and other baked goods. This step allows the ingredients to meld together, enhances the flavors, and chills the fat, preventing excessive spreading during baking.
To demonstrate the importance of these tips, let’s take a look at a classic example – cookie dough.
“One of the keys to making delicious cookies is achieving the perfect balance of tender and chewy. Resting and refrigerating the dough prior to baking allows the fat in the dough to solidify, resulting in cookies that hold their shape and have a soft, melt-in-your-mouth texture.” – Rebecca Smith, Pastry Chef
By following these simple tips, you can ensure your dough and batter are in optimal condition before baking, resulting in delectable treats that are sure to impress. Experiment with different recipes and techniques, and don’t be afraid to get creative in the kitchen!
Now that we’ve covered the essentials of perfecting dough and batter, it’s time to explore the world of different flours and their impact on your baking. In the next section, we’ll delve into the various types of flours and how they can influence the texture and flavor of your baked goods.
Conclusion
By incorporating foolproof baking techniques into your repertoire, you can elevate your baking skills and achieve consistent success in the kitchen. Whether you prefer the creaming method, all-in-one method, melting method, whisking method, or rubbing method, each technique offers its unique advantages and can be applied to a variety of baking recipes.
Through practice and experimentation, you can develop your baking skills and become a master in the art of foolproof baking. Utilize easy baking hacks and tricks to ensure your treats turn out perfect every time. From fluffy cakes to flaky scones, there are countless foolproof baking recipes to explore and enjoy.
Remember, precision and attention to detail are key. Take into account the type and quality of flour you use, as different flours can impact the texture and taste of your baked goods. And don’t forget to perfect your dough and batter handling techniques, ensuring your creations are tender and delicious.
So why not embark on a baking adventure and unlock your full baking potential? With foolproof baking skills under your belt, you’ll be able to create delectable treats that will impress both yourself and others.
FAQ
What are foolproof baking techniques?
Foolproof baking techniques are specific methods and approaches used in baking that guarantee successful results every time.
What is the creaming method?
The creaming method is a classic baking technique where sugar and fat, usually butter, are whisked together to create air bubbles that result in a soft and risen cake.
What is the all-in-one method?
The all-in-one method is a simple baking technique that involves mixing all the cake ingredients together in one bowl, saving time and reducing dishwashing.
What is the melting method?
The melting method is a foolproof baking technique where the fat and sugar are melted together before adding eggs and dry ingredients, resulting in a beautifully moist cake.
What is the whisking method?
The whisking method is a baking technique that involves vigorously whisking wet ingredients, usually eggs and sugar, until well combined, creating cakes with an airy texture.
What is the rubbing method?
The rubbing method is a baking technique where flour is rubbed into fat until the mixture resembles fine or coarse breadcrumbs. It is commonly used for making scones.
Why is it important to experiment with different flours in baking?
Different flours have unique flavors and densities, and experimenting with various brands and types of flour can lead to different and exciting results in baked goods.
How can I achieve great results in baking dough and batter?
It is important not to overmix dough to avoid a tough consistency. Resting and refrigerating the dough before baking can enhance the tenderness and flavor of cookies and other baked goods.
How can I elevate my baking skills?
By incorporating foolproof baking techniques, such as the creaming method, all-in-one method, melting method, whisking method, or rubbing method, into your baking repertoire, you can elevate your skills and ensure consistent success in the kitchen.

