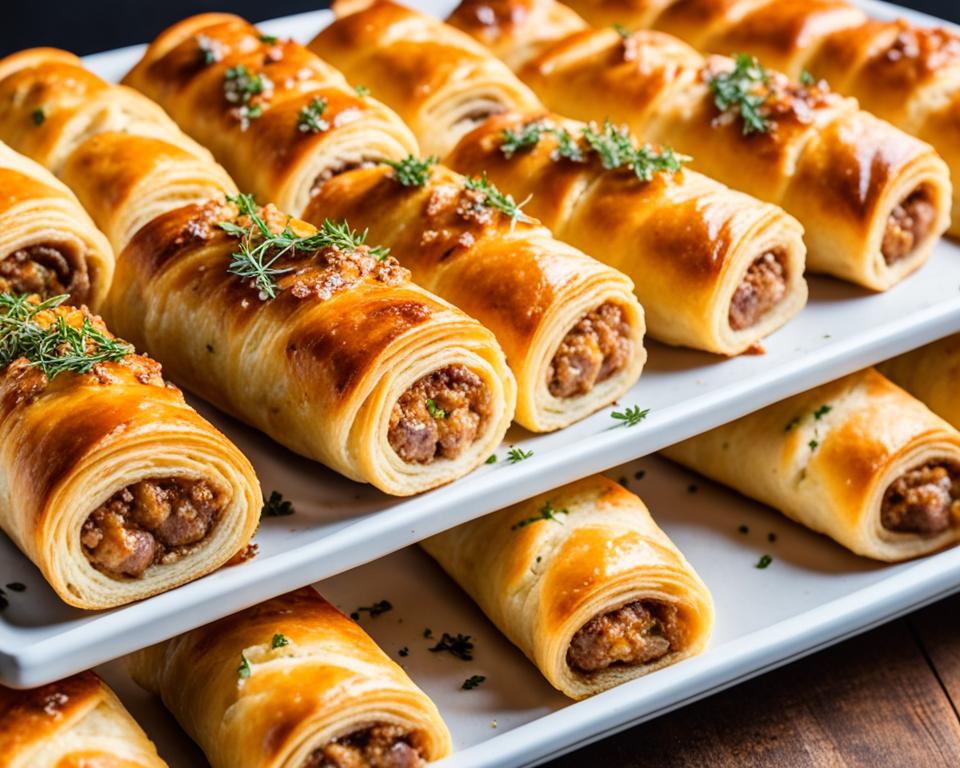
The allure of Flaky Danish Pastries lies in their ethereal, butter-rich layers that are both a delight and a marvel of the baking world. With their golden, crisp exteriors and soft, mouthwatering centers, these delicious pastries have become a beloved staple. Whether served as indulgent breakfast pastries or as sumptuous sweet treats, the flavor and texture of homemade Danish pastries are unparalleled. The technique, akin to making puff pastry, requires patience and precision, but the end result of these buttery pastries is worth every effort. Embark on a culinary adventure and create baked goods that promise to transform any moment into an extraordinary experience.
Key Takeaways
- The layered, buttery texture of Danish pastries sets them apart as a premier choice for baked goods aficionados.
- Meticulous preparation and baking methods are behind the delightful crispness and flakiness of every pastry.
- While similar to puff pastry, Danish pastries boast a unique softness, making them a perfect breakfast pastry option.
- Creating these pastries at home imbues them with a personal touch of warmth and hospitality, elevating any gathering.
- From rolling and folding to the final glaze, each step in the process contributes to the overall delectable experience of Danish pastries.
The Origins of Danish Pastry and its Global Popularity
The story of danish pastries is a fascinating tale of cultural exchange, craftsmanship, and the rise of a global pastry sensation. While today’s pastry lovers may associate these flaky treats with Denmark, their roots in fact trace back to the bakers of Austria in the mid-19th century.
A Journey from Austria to Denmark
In the 1840s, Austrian bakers were known for their skills in creating delicate, buttery pastries. Their techniques and recipes traveled across borders and found a new home in Denmark, where they were embraced and further refined by Danish bakers. This transference of skills and culinary styles led to the birth of a new sweet treat, which would become an integral part of Denmark’s baking tradition.
Adaptation of Vienna Bread
These expertly layered creations, while known as Danish pastries around the world, are referred to as Vienna Bread in Denmark itself—a nod to their Austrian origins. Over time, local ingredients and preferences led to adaptations, evolving the pastries into the distinctively rich and airy delights we now associate with Danish pâtisserie. Their global popularity can’t be overstated; from Europe to the Americas and beyond, these scrumptious pastries continue to be synonymous with indulgent breakfasts and cafe culture.
Let’s explore more about how these delicious pastry morsels went on to conquer the taste buds of people all over the world and become globally recognized symbols of Danish culinary artistry.
Flaky Danish Pastries: Understanding the Lamination Process
The art of creating Flaky Danish Pastries is a symphony of precision and patience, largely attributed to the intricate lamination process. This traditional technique is essential in achieving the pastry’s signature layers that are at once crispy and tender, and is one of the most revered baking secrets among artisan bakers.
A key component is the butter block, a steadfast pillar in the lamination process. Meticulous care is taken to ensure that this core element is consistent in texture and temperature, ultimately dictating the quality of the final product. When executed correctly, laminating dough leads to a multitude of gossamer-thin layers, each contributing to the overall exquisiteness of the pastry.
The steps of the lamination process are akin to a ballet of baking, where the choreography of rolling and folding leads to a crescendo of culinary delight. To better understand this, observe the following outline of the critical phases:
- Preparation of the Butter Block: Consistency in the butter’s temperature and pliability is key. It’s typically rolled out and chilled to a precise measurement before incorporation into the dough.
- Dough Rolling: Before each fold, the dough is carefully rolled to spread the butter uniformly, which will separate into thin layers during the baking process.
- Folding Techniques: The dough is folded in specific patterns, ensuring that the butter is sealed within and that new layers are continuously formed.
- Chilling Sessions: In between folds, the dough must be chilled to keep the butter from melting, ensuring distinct layers are maintained.
Each fold of the dough multiplies the layers, and the temperature-controlled rest periods allow the gluten to relax, preventing shrinkage and maintaining the dough’s shape. The illustrated sequence below encapsulates this delicate process.
| Step | Description | Tip |
|---|---|---|
| 1. Butter Preparation | Pound butter into a block consistent in thickness. | Use parchment paper for easy handling. |
| 2. Initial Rolling | Extend dough to a specified width for butter placement. | Keep the surface and the rolling pin lightly floured. |
| 3. First Fold | Encase butter block within dough, folding like a letter. | Ensure no butter is exposed to seal in layers. |
| 4. Subsequent Folds | Continue rolling out and folding the dough multiple times. | Allow dough to rest in a cool environment after each fold. |
The potency of the lamination process in the creation of these pastries cannot be overstated. It’s a marriage of science and art, culminating in the exemplary layers above showcases the transformation that occurs when the layered dough hits the oven’s heat, turning each fold into a puff of flavor and texture.
While seemingly daunting to novices, the lamination process is a skill acquired over time and with practice. Those seeking to master the baking secrets behind Flaky Danish Pastries will find repetition and attention to detail to be their greatest teachers. With each layer, the promise of buttery, flaky perfection becomes a sumptuous reality.
Gathering the Right Ingredients for Authentic Danish Pastries
The quest for crafting authentic Danish pastries begins with the careful selection of top-notch ingredients. Securing the right building blocks is pivotal to replicating the delectable taste and delicate layers characteristic of Denmark’s most famous baked delight.
The Role of High-Quality Butter
In the realm of baked goods, particularly those as renowned as authentic Danish pastries, the importance of high-quality butter cannot be overstated. It’s the heart of the pastry, imparting a rich flavor and contributing to that quintessential flaky texture. Only the finest unsalted butter, known for its superior creaminess and ability to laminate effectively, should be sourced to ensure your pastries melt in your mouth with each bite.
Selecting the Perfect Flour
The foundation of any pastry is its flour, and Danish pastries are no exception. The choice between generic versus perfect flour can make the difference between a good pastry and a great one. Expert bakers recommend using a flour with just the right protein content—enough to give the dough strength, but not so much that it becomes tough. This balance is crucial to achieve the tender, airy layers that are the hallmarks of a truly authentic Danish pastry.
Yeast, Sugar, and Salt: The Essentials
Alongside butter and flour, the trifecta of yeast, sugar, and salt constitutes the essential components of Danish pastry dough. Yeast is the leavening agent that breathes life into the pastry, allowing it to rise and develop texture. Sugar not only sweetens the dough but also helps in browning and tenderizing the crust. And finally, salt enhances flavor and controls yeast fermentation, providing the delicate balance vital for the unmistakeable taste of a true Danish pastry.

Preparing the Dough: The Foundation of Every Pastry
The process of preparing dough holds great importance in the assembly of any pastry, especially when attempting to replicate the delicate textures of a Danish pastry foundation. It is in this initial phase that the foundations for taste and layers are established. Masterful mixing of ingredients and precise handling techniques are key to achieving the desired outcome.
Mixing Dry Ingredients and Incorporating Butter
Begin by mixing ingredients such as flour, granulated sugar, and instant yeast in the bowl of a stand mixer. This blend forms the base of the dough. Yet, the crucial step of incorporating butter cannot be overlooked. With the objective to prevent large lumps, pieces of cold butter are worked into the dry mix, typically with a pastry blender, until a fine crumb is achieved. Meticulous blending at this stage ensures an even distribution of fat, a fundamental element in creating that flaky pastry structure.
Adding Liquids and Kneading to Perfection
Following the blending of dry components and butter, the dynamic stage of adding liquids emerges. Pour in cold milk, lukewarm water, and eggs, commencing the transformation of the mixture into a cohesive entity. The kneading process ensues—demanding both patience and precision—as the stand mixer’s dough hook attachment or bread machine’s dough cycle works the sticky dough to perfection. Usually taking 5 to 7 minutes, the completion of this step reveals a smooth, elastic dough that is slightly sticky to the touch, indicating readiness for the next phase in the exquisite journey towards pastry excellence.
Once the dough formation is complete, it is granted a short rest before further manipulation. The resting period allows the dough to hydrate evenly and for the gluten strands to relax. This is essential for later ease in handling and will contribute to the creation of the airy, soft layers that are characteristic of an authentic Danish pastry.
Secret Techniques for the Perfect Butter Block
At the heart of every delectable Danish pastry lies the butter block, the cornerstone of creating those irresistible, flaky layers that pastry connoisseurs love. Through carefully honed secret techniques, artisan bakers transform simple butter into the linchpin of pastry perfection. Let’s delve into the meticulous process that helps these craftsmen and women achieve layers upon layers of buttery finesse in their pastries.
Creating the perfect butter block begins with precision. Butter is cut into exact rectangles and then layered between sheets of parchment paper. The essential secret is neither to melt the butter nor to mix it with dough prematurely. Here, one finds a moment of sheer artistry, where a baker’s gentle yet firm touch shapes the butter’s future role in the pastry.
- Select Quality Butter: Choose the highest quality butter for its high fat content and optimal consistency. This ensures the development of those unmistakable flaky layers.
- Temperature Management: The butter should be chilled but not hard, achieving a balance that allows it to integrate smoothly into the dough without losing its integrity.
- Delicate Pounding: Using a rolling pin, gently pound the butter to soften it, enabling it to spread more easily when rolled out.
- Rolling to Perfection: With the utmost care, roll the butter into a thin sheet that maintains an even thickness throughout.
Once these steps have been skillfully executed, the baker is then ready to merge the butter into the pastry, setting the scene for the all-important folding and layering steps to come. The integrity of the butter block is paramount; this is where the magic of the Danish pastry flaky layers begins to unfold.
| Butter Block Creation Step | Technique | Impact on Flaky Layer Development |
|---|---|---|
| Cutting Butter into Rectangles | Measure and slice with precision. | Ensures consistent butter layering. |
| Chilling Butter to Ideal Temperature | Chill until malleable, but still cold. | Prevents butter from melting during folding. |
| Pounding and Rolling Butter | Gently flatten to the correct size between parchment. | Creates a uniform thickness for even lamination. |
| Stacking Layers of Butter | Layer butter pieces to form the block. | Crafts the foundational structure for layer development. |
By adhering to these secret techniques, bakers ensure the butter block maintains its structure and integrity throughout the lamination process. Such meticulous care is what separates the ordinary from the extraordinary in the world of Danish pastry artistry. As we unfold the layers of knowledge, it becomes increasingly clear that the path to pastry perfection is as much about method as it is about skill.
Mastering the Folding Technique for Layered Perfection
The heart of Danish pastry’s irresistible allure lies in mastering the folding technique, a methodical process that cultivates the layered perfection beloved the world over. The transformation of flour, butter, and yeast into a symphony of tender, airy signature layers is not just a craft but an art nurtured through the discipline of skillful hands. As with many gastronomic endeavors, the secret to the most exquisite pastry resides in the nuanced balance of consistency and temperature.
Creating the Signature Layers
Layer upon layer, the Danish pastry comes into being through a carefully choreographed dance between dough and butter. The folding technique begins with the dough rolled into a precise rectangle, upon which the carefully prepared butter block is placed, eagerly awaiting its encasement. As this rich, flavorful block is folded into the heart of the dough, it commences the journey to creating the signature layers that render authentic Danish pastries a textural delight. The way this is done, with the edges sealed and the layers stacked, ensures that each bite will be as flaky as it is flavorful.
Temperature Control During Folding
Paramount in the domination of this technique is temperature control, a factor that cannot be overemphasized. The butter, yielding to the slight warmth of the kitchen, must maintain its solid form throughout the lamination process. It is this firmness that leads to the separation of layers during the baking process, each stratum distinct in its buttery taste and feather-light composition. Without such vigilance in keeping a cool composition, the dough would lament in a buttery sludge, and thus, temperature control plays the sentinel’s role in protecting the potential within each fold.

- Rolling Out the Dough: To begin, roll the dough into a well-defined rectangle. The exactness of this form will determine the uniformity of the butter distribution and the layers.
- Integrating the Butter Block: Lay the butter block onto the heart of the dough, an essential introduction for the layers to come. It is here that temperature plays its critical role in preservation.
- Executing the Folds: Fold the dough in a series of precise motions, emulating the pages of a book or the neat tucks of an envelope, to enclose the butter within the folds of the dough.
- Consistent Rolling: With each fold comes another roll, patiently stretching the dough to its dimensions before the cycle repeats, augmenting the number of layers with each turn.
Through the iterations of folding and rolling, the Danish pastry becomes a testament to the baker’s pursuit of the perfect pastry, one that demands both dedication and a deft touch with chilled hands. The signature layers expand, bubble, and bake into a state of layered perfection, achieving the lofty heights of culinary excellence only dreamt of in one’s flakiest reveries.
Resting the Dough: A Critical Step in Pastry Making
In the world of pastry making, taking the time to rest your dough isn’t merely a suggestion—it’s a cornerstone that can make or break the delicate structure and sumptuous texture of Danish pastries. Understanding the science behind this resting period is crucial for any baker aspiring to perfect their craft. It’s during this phase that the magic of gluten development and hydration takes place, setting the stage for the flaky, tender layers that are the hallmark of excellent pastry.
The Importance of Patience
Patience truly becomes a virtue in the art of crafting Danish pastries. This critical step of allowing dough to rest is not about idle waiting; it embodies the baker’s respect for the natural processes that yield perfection. As they say, ‘time is the secret ingredient,’ and in this case, it allows the dough to fully absorb moisture, ensuring an even consistency that will later translate into layers that puff with elegance upon baking.
How Resting Affects the Dough’s Texture
The resting stage is pivotal in impacting the dough’s final texture. When dough is allowed to rest, the gluten strands relaxed from the kneading process have time to realign and strengthen without becoming too tight. This directly correlates to the flakiness of the pastry, as relaxed dough is easier to roll out, leading to more distinct, airy layers. A dough that hasn’t been given sufficient time to rest can result in a final pastry that’s tough and dense, rather than light and flaky; such is the power held in the seemingly simple act of resting dough.
- Hydration: Throughout the resting period, flour continues to absorb the liquid, leading to a dough that is easier to handle and shape.
- Gluten Relaxation: Properly rested dough promotes elasticity without excessive springback when rolled, essential for creating fine layers.
- Final Texture: Resting the dough makes for a more uniform crumb and a desirable final pastry texture, differentiating a good Danish from a truly great one.
Whether you’re a seasoned baker or new to the joys of pastry making, incorporating a rest period into the process of preparing Danish dough is an invaluable practice. It demands both the passage of time and the embrace of calm—a clear signal that when it comes to making pastries, rushing can never replace the benefits brought on by simple, unhurried patience.
Crafting Cheese and Fruit Fillings for Danish Pastries
Embarking on the delightful art of crafting pastries, particularly Danish pastries, involves a careful selection of fillings that promise to tantalize the senses. Cheese filling and fruit fillings stand out as favorites among pastry enthusiasts, both of which contribute their unique qualities to the final product. A mastery of complementary flavors ensures each bite is an exploration of taste and texture, elevating the pastry experience to new heights.
Choosing Complementary Flavors
Harmony in flavor is essential when pairing cheese filling with fruit fillings in Danish pastries. The contrast between rich, creamy cheese and the tart or sweet burst from fruits can be mesmerizing. Identifying complementary flavors is more than an act of mixing; it is a science of enhancing the natural profiles that both elements bring to the table.
Creating a Smooth Cheese Filling
The creaminess of a meticulously prepared cheese filling provides a luxurious counterpoint to the crisp layers of pastry. Achieving a smooth consistency, often with the aid of a food processor, results in an indulgent, richly textured filling that melds harmoniously with the buttery dough.
The Sweet Balance with Fruit Fillings
From the tang of berries to the luscious sweetness of stone fruits, fruit fillings bring a delightful contrast to the savory notes of the cheese filling. The versatility of fruit in Danish pastries lies not only in the spectrum of flavors but also in the burst of natural colors they lend to the visual appeal of these pastries.
| Cheese Type | Fruit Pairing | Flavor Profile |
|---|---|---|
| Cream Cheese | Strawberry Jam | Classic combination; creamy and sweet with a tangy edge |
| Ricotta | Blueberry Compote | Mild and slightly sweet cheese with bright and tart blueberries |
| Mascarpone | Apricot Preserve | Velvety cheese with the sweet and tart profile of apricots |
These carefully balanced complementary flavors are but a glimpse into the endless possibilities that lie within crafting pastries. Whether opting for a velvety cheese center or a sweet fruit pool, the combination is key to creating a memorable Danish pastry that beckons for another bite.
Shaping and Assembling: The Art of Danish Pastry Design
The meticulous art of shaping and assembling Danish pastries is what transforms a simple piece of dough into an exquisite work of edible art. This crucial phase in pastry crafting not only determines the pastry’s aesthetic appeal but also its textural contrasts. Mastery over Danish pastry design entails not just a keen eye for beauty but also an understanding of how each shape can enhance the overall taste experience.
From Balls to Rounds: Preparing for Fillings
To begin the journey of preparing for fillings, the dough is first portioned into balls. These are then skillfully flattened and shaped into rounds, with a keen attention to detail ensuring that the center is slightly thinner than the edges. The intention is to create a small wall around the circumference which acts as a barrier to contain the filling, thus preventing it from spilling out during the baking process.
Varieties of Danish Pastry Shapes
When it comes to pastry shapes, the possibilities are endless. The versatile Danish dough can be manipulated into a variety of forms, each offering its own unique textural experience and aesthetic charm. Below is a table showcasing a selection of classic Danish pastry shapes, highlighting the diversity and creativity involved in assembling these pastry treasures.
| Pastry Shape | Description | Visual Appeal |
|---|---|---|
| A square of dough is shaped with the corners folding towards the center, creating a pocket for the filling. | Features a balanced geometric form with a peek of the filling. | |
| Pinwheel | Dough is cut into a star formation and folded to resemble a pinwheel, often filled at the center. | Exhibits a playful swirl that entices the eye with its spiral patterns. |
| Plait | Strands of dough intricately woven to resemble a braid, often layered with fillings. | Displays a complex interplay of dough and filling for an artisanal touch. |
| Spiral | A long strip of dough is twisted to form a spiral that encases layers of filling within. | Imparts a rustic charm with visible spiraling layers. |
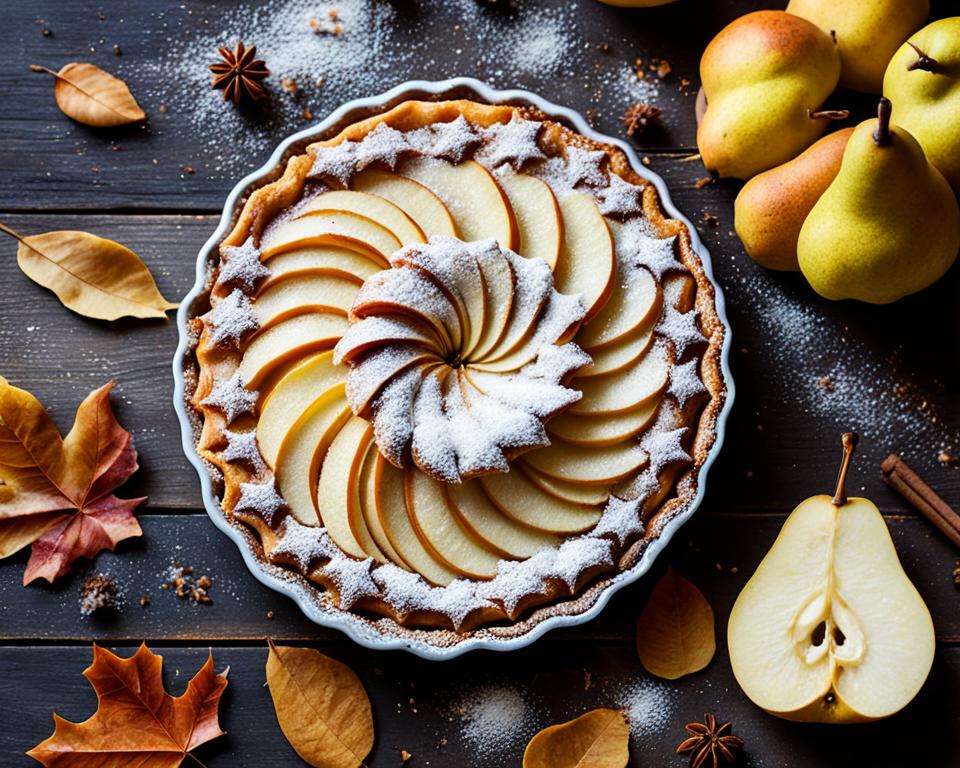
| Crown | Dough is shaped into a circle and filled then cuts are made to create a crown-like appearance when baked. | Presents a majestic form with wedges framing the central filling. |
Whether opting for the simplicity of a round or the sophistication of a plait, adept shaping techniques ensure that the Danish pastry’s design complements its rich flavors and delicate, buttery textures. The presentation is vital; it’s what first captures the eye and tempts the palate, making the art of Danish pastry design an essential component in crafting these esteemed baked goods.

This guide to assembling and shaping provides both an insight into traditional practices and an invitation to innovate. While the classic shapes of Danish pastries have stood the test of time, the adventurous baker is always encouraged to explore new forms and bring a personal signature to their creations. Understanding the interplay between form, function, and flavor is key to designing pastries that are not just a feast for the eyes but a delight for the taste buds as well.
The Final Touch: Egg Wash and Baking to Golden-Brown Glory
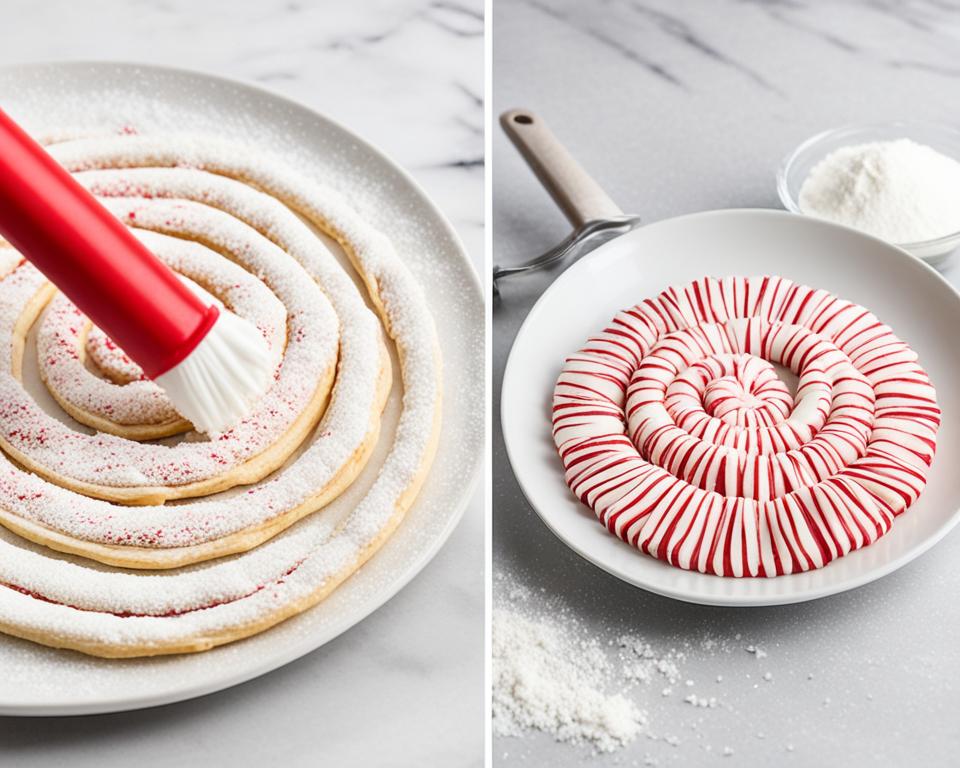
The culmination of baking Danish pastries lies in the final steps that lead to their golden-brown glory, synonymous with high-quality, delectable treats. A beautiful pastry shine is the aspiration of every baker, and the secret to this lies in the application of a simple, yet effective egg wash. This, followed by attentive baking, ensures each Danish pastry is a piece of visual and gustatory art.
Achieving the Desired Pastry Shine
The indispensable egg wash plays a pivotal role in creating the perfect shine and color on Danish pastries. It acts as a glue for toppings and as a protein-rich layer that caramelizes under heat to bestow a beautiful sheen upon the pastries. Made with a proper ratio of egg white to water, this mixture is generously brushed over the shaped dough, preparing it to transform into a golden, luscious treat through the alchemy of baking.
Baking Times and Temperatures
Baking Danish pastries requires a balance of the right temperature and time to achieve the quintessential crispy yet tender texture. The oven’s heat reacts with the laminated layers and egg wash, resulting in the transformation from delicate dough to the lauded golden-brown glory of Danish pastries. Monitoring baking times is critical to ensure the pastries emerge at the pinnacle of their potential, ready to delight any connoisseur.
| Pastry Type | Temperature (Fahrenheit) | Baking Time | Visual Cues |
|---|---|---|---|
| Classic Danish | 400°F | 15-20 minutes | Even golden-brown with a glossy finish |
| Braided Danish | 375°F | 20-25 minutes | Rich golden color and puffed layers |
| Mini Danish Pastries | 400°F | 12-15 minutes | Glistening golden-brown surface |
Adhering to these final crucial steps, from the application of the egg wash to the precision in baking, is what transitions a pastry from dough to Danish, ensuring every bite offers both aesthetic pleasure and an explosion of exquisite flavors. It’s this culmination of efforts that certifies golden-brown glory and the pastry shine that captivates Danish aficionados everywhere.
Adding the Sweet Finish: Glaze and Toppings
The artistry of Danish pastries culminates in a sweet finish that not only enhances their flavor but also adds visual allure. A glaze lovingly applied to each pastry reflects the light with a tempting sheen, an invitation to indulge. Beyond the glaze, a plethora of toppings can be sprinkled on to add texture, color, and taste, ensuring each bite is as pleasing to the eye as it is to the palate.
To create this magical glaze, confectioners’ sugar is whisked with milk, judiciously adding just enough to reach a “drizzle-able” consistency. The key here is balance: a glaze too thin will slide right off, too thick, and it won’t grace the entire pastry. It’s this attention to detail that imparts the pastries their irresistible charm.
Confectioners’ sugar, the fine, powdery ally of bakers, plays a starring role, giving the glaze its perfectly smooth texture. With its ability to dissolve quickly, it ensures that the glaze is free from unwanted granules, cloaking the delicate Danish surfaces in a veil of sweetness without overpowering the nuanced flavors nestled within the pastry layers.
The crowning glory of Danish pastries, though, may very well be the toppings. From the richness of crushed nuts to the dazzle of decorative sprinkles, each topping is selected to complement the pastry’s flavor profile. Even the simplest of toppings, like a dusting of additional confectioners’ sugar, adds dimension and character to the already-enticing treat.
| Glaze Type | Topping Suggestion | Taste and Texture Contrast |
|---|---|---|
| Classic Vanilla | Chopped Almonds | Crisp nuts complement the soft sweetness |
| Chocolate Drizzle | Shredded Coconut | Bitter cocoa countered by the mellow coconut |
| Lemon Glaze | Candied Lemon Peel | Zesty tartness with a snappy chew |
As a final note, while toppings add visual and textural excitement to Danish pastries, they also play a role in subtly signaling the flavor. A glaze with a hint of citrus can be cleverly foreshadowed with zest scattered on top, while a sprinkle of cinnamon may whisper of the spice laced within the dough. The artful application of these elements beckons a sensory exploration from first glimpse to last crumb—each Danish pastry, a complete masterpiece.
Storing and Serving Danish Pastries: Tips for Freshness
The enjoyment of Danish pastries is at its peak when they are fresh and full of flavor. Proper storing and serving methods are crucial for preserving their delightful texture and taste. Discover essential freshness tips and storage solutions to ensure that your pastries remain as tantalizing as when first baked.
Preservation Methods
To maintain the freshness of Danish pastries, one must consider both short-term and long-term preservation methods. When planning to enjoy these treats within a couple of days, storing them at room temperature in an airtight container is sufficient. For optimal freshness, separate layers with parchment paper to prevent them from sticking together.
For longer storage, freezing offers a practical solution. Both the dough and assembled pastries can be frozen, helping to lock in flavor and facilitate serving at a later date. Below is a step-by-step guide to freezing and storing Danish pastries effectively:
- Pre-Freeze: Place individual pastries on a baking sheet and freeze until solid. This step prevents them from sticking together.
- Wrap Tightly: Once solid, wrap pastries in plastic wrap, followed by aluminum foil, to protect against freezer burn.
- Freezer Storage: Store the wrapped pastries in a freezer-safe container or zip-top bag.
- Thawing: When ready to enjoy, thaw pastries at room temperature before refreshing them in the oven.
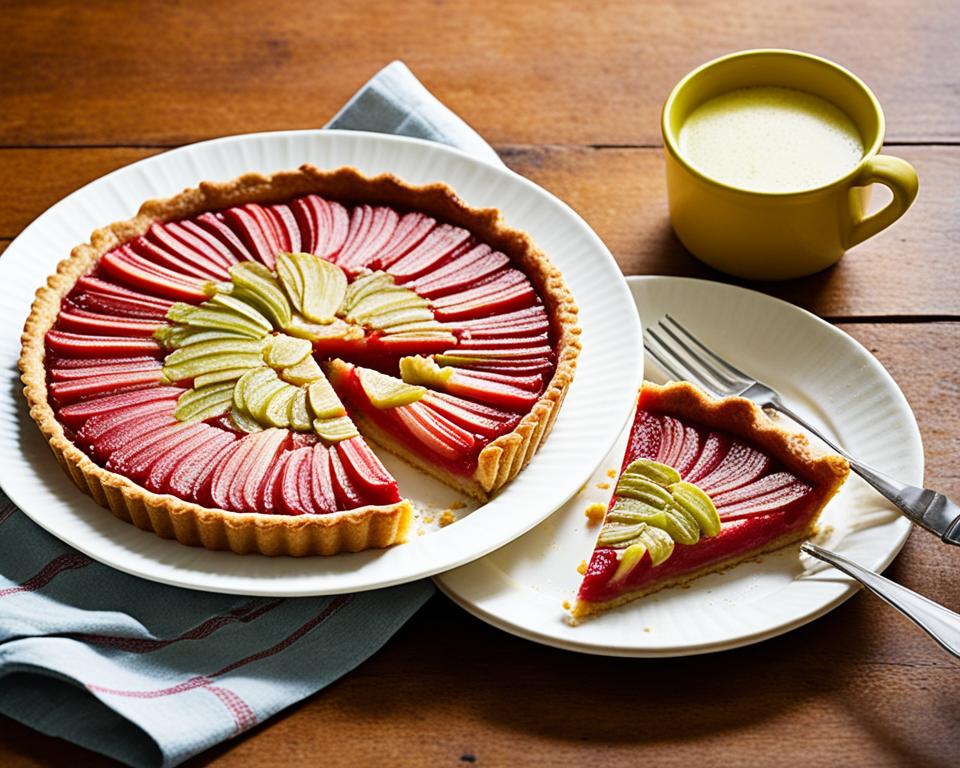
Serving Suggestions for Optimal Enjoyment
When it comes to serving Danish pastries, a few additional steps can amplify their rich buttery layers and heighten the overall experience. For those who enjoy pastries warm, a short stint in a preheated oven can revive the pastry’s crispy texture. Conversely, if you prefer the pastries at room temperature, simply allow them to sit out for a short period until they reach the desired warmth.
Here are detailed serving suggestions to bring out the best in your Danish pastries:
| Serving Condition | Method | Expected Outcome |
|---|---|---|
| Room Temperature | Let pastries sit covered at room temperature for 15-20 minutes. | Soft and buttery layers with preserved moisture. |
| Slightly Warmed | Heat in a 350°F oven for 5-10 minutes. | Restores the outer crispness while keeping the inside tender. |
| From Frozen | Thaw first, then warm in the oven as above. | Replicates the fresh-baked pastry experience. |
By adhering to these recommendations, your Danish pastries will not only retain their integrity but also provide maximum pleasure to those who indulge. Pairing this knowledge with effective storage practices will ensure that each pastry is a testament to the craft of baking. The key takeaway is simple: proper storing equals lasting freshness, and precise serving equals ultimate enjoyment.
Conclusion
As we bring our examination of the journey to perfect flaky layers to a close, it’s worth reflecting on the meticulous process that Danish pastries require. We’ve delved into the minutiae of the craft, from the precise butter block construction to the decisive folding techniques that result in those enviable, tender laminations. This amalgamation of skill, patience, and passion in baking Danish pastries underscores the dedication of artisans who elevate simple ingredients to a fine art.
Recapping the Journey to Perfect Flaky Layers
The creation of the perfect Danish pastry is emblematic of baking’s intricate dance with science — a journey where the crispness of flaky layers signifies many steps undertaken with precision. This odyssey through the world of Danish pastries has revealed that the process is about more than just culinary prowess; it’s a testament to the harmonious touch bestowed by a baker’s hands. Each fold, rest, and turn plays a critical role, taking these delightful treats from dough to sumptuous delicacy.
Inviting Readers to Try Their Hand at Baking Danish Pastries
This guide serves as an invitation to readers to embark on their own adventure in creating these layered masterpieces. Embrace the challenge, and wield the newfound knowledge to transform quality ingredients into the flaky, buttery pastries that have captivated taste buds worldwide. Whether as a quiet morning indulgence or the centerpiece of a festive brunch, these pastries promise delight. With this comprehensive walkthrough, the art of baking Danish pastries is demystified, beckoning every baking enthusiast to bring these classics from oven to table.
FAQ
What are Flaky Danish Pastries?
Flaky Danish Pastries are a type of sweet treat, featuring buttery layers that resemble puff pastry. These delicious baked goods are popular breakfast pastries enjoyed around the world and are known for their fluffy texture, rich aroma, and versatility as they can be filled with a variety of sweet fillings.
Where did Danish Pastry originate?
Danish Pastry actually originated from Austrian bakers in the 1840s. The pastries were created when these bakers were hired in Denmark and they made what was known in Denmark as “Vienna Bread,” which eventually evolved into what we now recognize as Danish pastries. Today, this buttery pastry enjoys global popularity.
What is the lamination process in making Danish Pastries?
The lamination process is the technique used to create the multiple thin, flaky layers in Danish Pastries. It involves alternating layers of dough and butter, rolling out and folding the dough several times before baking. This process results in the characteristic flaky texture of the pastries when they’re finished baking.
How important are the ingredients in crafting authentic Danish Pastries?
High-quality ingredients are crucial in crafting authentic Danish pastries. Premium unsalted butter is essential for both the taste and the flakiness of the pastry, while the right kind of flour contributes to the soft, yet structured texture. Yeast, sugar, and salt are also fundamental elements that define the pastry’s taste and texture.
What is the foundation of every Danish Pastry?
The foundation of every Danish Pastry is the dough. It starts with mixing dry ingredients and incorporating butter to ensure no large lumps remain, followed by the addition of liquids and kneading to create a cohesive yet sticky dough that sets the stage for the pastries to develop their delicious texture upon baking.
Why is it important to control the temperature during the folding technique?
Temperature control is crucial during the folding technique to maintain the consistency of the butter. By keeping the butter solid and avoiding melting during the folding process, the layers remain distinct and result in a more flaky texture after the Danish Pastries are baked.
What role does resting the dough play in making Danish Pastries?
Resting the dough is a critical step in pastry making because it allows the dough to relax. This relaxation ensures that the gluten develops properly, which is important for achieving the right texture and rise in the Danish Pastry. Patience during this step pays off in the final quality of the baked good.
How do cheese and fruit fillings enhance the taste of Danish Pastries?
Cheese and fruit fillings offer contrasting flavors that enhance the buttery dough of the Danish Pastries. A smooth cheese filling adds creamy richness, while fruit fillings contribute sweetness and a touch of tartness, creating a balanced and heightened flavor profile in every bite.
What is the significance of pastry shapes in Danish Pastry design?
The shape of a Danish Pastry is not only about aesthetics but also impacts the texture and overall eating experience. Shaping allows for different fillings and toppings and can influence the crispness and flakiness of each bite. A variety of shapes from rounds to twists can create a playful and appealing assortment of pastries.
How do you achieve the perfect golden-brown finish on Danish Pastries?
A golden-brown finish on Danish Pastries is achieved through an egg wash applied before baking. This wash gives a shiny appearance and helps in browning. The pastries should then be baked at the right temperature and for the optimal time to ensure they turn out beautifully golden and fully cooked.
What is the best way to store and serve Danish Pastries to maintain their freshness?
To maintain the freshness of Danish Pastries, they can be stored through freezing either the dough or the fully assembled pastries. When serving, bring them to room temperature or warm them up slightly to emphasize the rich buttery flavor and flaky layers for optimal enjoyment.