Embarking on the art of crafting homemade croissants, many bakers face a complex challenge that is as intimidating as it is rewarding. Yet, this culinary quest need not be reserved solely for the seasoned patissiers. With the right guidance and an Easy Croissant Recipe at their fingertips, even those new to the baking world can unfold the secrets to creating the most delectably flaky pastry—right from their home ovens.
Delving into the realm of Homemade Croissants may demand patience and attention to detail, but the rise of golden layers, crisped to perfection, heralds a triumphant foray into French baking traditions. Baking Tips unfold before the novice baker like a map to treasure; a journey not of miles, but of meticulous rolling, folding, and understanding the tender balance of ingredients and temperature.
Through every buttery layer, this guide is set to provide the confidence and know-how needed to navigate the sometimes-turbulent waters of French pastry making. There’s a certain magic in watching dough transform into a masterpiece of texture and taste—a harmony achieved with no need for fancy equipment or secret ingredients. It’s time to embrace the challenge and create a Flaky Croissants Recipe that promises to wow and satisfy.
Key Takeaways
- The perfect flaky croissants are achievable with patience and the proper technique.
- An easy croissant recipe is accessible to bakers of all expertise levels, encouraging culinary adventures at home.
- Creating homemade croissants allows for a deeper appreciation of the intricate baking process of French pastries.
- Essential baking tips guide bakers through each step to ensure croissant-making success.
- Mastering croissants requires understanding the importance of dough lamination and temperature control for optimal flakiness.
The Art of Crafting the Perfect Flaky Croissants Recipe
Mastering the Classic Croissant Recipe might seem shrouded in the mystique of French culinary expertise, but it’s an art that’s delightfully approachable. This journey into the world of Homemade Croissants is about patience, learning, and the satisfaction of pulling apart a warm, buttery piece of heaven.
The basic elements of a Flaky Pastry Recipe meld harmoniously to bring forth croissants that boast dozens of thin, air pockets achieved through a technique known as laminating. The seemingly daunting layers are not the work of seasoned chefs alone; this recipe is tailored to empower bakers across skill levels to produce authentic French Pastry marvels.
Demystifying the Croissant-Making Process
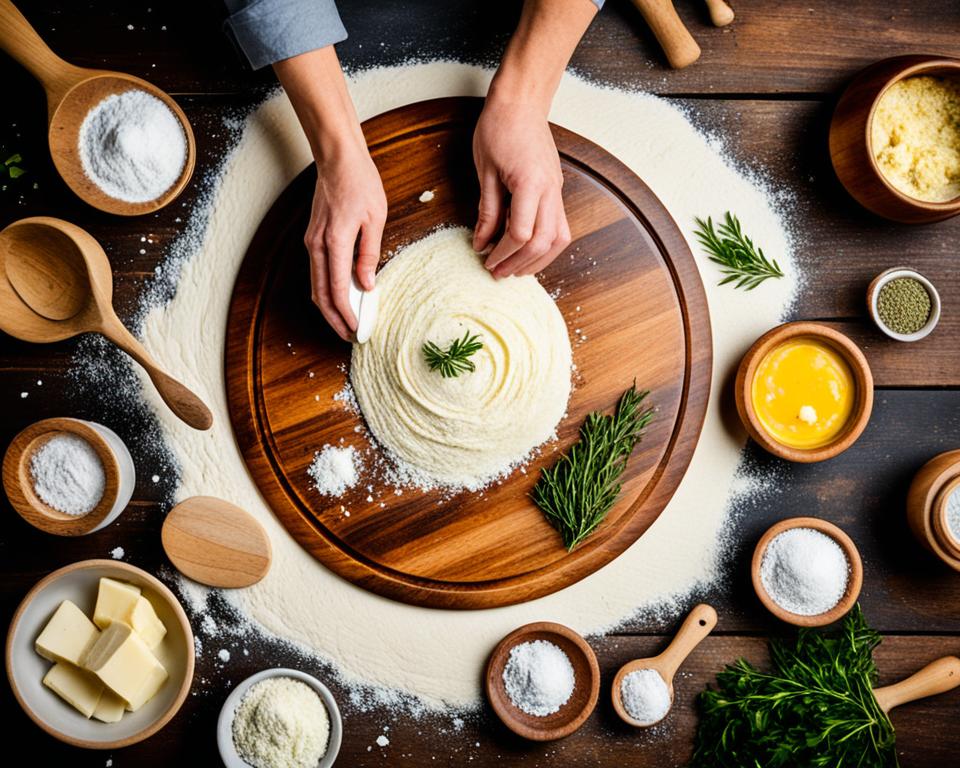
To demystify Homemade Croissants, one must understand how simplicity in ingredients – butter, flour, sugar, salt, yeast, and milk – transforms through methodical rolling and folding into a layered masterpiece. The magic lies within these folds, where each turn of the dough encapsulates butter, building the foundation for those sought-after 81 delicate layers.
Why This Flaky Croissants Recipe Works for All Bakers
This recipe is akin to a reliable blueprint; it provides clear instructions coupled with helpful tips to guide any baker through the precise steps necessary for croissant excellence. Whether a novice or seasoned baker, everyone can delight in the process of creating a flaky, layered French Pastry that rivals those found in the streets of Paris. All it takes is a willingness to follow through the detailed phases of dough preparation, laminating, and baking. The result? A deeply satisfying, buttery indulgence that all can take pride in knowing was crafted in their own kitchen.
Understanding the Basics: Classic Croissant Ingredients
In the pursuit of creating the ultimate Butter Croissants, one must begin with a fundamental understanding of the ingredients that compose the heart of this esteemed French Pastry. Each ingredient in the Homemade Croissants Recipe plays a critical role in achieving the desired texture and taste that is the mark of true croissant craftsmanship.
Selecting the Right Flour for Your Croissants
An exceptional Croissant Dough starts with the selection of flour. The choice of all-purpose or Type 55 flour is essential as it determines the structural integrity of your pastry. Flour acts as the scaffolding that supports the delicate layers of dough and butter, each contributing to the flaky layers that one delights in with each bite.
Why the Type of Butter Matters
Butter is more than merely an ingredient; it’s the soul of the Butter Croissants. The quality and type of butter used are pivotal, as European or European-style butter grants a higher fat content to the mix. This high-quality butter ensures creaminess and pliability, crucial for the lamination process that gives croissants their iconic, airy texture.
The Importance of Measuring Ingredients Precisely
The axiom ‘baking is a science’ reaches its full embodiment in the realm of Homemade Croissants. A kitchen scale becomes an invaluable precision tool, ensuring each measurement is exact. Correct proportions of sugar, active dry yeast, and cold whole milk come together to perfectly balance the mixture. In precise alchemy, the interplay of these components crowns the success of the ideal flaky pastry.
Laminating Like a Pro: The Key to Flakiness
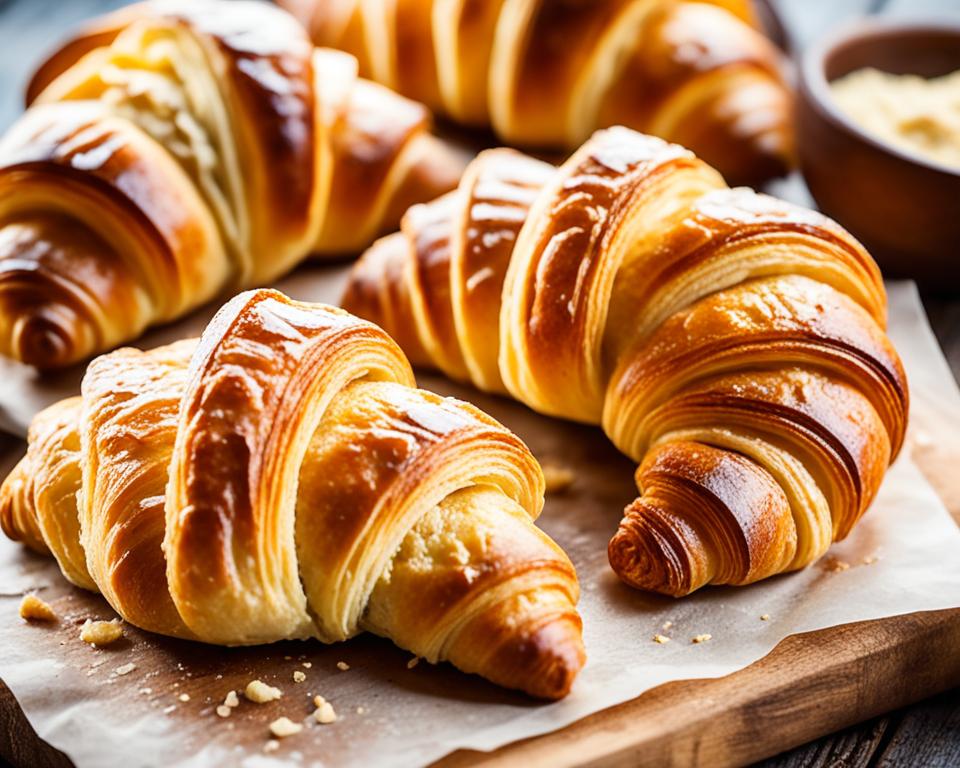
Imagine biting into a warm, flaky croissant, tasting the buttery layers that are the hallmark of a perfect French pastry. The exquisite, feather-light layers that define butter croissants are the result of a technique known as laminating. This process can seem daunting, but fear not—by following some essential steps, anyone can master the art of laminating dough at home.

Laminating is what gives our Flaky Croissants Recipe its enviable texture. The term refers to the art of methodically folding and rolling butter into the dough, creating alternating layers that lead to that quintessential flakiness. When done correctly, as the croissants bake, the butter layers produce steam, puffing up the dough to airy perfection.
| Step | Description | Tips |
|---|---|---|
| 1. Encasing Butter | Begin by encasing a block of high-fat butter within the dough. | Keep both butter and dough cool to maintain distinct layers. |
| 2. First Fold | Roll the dough into a rectangle then fold it into thirds. | Roll gently to avoid pressing the butter out of the dough. |
| 3. Chilling | Rest the dough in the fridge to keep butter from melting. | Chill for at least 30 minutes to ensure manageability. |
| 4. Repeating Folds | Complete the lamination by two more folds, chilling between each. | Turn the dough 90 degrees before each new fold. |
To begin with, it is crucial to maintain the right temperature. If the butter is too hard, it will not fold smoothly into the dough; if it is too soft, the butter will meld into the dough and you’ll lose those coveted layers. Start by pounding the butter block into a square slightly smaller than the rolled-out dough. The butter should be malleable but still cool to the touch.
- Roll out the laminated dough one final time before shaping it.
- Meticulously count the folds during the laminating process to achieve the ideal number of layers.
With this simplified approach to laminating, that once elusive flakiness is now within reach. Each layer of the laminated dough contributes to the overall taste and texture of a premium French pastry, and by mastering this method, home bakers can proudly produce butter croissants that would not be out of place in a Parisian boulangerie. It’s the careful attention to the science and craft of laminating dough that distinguishes an expertly made croissant from its mass-produced counterparts. Go ahead, envelope yourself in the art of French baking and delight in the flakiness of an impeccably crafted croissant.
Chilling: The Essential Yet Overlooked Step
The journey to baking the quintessential Flaky Croissants Recipe traverses a path less acknowledged yet vital for success—the chilling phase. At the heart of a French Pastry‘s flakiness lies the secret of meticulously chilling the Croissant Dough. It’s here, in the calm of the refrigerator, that the magic subtly unfolds, ensuring layers upon layers of buttery delight.
Why does chilling play such an influential role in Baking Croissants? When the dough is allowed to rest at a colder temperature, it provides a pause, a precious moment for the gluten to relax, and ensures that the butter remains a distinct, solid layer rather than merging into the dough. These are not mere intermissions; they are fundamental steps that build the characteristic texture of an authentic croissant.
Let’s detail the essential phases of this cold interlude inherent to Baking Croissants:
-
Post-Roll Chill: Immediately after the rolling process, a 30-minute sojourn in the fridge helps maintain the butter’s consistency. This break in the action is your ally against the heat of the kitchen, safeguarding the separate layers vital for later expansion.
-
Overnight Rest: Post-lamination, an overnight stay in the cool confines of your fridge sets the stage for perfection. It’s not idle time, but a period that allows the dough to fully hydrate and flavors to mature. With dawn, the dough emerges poised for final transformation.
Employing these chilling steps is non-negotiable in mastering the art of the French Pastry. The patient baker is rewarded with towering croissants, their layers distinct and their texture unmatched. So, remember, the road to the flakiest croissants is paved with more than just butter—it’s a path chilled to just the right degree.
Rolling Techniques for the Best Butter Croissants
When it comes to crafting Homemade Croissants, rolling the dough is a critical step that can make or break your flaky pastry aspirations. As you embark on the quest for perfect butter croissants using French Pastry Technique, knowing how to roll croissant dough correctly becomes as essential as the ingredients themselves. The rolling process stretches and layers the dough with butter, setting the stage for the flakiness that epitomizes an exquisite pastry experience. Let’s delve into the nuances of this technique to help you craft a flaky and flavorful delight in your own kitchen.
Achieving the Perfect Thickness
Attaining the ideal thickness in your Rolling Croissant Dough is a delicate balance. Too thick and your croissants will be doughy; too thin and they may not hold the luscious layers of butter properly. Aiming for an even thickness across the entire expanse of dough ensures consistency in texture after baking. Precision is paramount, and tools like a ruler come in handy to keep the measurements accurate and consistent.
Tips for Rolling Dough Evenly
Even rolling is the cornerstone of the perfect French Pastry Technique. Doubling as a guide and non-stick surface, a silicone baking mat is a baker’s ally in maintaining the desired shape and size of Croissant Dough. Flour the dough sparingly as excess flour can become incorporated into the layers, hindering their separation and the ultimate goal of a flaky pastry. Strategic chilling at various phases of the rolling process ensures the butter remains firm and malleable for the subsequent folds.
Here’s a step-by-step guide to help you routinize the perfect roll:
- First Roll: After the initial rest, gently roll your dough into a large rectangle, checking regularly for uniform thickness.
- Ensuring Precision: Measure your dough with a ruler or measuring tape to guarantee the dimensions are exact for optimal lamination.
- Chilling Stopgap: If at any point the dough softens too much, making it challenging to handle, refrigerate it for a short period before continuing.
- Final Roll: After the layers have been laminated, roll out the dough to the final specified dimensions before cutting and shaping.
With each roll and fold, a story is written in the layers of what will become a Flaky Pastry Recipe centerpiece. So take your time and apply these techniques, for each roll brings you closer to that buttery, Homemade Croissants treasure.
The Butter Layer: Achieving Ultimate Pliability
Unlocking the secret to an exceptional Flaky Croissants Recipe lies in mastering the Butter Layer Technique. The difference between good and great croissants hinges upon achieving just the right consistency and temperature of your butter. It should merge with the Croissant Dough during lamination without losing its integrity, forming hundreds of miniature steam pockets upon baking that result in the flaky texture croissant-lovers cherish.
Home bakers will find relief in the knowledge that the perfect butter consistency doesn’t require tedious manipulation of cold, firm butter sticks. By employing a strategic mix of pliability and solidity, bakers can easily integrate the butter into the dough, paving the way for a lamination process on par with professional Baking Croissants standards.

Much like sculptors need pliable clay, the butter for your croissants requires suppleness to smoothly roll within layers of dough. This delicate balance is achieved by allowing the butter to soften, then combining it with a touch of flour to give it the necessary stability before forming it into a precise rectangle. Once shaped, it’s chilled to a prime firmness—not rock-hard, but firm enough to be handled without melting.
Imagine each fold and roll of the dough as a step closer to the golden, airy croissants you strive to bake. To aid home bakers in replicating artisanal techniques, the following table illustrates the stages of preparing the butter layer for optimal integration:
| Stage | Technique | Tip |
|---|---|---|
| 1. Softening Butter | Allow butter to soften at room temperature until it yields to light pressure. | Spread the softened butter on parchment paper for easy handling. |
| 2. Adding Flour | Mix a small proportion of flour into the softened butter for stability. | Use a spatula or mixer to evenly combine flour with butter. |
| 3. Shaping | Form the butter-flour mixture into a clean rectangle on parchment paper. | Employ a rolling pin or dough scraper to straighten the edges and maintain an even thickness. |
| 4. Chilling | Refrigerate the butter until it’s cold but pliable, ideally around 30 minutes. | Chill the butter on a flat surface to prevent warping. |
The right pliability in the butter layer is transformative in the realm of Baking Croissants. With this in hand, the fusion of butter and dough during lamination raises the humble materials of butter, flour, and yeast to a crescendo of flavor and texture that exemplifies the very best of a Flaky Croissants Recipe. By ensuring your butter layer is poised for success, you set up each croissant for layer upon layer of buttery, flaky excellence.
Shaping Your Croissants for Symmetry and Beauty
The final touches to the French Pastry-making process culminate in Shaping Croissants, where precision yields to the allure of form and symmetry. This stage is critical—it’s where the dough’s transformation into the iconic crescent shape takes place, a union of artistry and culinary technique.
To ensure even baking and the separation of layers necessary for a Flaky Croissants Recipe, the dough must first be precisely cut. Mark the distinctions of elegance and geometry on your dough by carving out triangles with equal sides and angles, offering uniformity as the foundation for your pastry.
Here begins the delicate process of stretching the dough— a gentle pull at the base of each triangle elongates its potential, setting the stage for the Easy Croissant Recipe to take form. A small notch at the base is not merely aesthetic; it aids in the rolling process, offering the dough the slight give necessary to curl into the trademark shape that croissants are renowned for.
Below is a guide to the essential stages of Shaping Croissants, a journey from flat dough to the curved majesty of a French delicacy.
| Stage | Action | Tips for Symmetry |
|---|---|---|
| Cutting Dough | Cut dough into even, triangular sections. | Use a sharp knife or pastry cutter for clean edges. |
| Gentle Stretch | Lightly stretch each triangle to elongate. | Be uniform in your stretching for consistency in the final bake. |
| Notching the Base | Cut a small slit at the center of each triangle’s base. | This helps roll the dough into a perfect crescent shape. |
| Rolling | Roll the dough from the base towards the point. | Ensure the tip is tucked beneath for a cohesive bake. |
In the art of French Pastry, the act of rolling is transformative, taking shape into something both beautiful to behold and delightful in taste. As bakers wrap the stretched, notched triangular dough from base to tip, a form emerges that is quintessentially croissant: crescent, layered, and ready for the oven’s alchemy.
With these steps, novice and experienced bakers alike can develop their proficiency in Shaping Croissants, making the transition from dough to neatly arrayed pastries on a baking sheet seem less like a challenge and more like the fulfillment of a baking destiny.
- Make sure your triangles are of even size and shape for uniform croissants.
- Stretch gently, avoiding any tearing or overstretching that can deflate the layers.
- Roll with care, ensuring a tight seal to preserve the integrity of each layer.
Mastering these final details is what turns a simple dough into a repertoire of Easy Croissant Recipes, each with the potential to grace breakfast tables and dazzle alongside café au lait. As these croissants rest on their trays ready for proofing, bakers can take pride in their handiwork, anticipating the flaky, golden results that embody the pinnacle of French Pastry.
Proofing: The Final Rise Before Baking Perfection
The penultimate step in the creation of delectable French pastries lies in proofing croissants. This stage is less about physical transformation and more about patience, allowing the delicate balance of yeast and gluten to work their silent magic. Proofing is an intricate dance of time and temperature, a crucial precursor to achieving the luscious, airy texture we all crave in a flaky croissant recipe.
Proofing at the Right Temperature
Proofing demands a vigilant eye on the thermostat, as well as an acute sense of timing. The process begins at room temperature, allowing the dough’s yeast to become animated and give rise to the dough. While most proofing is done in a warm environment, for baking croissants, a second, cooler phase is imperative. Moving the dough to the refrigerator does more than simply slow yeast activity—it solidifies the butter, refining the structure and minimizing spread as it bakes to perfection.
Recognizing Properly Proofed Croissant Dough
It’s a moment of truth for any baker—the reveal of properly proofed dough, a prelude to the final act of baking. For the unaided eye, a proofed croissant will be discernibly larger. However, the true testament comes from a gentle touch; the dough should yield softly to pressure yet retain its form, a puffiness suggesting an interior that is both tender and robust.
Understanding the nuances of proofing is essential. Have patience; the yeast is your invisible ally, gently propelling dough into balloon-like readiness. This critical preparation stage is your last chance to refine texture and volume, the stepping stones to a masterpiece of French pastry.
| Step in Proofing Process | Expected Outcome | Sign of Readiness |
|---|---|---|
| Room Temperature Rest | Dough begins to rise and develop flavor | Dough is visibly larger and softer to the touch |
| Refrigeration | Butter solidifies, preserving layers for baking | Dough feels chilled, firm on the exterior but still pliable |
| Final Check Before Baking | Dough holds shaped form, ready for oven | Retains indentation when gently pressed then slowly bounces back |
Embarking on the journey of baking croissants means embracing each step with the anticipation of crafting an exquisite French pastry. Those who heed the subtle cues of proofing are rewarded with buoyant, flaky croissants that resonate with the taste of achievement.
Scoring and Egg Wash: Secrets to a Golden Finish
Approaching the final stages of creating an impeccable Flaky Pastry Recipe, there are two critical techniques that every baker must master for that professional appearance and exquisite taste—Croissant Scoring and the application of an Egg Wash. Given their significance in the baking process, these steps are not merely about aesthetics but are integral to the overall quality and flavor of the baked goods. Scoring the dough allows the croissants to open beautifully during the baking process, while that final brush of egg wash ensures a golden, glossy finish that’s typical of high-caliber Egg Wash Croissants.
Here are some Baking Tips to guide you through applying an even egg wash and scoring your dough like a pro:
-
Prepare the Egg Wash: For a golden sheen, whisk together one whole egg with a tablespoon of milk until fully combined.
-
Even Application: Use a pastry brush to gently coat the surface of each croissant, being careful not to let the egg wash pool in the seams and folds.
-
Scoring the Dough: With a sharp knife or a lame, make shallow, diagonal cuts on the surface of the dough. The cuts should be swift and confident to avoid deflating the dough.
-
Final Touch: After scoring, give the dough a second light brush with the egg wash to enhance the richness of the color.

Adhering to this technique ensures that the croissants will not only taste divine but will also possess a tempting appeal that makes them simply irresistible. Remember, it’s these small, thoughtful touches in the Flaky Pastry Recipe process that underscore the craftsmanship of your baking expertise.
As you prepare to send your pastries into the oven’s embrace, reflect on the journey that has brought you to this point—a path marked by precision, patience, and passion. Now, with the secrets of scoring and egg wash in your repertoire, you stand ready to achieve golden, picture-perfect Egg Wash Croissants.
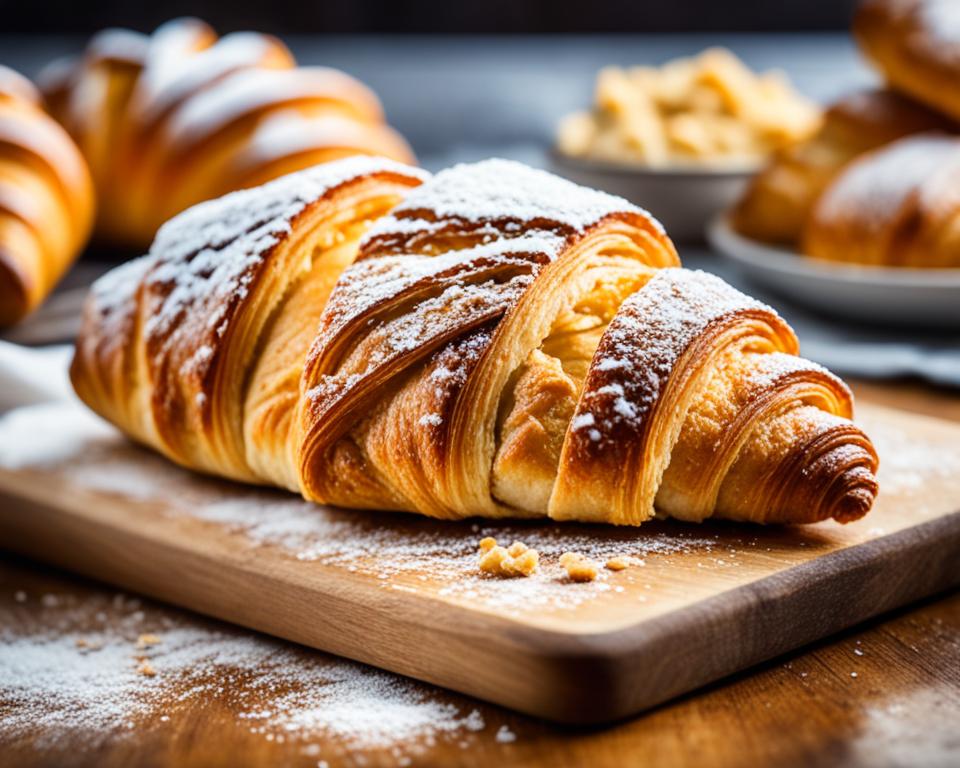
Oven Baking Tips for Irresistible French Pastry
The final stage in creating a Flaky Croissants Recipe that is both delightful to the eyes and decadent to the palate is Oven Baking Croissants. Achieving that enviable balance between a tender interior and a crispy, golden exterior epitomizes the mastery of French Pastry techniques. With a few Perfect Baking Tips, the elusive perfection of the classic croissant is within reach for any home baker aspiring to recreate a corner of France in their own kitchen.
Temperature control is the linchpin of baking pastries. For croissants, an oven preheated to 375°F (190°C) strikes just the right note, ensuring that each layer puffs up without burning the delicate edges. The initial high heat helps to rapidly expand the layers, creating the flaky texture that these pastries are renowned for.
Another pivotal baking step is the art of timing. Croissants typically require 15-20 minutes in the oven, but this could vary depending on the oven’s characteristics and the size of the croissants. It’s advisable to start checking at the 15-minute mark for a lighter color, then continue to monitor for the signature golden hue associated with premium French Pastry.
The golden rule is to trust your senses: the aroma of buttery dough along with a rich, golden-brown color are the harbingers of perfectly Oven Baked Croissants.
| Baking Stage | Temperature | Visual Cue | Tip |
|---|---|---|---|
| Preheat | 375°F (190°C) | – | Avoid opening the oven door during the preheat to maintain a stable temperature |
| Initial Bake | 375°F (190°C) | Beginning to puff | Bake croissants in the center of the oven to promote even cooking |
| Color Check | – | Light golden brown | Rotate the baking sheet if necessary for uniform color |
| Final Bake | – | Deep golden brown | Remove from oven once they’re uniformly colored and hollow-sounding when tapped |
Uniformity is paramount in the presentation and baking of croissants. Ensuring that all the pastries are of the same size and shape will promote even baking, preventing certain croissants from burning while others remain underdone. An unequivocal sign of a well-baked croissant is its ability to hold a firm shape while boasting a rich and crisp shell.
Remember, the culmination of all your patient prep work, lamination, and proofing is realized in these final moments of baking. By adhering to these Perfect Baking Tips, you’re guaranteed to pull out a batch of Oven Baked Croissants that would not seem amiss under the glass counters of the finest Parisian boulangeries. Happy baking!
Flaky Croissants Recipe: Step-By-Step Success
Embarking on the journey to create the perfect Homemade Croissants begins with a clear, detailed Flaky Croissants Recipe Guide. This step-by-step walkthrough is designed to illuminate the path from initial mixing of Croissant Dough to the rewarding moment when golden pastries emerge from the oven. By adhering to guidelines steeped in French Pastry Technique, bakers are equipped to avoid common errors and achieve croissant excellence.
From Dough to Golden Pastry: The Full Guide
The full guide to a successful Homemade Croissants recipe involves a sequence of critical stages—from preparing the dough to the final baking. Every phase is meticulously planned to facilitate learning and prevent mishaps commonly associated with croissant making.
Mistakes to Avoid for Croissant Excellence
The art of producing exceptional croissants lies in perfecting each step while mindful of potential errors. One prevalent mistake is overworking the dough, which can lead to tough pastries lacking delicacy. Incorrect proofing can result in insufficient rise or overinflated croissants that lose their shape. Additionally, it’s vital to manage butter temperatures accurately to prevent butter leakage in the oven, a sign of layers lost to excessive heat.
To solidify your understanding, here’s a table outlining the stages and common mistakes to avoid:
| Stage | Common Mistakes | Best Practices |
|---|---|---|
| Mixing the Dough | Over-kneading, leading to tough dough | Gentle mixing until ingredients are just combined |
| Rolling & Folding | Uneven rolling, or folding that traps air | Roll out even layers and fold meticulously for lamination |
| Proofing the Dough | Insufficient rise or over proofing | Allow dough to double in size and retain a slight springiness |
| Baking | Incorrect oven temperature causing under or overbaking | Preheat oven and bake until golden brown |
By paying attention to these stages and heeding cautionary advice, the baker steps closer to replicating the cherished textures and flavors of a classic French Pastry. Mastering the Flaky Croissants Recipe is within reach, rewarding you with the irresistible sight and taste of your own golden, buttery creations.
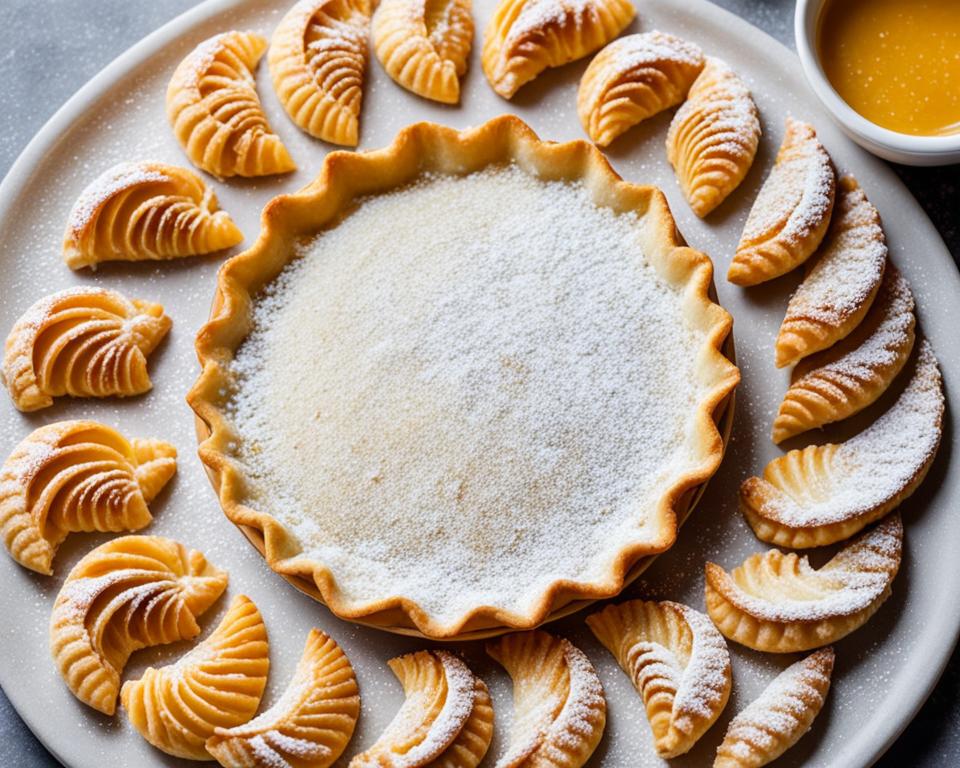
Customizing Your Croissants: Variations and Add-ins
Having conquered the classic butter croissant, it’s time for bakers to flex their creative muscles with Croissant Variations and Custom Croissants. A dash of French Pastry Creativity can transform the simple croissant into an array of savory and sweet delights. The options are boundless, and by incorporating different add-ins, each batch of croissants can become a personalized expression of culinary artistry. Ready to explore beyond the Easy Croissant Recipe? Here’s how you can make each pastry a unique treat.
To inspire your journey into customizing croissants, consider the following table of add-ins. Whether preparing for a special occasion or simply spicing up your breakfast routine, these ideas will make your French pastry creations stand out. Get ready to experiment and tailor each recipe to your taste, crafting Custom Croissants that will delight and surprise with every bite.
| Add-in Category | Examples | Sweet or Savory |
|---|---|---|
| Chocolate | Chocolate chips, Chocolate batons | Sweet |
| Fruit Fillings | Apple compote, Raspberry jam | Sweet |
| Cheese | Feta, Gruyere, Cream cheese | Savory |
| Meats | Ham, Bacon, Prosciutto | Savory |
| Nuts & Seeds | Almonds, Sesame seeds, Pistachios | Both |
| Herbs & Spices | Rosemary, Cinnamon, Vanilla | Both |
Each of these add-ins can be incorporated at different stages of the croissant-making process. For instance, chocolate can be placed on the dough before rolling, while fillings like jams or compote can be spooned into the center of shaped croissants just before baking. When it comes to savory options like cheese or ham, consider layering them with the butter during laminating, or adding them to the dough as you shape the croissants.
- **Sweet Variants:** For a breakfast indulgence, sweet fillings can make the start of your day feel like dessert. Fresh fruit tucked inside the dough adds a juicy burst to every bite. Or drizzle the finished product with a vanilla or orange glaze for an irresistible finish.
- **Savory Creativity:** Fill your croissants with a combination of herbs and cheese for a portable quiche-like experience. Or, wrap them around a savory meat for a hearty, satisfying treat.
- **Textured Toppings:** Before the final proofing stage, sprinkle your croissants with a topping of choice, like seeds or finely chopped nuts, adding a delightful crunch.
Inspiration for Croissant Variations can come from existing recipes or even personal flavor preferences. Test the waters with small batches to ensure the combinations work well together, and don’t be afraid to mix-and-match ideas to achieve your desired profile. Through trial, error, and joy, you will advance from following an Easy Croissant Recipe to becoming a connoisseur of French Pastry Creativity in your own right.
Storing and Reheating Croissants to Preserve Flakiness
The joy of indulging in a fresh, flaky pastry lies in its delicate, buttery layers. To retain the delectable quality of freshly baked pastries, adhering to proper Storing Croissants and Reheating Croissants techniques is paramount. The right approach to preserving your Flaky Pastry Recipe result can be the difference between a slightly stale bite and rediscovering the fresh-from-the-oven bliss. The art of Croissant Storage Tips is thus as crucial as the baking process itself.
Whether you find yourself with an abundance of croissants from your latest baking endeavour or leftovers from a bountiful brunch, the question looms—how best to save these flaky treasures? Here we navigate through the dos and don’ts of croissant storage, reheating methods that resuscitate that prized crispness, and creative ways to give day-old croissants new life.
-
Seal in Freshness: As soon as your croissants have cooled completely, store them in an airtight container. Keep them at room temperature if you plan to enjoy them in the next 24-48 hours.
-
Freezing for Longevity: For longer storage, wrapping individual croissants in plastic, followed by a heavy-duty foil layer before freezing, can maintain their taste and texture for up to a month.
-
Avoiding Refrigeration: Resist the urge to refrigerate as it can hasten the staling process, leading the delicate layers to lose their distinctive crispness.
When the time arises for enjoying your stored pastries, knowing the best Reheating Croissants method is key:
To recapture the fresh taste and texture, place thawed croissants into a preheated 365°F oven for about 3 to 4 minutes. This small investment of time rewards you with nearly-bakery fresh croissants, as the heat restores their outer crispness while keeping the inside soft and tender.
Utilize the following table to guide you through the process of storing and reheating your croissants with precision:
| Method | For Storing | For Reheating | Expected Result |
|---|---|---|---|
| Room Temperature | Airtight container, consume within 48 hours | Oven at 365°F for 3-4 minutes | Restored crispness and warmth |
| Freezing | Wrap in plastic and foil, freeze up to a month | Thaw and follow room temperature reheating | Preserved flakiness and flavor |
| Refrigeration | Avoid to prevent staling | Not recommended | Potential for a stale texture |
While enjoying croissants as they are intended is always best, do not despair if you find yourself with leftovers. Day-old croissants have their place in the kitchen. Sliced and soaked in a mixture of eggs and milk, they can be revived as a luxurious French toast or chopped into a delicious breakfast casserole, absorbing flavors and providing a satisfyingly rich and layered breakfast experience.
Remember, the secret to prolonging the life of your homemade croissants goes beyond the confines of a well-followed Flaky Pastry Recipe. It extends into the realm of thoughtful preservation—with these Croissant Storage Tips, you ensure that every croissant from today’s labor can be a delightful treat for tomorrow.
Conclusion
The odyssey of creating Homemade Croissants is both a test of patience and a triumph of technique. Through the Croissant Baking Journey, bakers embrace the meticulous and layered process of bringing a Flaky Pastry Recipe to life. From selecting the finest ingredients to mastering the folds of lamination, each step has been a building block toward the crowning moment when the oven door opens to reveal pastries of golden perfection.
Recapping the Journey to Croissant Mastery
In retracing the steps of Baking Croissants, we celebrate the small victories; the dough that proofed just right, the butter that laminated into seamless layers, and the unmistakable flakiness achieved through careful temperature control and rolling technique. These moments, pieced together, form the rich tapestry of a baker’s growth—from the initial mix to the final, satisfying crunch.
Why Homemade Croissants are Worth the Effort
There’s an unparalleled joy in savoring Homemade Croissants, each bite a testament to the labor and love invested in the craft of baking. The scent of fresh pastry, warm from the oven, and the intricate layers that melt in your mouth, are ample reward for the hours of dedication. It’s a labor not just of necessity, but of passion, where bakers transform humble ingredients into an emblem of culinary artistry. The journey may have its trials, but the outcome is a delicious triumph that beckons bakers to return, time and again, to the rewarding ritual of croissant creation.
FAQ
What are the key ingredients for a classic croissant recipe?
The key ingredients include all-purpose or Type 55 flour, high-quality unsalted butter, cold whole milk, sugar, and active dry yeast. The quality of these ingredients significantly impacts the texture and flavor of the croissants.
Why is laminating the dough important in making flaky croissants?
Laminating is the process of folding butter into the dough multiple times to create layers. This technique is critical for achieving the flaky texture of croissants, as it allows steam to puff the dough during baking, creating airy layers.
How does one achieve the perfect butter layer for croissants?
To achieve the perfect butter layer, mix softened butter with a bit of flour to provide stability, shape it into a precise rectangle, and chill it. This ensures the butter is cold but pliable, allowing it to integrate seamlessly with the dough during lamination.
What is the importance of chilling the croissant dough?
Chilling the dough is crucial to maintain a lower temperature, which keeps the butter solid and prevents it from being absorbed into the dough. Chilling the dough after each roll and fold ensures that the layers remain distinct and contribute to the flaky texture of the croissants.
Can I use regular butter for making croissants, or should it be a specific type?
It’s recommended to use high-quality European or European-style butter, which has a higher fat content. This type of butter provides creaminess and pliability to the dough, which is essential for creating beautiful lamination and flaky layers.
What are some common mistakes to avoid when making homemade croissants?
Common mistakes include overworking the dough, not properly chilling the dough, and incorrect proofing times. It’s also important to avoid issues with butter temperature, as this can lead to butter leakage during baking.
How do I know when my croissants have proofed enough before baking?
Properly proofed croissants will be visibly larger, feel light and puffy, and maintain their shape when gently pressed. Avoid under-proofing, which leads to dense pastries, or over-proofing, which can cause croissants to lose shape.
What’s the best way to store and reheat croissants to maintain their flakiness?
Croissants are best enjoyed fresh, but if you need to store them, keep them at room temperature in an airtight container for up to two days, or freeze for longer storage. To reheat, warm them in an oven at 350°F for a few minutes until crisp.
How thin should I roll the croissant dough?
The dough should generally be rolled out to a thickness of about 1/4 inch. It’s essential to maintain an even thickness across the entire dough to ensure uniform baking and layering.
Can I add fillings to my croissants?
Absolutely! Once you’ve mastered the basic croissant, you can start experimenting by adding fillings like chocolate sticks for pain au chocolat or savory fillings such as cheese or ham before shaping and baking.