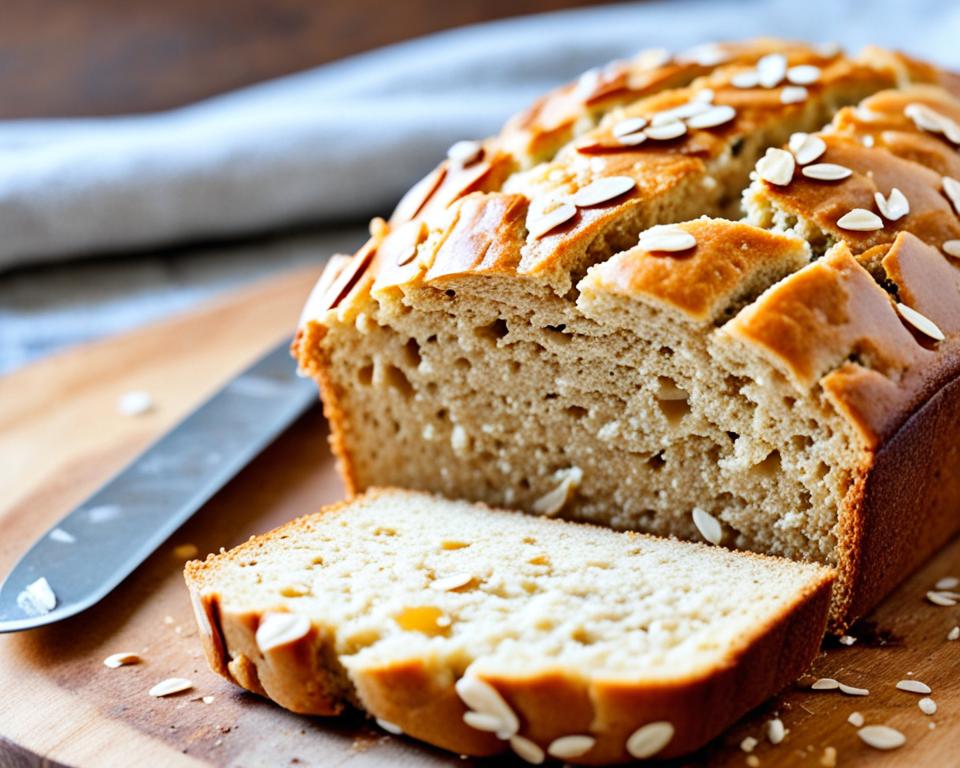
Greetings, bread enthusiasts! Today I want to share with you my favorite recipe for flaky whole wheat honey oat bread. This homemade bread is not only nutritious but also incredibly delicious. By combining the goodness of whole wheat flour, rolled oats, and sweet honey, you’ll create a loaf that’s moist, flavorful, and perfect for any occasion.
There’s something truly satisfying about the process of baking your own bread. From measuring the ingredients to kneading the dough and finally savoring the aroma as it bakes, every step is a labor of love. This flaky whole wheat honey oat bread recipe is a wonderful way to embark on your homemade bread-making journey.
Key Takeaways:
- Make a delicious and nutritious loaf of flaky whole wheat honey oat bread at home.
- Combine whole wheat flour, rolled oats, and honey for a moist and flavorful result.
- Enjoy the process of baking your own bread and savor the delicious aroma.
- Embark on your homemade bread-making journey with this easy recipe.
- Create a versatile bread that’s perfect for sandwiches or enjoying on its own.
Ingredients and Preparation
To make this delicious flaky whole wheat honey oat bread, you’ll need a few simple ingredients and a little bit of preparation. Here’s what you’ll need:
- Boiling water
- Large-flake rolled oats
- Salt
- Butter (or vegetable oil)
- Honey (or substitute maple syrup or brown sugar)
- Lukewarm water
- Active dry or instant yeast
- Whole wheat flour
- All-purpose flour
The first step in making this bread is to soak the oats in boiling water. This helps to soften them and brings out their natural flavor. While the oats are soaking, you can gather the remaining ingredients and prepare your workspace.
Once the oats have soaked for a few minutes, you can start combining all the ingredients in a large mixing bowl. Measure out the salt, butter (or vegetable oil), honey (or substitute), lukewarm water, yeast, whole wheat flour, and all-purpose flour. Add them to the bowl with the soaked oats.
Tip: You can customize the sweetness by adjusting the amount of honey or substituting it with maple syrup or brown sugar.
Using a wooden spoon or your hands, mix all the ingredients together until they are well combined and form a sticky dough. Next, transfer the dough to a floured surface and knead it for about 8-10 minutes. Kneading helps to develop gluten and gives the bread structure.
After kneading, place the dough back into the mixing bowl and cover it with a clean kitchen towel or plastic wrap. Let it rise in a warm place for about 1-2 hours or until it doubles in size.
Once the dough has risen, it’s time to shape the loaf. Turn the dough out onto a lightly floured surface and gently shape it into a loaf. You can use your hands or a rolling pin to flatten the dough and then roll it up tightly, tucking in the sides as you go.
Transfer the shaped loaf to a greased bread pan and let it rise once again, uncovered, for about 30-45 minutes. During this time, the dough will rise further and develop its final shape.
Now it’s time to bake the bread! Preheat your oven to 375°F (190°C) and place the bread pan in the center rack. Bake for approximately 40-45 minutes or until the crust is golden brown and the bread sounds hollow when tapped on the bottom.
Once the bread is baked, remove it from the oven and let it cool in the pan for a few minutes. Then, transfer it to a wire rack to cool completely before slicing.
I hope you enjoy making this flaky whole wheat honey oat bread as much as I do. It’s a rewarding and delicious experience that will fill your home with the comforting aroma of freshly baked bread. Happy baking!
Tips for Making the Perfect Loaf
When it comes to baking the flaky whole wheat honey oat bread of your dreams, a few tips can make all the difference. Here are my tried-and-true tips to ensure your loaf turns out perfectly every time:
- Use an Instant-Read Thermometer: To determine if your bread is fully baked, use an instant-read thermometer to check the internal temperature. The loaf should reach at least 200°F to ensure it’s fully cooked.
- Prevent Over-Browning: Sometimes, your loaf may start to brown too quickly during the baking process. If that happens, simply cover it with aluminum foil to prevent excessive browning while allowing it to continue baking to perfection.
- Cool Completely before Slicing: It can be tempting to dig into your freshly baked loaf, but resist the urge! Allow the bread to cool completely before slicing. This will prevent it from becoming crumbly and lead to beautiful, even slices.
By following these bread baking tips, you’ll be on your way to creating a homemade loaf that is not only visually appealing but also tastes incredible. So, don’t forget to use your handy instant-read thermometer, keep an eye on the browning, and exercise a little patience before enjoying the delicious rewards of your labor.

Storing and Freezing the Bread
Proper bread storage is essential to keep your flaky whole wheat honey oat bread fresh for as long as possible. Here are some tips on bread storage and freezing to help you enjoy your homemade bread:
Storing at Room Temperature
When storing your bread at room temperature, it’s important to protect it from air and moisture. To keep it fresh and prevent it from drying out, follow these steps:
- Allow the bread to cool completely before storing it.
- Wrap the bread tightly in plastic wrap or place it in a resealable plastic bag.
- Make sure the container or bag is airtight to prevent air from reaching the bread.
- Place the wrapped bread in a cool, dry place, away from direct sunlight and heat sources.
Freezing the Bread
If you want to extend the shelf life of your flaky whole wheat honey oat bread, freezing is a great option. Follow these steps to freeze your bread:
- Allow the bread to cool completely.
- Wrap the loaf tightly in plastic wrap or place it in a freezer bag.
- Make sure to remove any excess air from the bag or wrap to prevent freezer burn.
- Label the package with the date of freezing.
- Place the wrapped bread in the freezer.
When you’re ready to enjoy your frozen bread, follow these steps:
- Remove the bread from the freezer and let it thaw at room temperature. This usually takes a few hours.
- To reheat and regain that fresh-out-of-the-oven taste, toast the thawed bread slices in a toaster or toaster oven.
Note: It’s best to consume the thawed bread within 2-3 days for optimal freshness.
“Properly storing your homemade bread will ensure it stays fresh and delicious for longer.”
| Storage Method | Duration |
|---|---|
| Room temperature | Up to 5 days |
| Freezer | Up to 3 months |
Bread Making for Beginners
If you’re new to bread making, don’t worry! This flaky whole wheat honey oat bread recipe is beginner-friendly. With a few simple steps and basic ingredients, you can create a delicious loaf of homemade bread that will impress your family and friends. It’s a great starting point for those who are just beginning their bread baking journey.
When it comes to bread making, one of the key ingredients is yeast. Yeast is responsible for the rising of the dough and giving the bread its fluffy texture. It’s important to ensure that your yeast is active and fresh for the best results. You can test the yeast by dissolving it in warm water with a pinch of sugar. If it becomes frothy and bubbly after a few minutes, it’s ready to use.
Once you have your active yeast, it’s time to gather your ingredients and start baking. This recipe calls for whole wheat flour, rolled oats, honey, and a few other pantry staples. As you become more comfortable with the process, you can experiment with different variations and substitutions to create your own unique bread recipes.
Follow the recipe’s instructions carefully and pay attention to details such as kneading the dough, letting it rise, and baking it at the right temperature. These steps play a crucial role in achieving a successful loaf of bread. Don’t rush the process and be patient while waiting for the dough to rise. It’s worth the wait!
If you need additional guidance and tips for yeast bread baking, the author provides a dedicated resource page. This page contains helpful information on ingredients, techniques, troubleshooting tips, and more. It’s a valuable reference for beginners and even experienced bakers looking to brush up on their skills.
Remember, bread making is both an art and a science, and practice makes perfect. Don’t be discouraged if your first few loaves don’t turn out exactly as you imagined. Embrace the learning process and enjoy the journey of creating homemade bread from scratch. With each attempt, you’ll gain more confidence and develop your own signature bread recipes.

So, roll up your sleeves, gather your ingredients, and embark on your bread making adventure. With this beginner-friendly flaky whole wheat honey oat bread recipe and a bit of practice, you’ll soon be impressing everyone with your homemade bread mastery.
Variations and Substitutions
While this flaky whole wheat honey oat bread recipe is delicious as is, you can experiment with variations and substitutions to create your own unique twist. Customizing the bread with different ingredients allows you to explore new flavors and cater to your personal preferences. Here are some ideas to inspire your bread-making journey:
Additions:
Enhance the flavor and texture of your bread by incorporating various additions. Consider adding:
- Nuts, such as walnuts, almonds, or pecans, for added crunchiness
- Seeds, like sunflower seeds or flaxseeds, to introduce a nutty taste and extra nutrients
- Dried fruits, such as raisins, cranberries, or apricots, for a touch of sweetness
Substitutions:
If you have dietary restrictions or preferences, you can make substitutions to accommodate your needs. Here are a few ideas:
- For a vegan version, replace the butter with vegetable oil
- Swap honey with maple syrup or brown sugar to make it vegan or add a different kind of sweetness
- Experiment with different types of flour, like spelt flour or rye flour, for unique flavors and textures
- If you prefer a gluten-free option, substitute the whole wheat flour with a gluten-free flour blend
Remember, these suggestions are just the beginning. Feel free to get creative and explore your own combinations. By trying different variations and substitutions, you’ll discover new bread flavors that are tailored to your taste buds. Happy bread baking!
Nutrition Facts
This flaky whole wheat honey oat bread is not only tasty but also nutritious. It’s made with whole wheat flour, rolled oats, and honey, providing fiber, vitamins, and minerals. Each serving contains approximately 179 calories, 35g of carbohydrates, 4g of protein, and 3g of fat. It’s a healthy choice for those looking to incorporate more whole grains into their diet.
Whole wheat flour is rich in dietary fiber, which aids in digestion and helps maintain a feeling of fullness. Rolled oats are a good source of complex carbohydrates, providing sustained energy throughout the day. Honey adds a touch of natural sweetness, while also providing antioxidants and trace amounts of essential minerals.
“This bread is not only delicious but also packed with nutrients. It’s a great way to enjoy a healthy and flavorful homemade treat!” – Anne Smith, Nutritionist
By choosing this flaky whole wheat honey oat bread, you’re not only indulging in a delectable treat but also nourishing your body with wholesome ingredients. Its nutritional profile makes it a suitable option for individuals seeking a balanced and nutritious diet.

Key Nutrients in Flaky Whole Wheat Honey Oat Bread:
| Nutrient | Amount per Serving (1 slice) |
|---|---|
| Calories | 179 |
| Carbohydrates | 35g |
| Protein | 4g |
| Fat | 3g |
Source: USDA National Nutrient Database
Homemade Bread vs. Store-Bought Bread
When it comes to bread, there’s nothing quite like the satisfaction of making your own at home. Not only does homemade bread offer a delightful and comforting experience, but it also comes with a range of benefits that set it apart from store-bought bread.
Control Over Ingredients
One of the primary advantages of homemade bread is having complete control over the ingredients used in the recipe. By choosing to bake your own bread, you can opt for healthier alternatives like whole wheat flour, which is packed with essential nutrients and higher in fiber compared to refined white flour.
Additionally, homemade bread allows you to avoid preservatives and additives commonly found in store-bought bread. Many commercial bread products contain ingredients that extend their shelf life but may not necessarily align with your dietary preferences or health goals. By making your own bread, you can eliminate unnecessary additives and enjoy a more wholesome loaf.
A Satisfying and Fulfilling Experience
Baking bread from scratch is not just about the end result; it’s also about the process itself. Kneading the dough, watching it rise, and smelling the aroma of freshly baked bread wafting through your home can be an incredibly rewarding experience. It provides a sense of accomplishment and connects you to a time-honored tradition that has been passed down for generations.
“Making bread is like a meditation. It allows me to slow down, be present, and enjoy the simple pleasure of creating something nourishing with my own hands.”
Beyond the satisfaction of creating something delicious, homemade bread also allows you to customize your loaves according to your preferences. Want to add some seeds or nuts for extra crunch? Go ahead! Feel like experimenting with different flavors and spices? The choice is yours. With homemade bread, the possibilities are endless, allowing you to explore and express your culinary creativity.
The Superior Experience and Taste
Nothing quite compares to the taste and texture of freshly baked homemade bread. Warm from the oven, it boasts a crusty exterior and a soft, tender crumb that is simply irresistible. Each bite is a sensory delight, offering a depth of flavor and complexity that store-bought bread often lacks.
Comparison Table: Homemade Bread vs. Store-Bought Bread
| Factors | Homemade Bread | Store-Bought Bread |
|---|---|---|
| Taste and Texture | Delicious and customizable | Standardized and may lack depth of flavor |
| Ingredients | Choose healthier options, avoid additives | May contain preservatives and additives |
| Aroma and Freshness | Irresistible aroma, stays fresh for shorter duration | Varies based on packaging and preservatives used |
| Satisfaction | Rewarding and fulfilling experience | Convenient but lacks personal touch |
As you can see from the comparison table, homemade bread offers a range of advantages over store-bought options. With its superior taste, healthier ingredients, and the joy of the baking process, homemade bread truly stands out as the preferred choice for bread enthusiasts.
So why not gather your ingredients, roll up your sleeves, and embark on the delightful journey of baking your own bread? You’ll not only enjoy the benefits of homemade bread but also savor every moment of the baking process.
Frequently Asked Questions
Here are some frequently asked questions about bread making:
-
Can I use instant yeast instead of active dry yeast?
Yes, you can substitute instant yeast for active dry yeast. However, keep in mind that the rising time may be slightly shorter when using instant yeast.
-
Why is my bread not rising?
There are several reasons why bread may not rise properly. It could be due to inactive yeast, incorrect water temperature, or not enough kneading. Make sure to follow the recipe instructions precisely and check the expiration date of your yeast.
-
How do I know if my bread is fully baked?
You can check the doneness of your bread by tapping the bottom of the loaf. If it sounds hollow, it’s usually a sign that the bread is fully baked. Additionally, you can use an instant-read thermometer to test the internal temperature of the bread, which should be at least 200°F.
-
Can I freeze the dough?
Yes, you can freeze bread dough for later use. After shaping the dough into a loaf, wrap it tightly in plastic wrap and place it in a freezer bag. When ready to bake, thaw the dough in the refrigerator overnight, then let it come to room temperature before baking.
-
How long does homemade bread stay fresh?
Homemade bread typically stays fresh for 2 to 3 days when stored properly in a plastic bag or airtight container at room temperature. To extend its freshness, you can also freeze the bread for up to 3 months.
If you have any other questions or concerns about bread making, feel free to reach out to us. We’re here to help you become a bread baking pro!
| Bread Making FAQs | Answers |
|---|---|
| Can I use instant yeast instead of active dry yeast? | Yes, you can substitute instant yeast for active dry yeast. However, keep in mind that the rising time may be slightly shorter when using instant yeast. |
| Why is my bread not rising? | There are several reasons why bread may not rise properly. It could be due to inactive yeast, incorrect water temperature, or not enough kneading. Make sure to follow the recipe instructions precisely and check the expiration date of your yeast. |
| How do I know if my bread is fully baked? | You can check the doneness of your bread by tapping the bottom of the loaf. If it sounds hollow, it’s usually a sign that the bread is fully baked. Additionally, you can use an instant-read thermometer to test the internal temperature of the bread, which should be at least 200°F. |
| Can I freeze the dough? | Yes, you can freeze bread dough for later use. After shaping the dough into a loaf, wrap it tightly in plastic wrap and place it in a freezer bag. When ready to bake, thaw the dough in the refrigerator overnight, then let it come to room temperature before baking. |
| How long does homemade bread stay fresh? | Homemade bread typically stays fresh for 2 to 3 days when stored properly in a plastic bag or airtight container at room temperature. To extend its freshness, you can also freeze the bread for up to 3 months. |
Conclusion
In conclusion, this flaky whole wheat honey oat bread recipe is a delightful and wholesome option for homemade bread lovers. With its soft crumb, rustic appearance, and delicious flavor, it’s a versatile bread that can be enjoyed on its own or used for sandwiches. Whether you’re a beginner or an experienced bread baker, this recipe is a must-try. So grab your ingredients, follow the simple instructions, and savor the goodness of freshly baked bread.
FAQ
Is this flaky whole wheat honey oat bread recipe difficult to make?
Not at all! This recipe is beginner-friendly and easy to follow. With proper instructions and a little practice, you’ll be able to bake this delicious bread.
Can I make substitutions in this recipe?
Absolutely! You can customize this bread by adding nuts, seeds, or dried fruits to the dough. If you prefer a vegan version, you can substitute the butter with vegetable oil and honey with maple syrup or brown sugar.
How long does this bread stay fresh?
When stored at room temperature in a well-wrapped container, this bread will stay fresh for several days. It can also be frozen for up to 3 months.
Do I need any special equipment to make this bread?
No, you don’t need any special equipment. A mixing bowl, measuring cups, a spoon, and an instant-read thermometer are all you need to bake this bread.
Can I make this bread without a stand mixer?
Absolutely! The dough can be easily mixed and kneaded by hand. Use a wooden spoon and your hands to combine the ingredients and knead the dough until it becomes smooth and elastic.
Can I freeze the dough instead of baking it right away?
Yes, you can freeze the dough for later use. Simply wrap it tightly in plastic wrap and place it in a freezer bag. When ready to bake, thaw the dough in the refrigerator overnight, let it reach room temperature, shape it, and then bake as directed.
How can I tell if the bread is fully baked?
Use an instant-read thermometer to test the internal temperature of the loaf. The bread should reach at least 200°F to ensure it is fully baked.
Can I use instant yeast instead of active dry yeast?
Yes, you can use instant yeast in this recipe. Keep in mind that the rising time may be slightly shorter when using instant yeast.
Can I use a bread machine to make this bread?
This recipe is meant for baking in a conventional oven. While you can try adapting it for a bread machine, the instructions may need to be adjusted accordingly.
Can I make this bread gluten-free?
Unfortunately, this recipe is not gluten-free as it contains wheat flour. However, you can try experimenting with gluten-free flours and additives to create a gluten-free version.