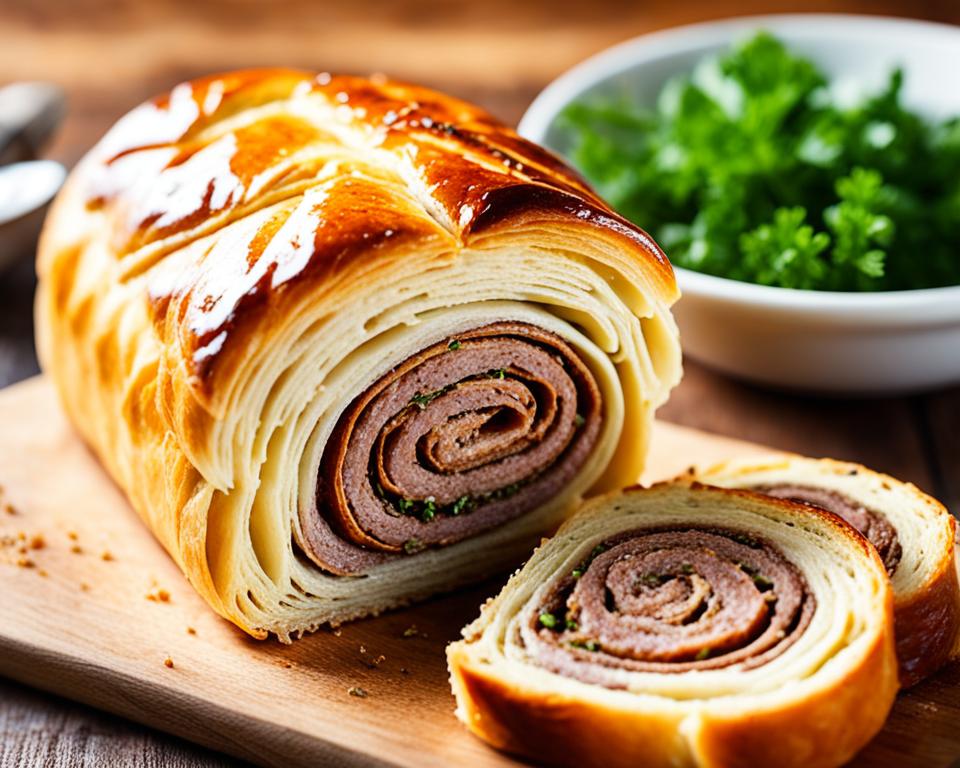
Are you ready to elevate your bread-making skills? Look no further than this Flaky Cheesy Herb Bread Recipe. Whether you’re a seasoned baker or new to homemade bread recipes, this easy bread recipe is a must-try. With its flaky texture, cheesy filling, and burst of flavor from the herbs, this bread is sure to impress.
There’s nothing quite like the satisfaction of baking your own bread, and this recipe is the perfect way to dive into the world of bread-making. From kneading the dough to the aroma that fills your kitchen as it bakes, the joy of homemade bread is unparalleled.
In this article, I’ll guide you step by step through the process of making this delicious Flaky Cheesy Herb Bread. From the easy and versatile dough to the flavorful garlic herb and cheese filling, you’ll learn all the secrets to create a bread that will leave your family and friends begging for more.
Key Takeaways:
- Flaky Cheesy Herb Bread is a delightful homemade bread recipe that’s perfect for any occasion
- This easy bread recipe is suitable for both seasoned bakers and beginners
- The garlic herb and cheese filling adds incredible flavor to the bread
- Assembling and baking the bread is a fun and hands-on process
- The recipe offers versatile options for customization with different herbs or additional ingredients
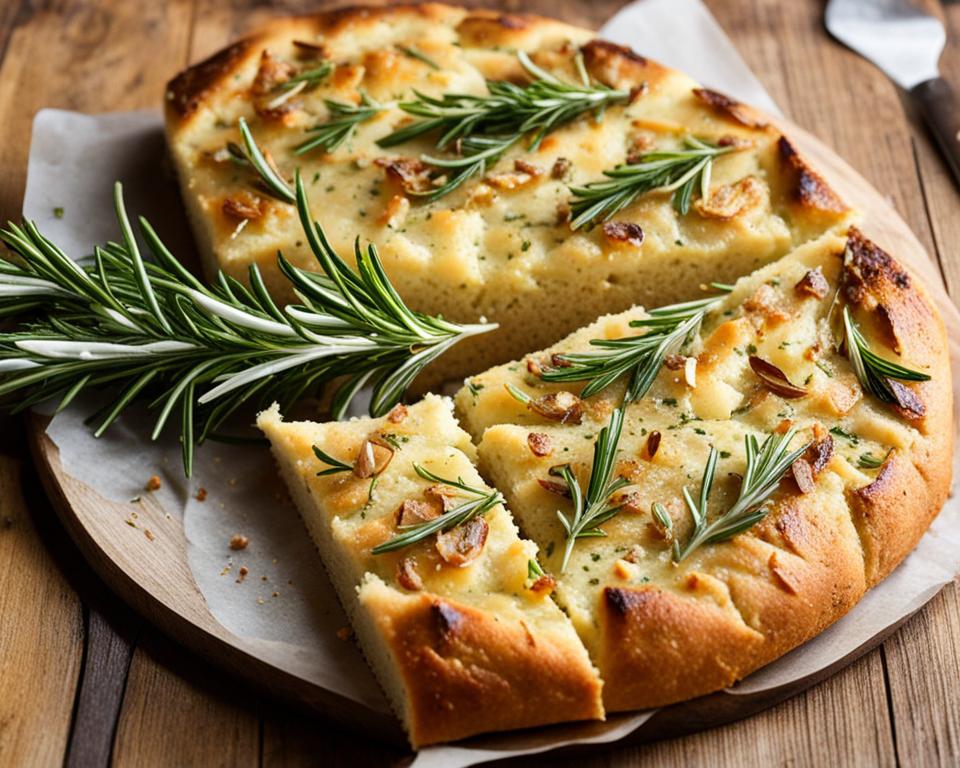
The Best Cheesy Garlic Bread
The Best Cheesy Garlic Bread is a crowd-pleasing side dish that comes together in no time. With three types of cheese, fresh herbs, and plenty of garlic, this homemade garlic bread is the perfect accompaniment to any meal.
Whether you’re serving it with Italian recipes, soups, salads, or baked chicken, this cheesy garlic bread is sure to be a hit.
Indulge in the delectable flavors of this easy homemade garlic bread recipe and elevate your dining experience. The combination of gooey melted cheese, fragrant garlic, and aromatic herbs will tantalize your taste buds and leave you craving for more.
Not only does this bread make a scrumptious side dish, but it also adds a touch of sophistication to your dinner table. The golden crust, oozing cheese, and irresistible aroma will make your guests’ mouths water in anticipation.
Prepare this mouthwatering garlic bread for family gatherings, potluck dinners, or casual weeknight meals. It’s an excellent way to impress your loved ones with your culinary skills while providing a comfort food that everyone will adore.
“This cheesy garlic bread is like a warm, comforting hug on a plate. The combination of flavors and textures is simply irresistible.” – Mary, garlic bread lover
So, why settle for ordinary bread when you can have a scrumptious, cheesy, and garlicky delight? Let’s dive into the easy homemade garlic bread recipe that will make your taste buds dance with joy!
The Perfect Cheese Bread Mashup
The Perfect Cheese Bread Mashup combines two delicious ingredients – cream cheese and tasty cheese – to create a new and exciting grated cheese product. This mashup ingredient is the star of this recipe for a garlic herb and cheese pull-apart bread. With a savory herb mixture and a generous amount of cheese, this bread is moist, fragrant, and perfect as a side dish.
Herb-Infused Cheese Bread Recipe
To recreate this heavenly herb-infused cheese bread at home, follow these simple steps:
- Preheat your oven to 350°F (175°C).
- In a bowl, combine 1 cup of softened cream cheese, 1 cup of grated tasty cheese, and 2 tablespoons of chopped fresh herbs (such as parsley, basil, and rosemary).
- Roll out your favorite bread dough into a rectangular shape.
- Spread the herb-infused cheese mixture evenly over the dough.
- Roll the dough tightly, starting from the long side.
- Cut the rolled dough into 1-inch slices.
- Place the slices in a greased baking dish, leaving a little space between each slice.
- Cover the dish with a clean kitchen towel and let it rise for 30 minutes.
- Bake the cheese bread in the preheated oven for 25-30 minutes, or until golden brown.
- Remove from the oven and let it cool for a few minutes before serving.
This herb-infused cheese bread is best enjoyed warm, straight from the oven. The cheesy filling melts beautifully, and the aroma of the fresh herbs perfumes the air. Serve it as a side dish for soups, salads, or even as an appetizer. Your guests will be impressed by the flaky texture and delicious flavors.
This herb-infused cheese bread is a delightful combination of creamy cheese, fragrant herbs, and fluffy bread. It’s the perfect comfort food and a crowd-pleaser at any gathering. The cheesy pull-apart slices make it fun to eat, and the savory flavors will have everyone coming back for more.
Ingredient Benefits
The combination of cream cheese and tasty cheese creates a rich and creamy texture, while the fresh herbs add a burst of flavor to the bread. Cream cheese adds indulgence and a tangy taste, while tasty cheese, with its sharp flavor, adds depth to the cheesy pull-apart bread.
Tips and Variations
Here are a few tips and variations to enhance your herb-infused cheese bread:
- Experiment with different herbs like thyme, oregano, or chives to suit your taste preferences.
- Add a sprinkle of garlic powder or onion powder to the cheese mixture for an extra kick.
- For a touch of sweetness, drizzle honey over the baked bread before serving.
Now that you have the recipe and some ideas for customization, it’s time to get baking and experience the deliciousness of this herb-infused cheese bread.
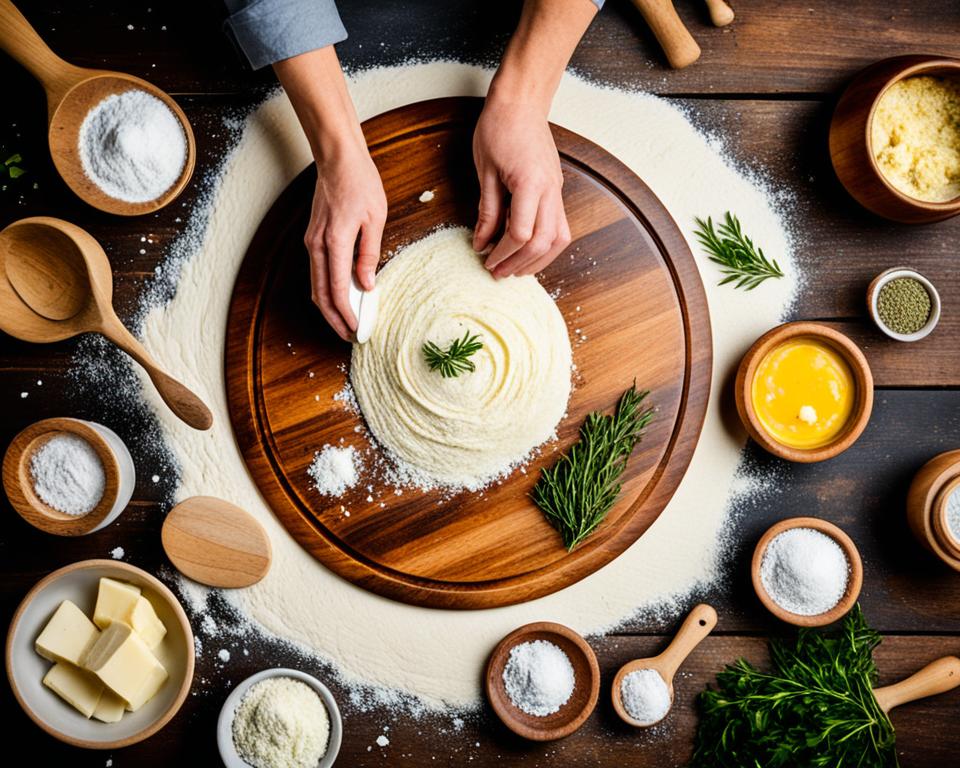
Easy and Versatile Dough
To create the delicious Flaky Cheesy Herb Bread, I start with a simple and versatile dough. The base of this bread recipe is made using a half quantity of pizza dough. This choice of dough gives the bread a light and airy texture, perfect for the flaky layers.
The pizza dough is made with a combination of plain flour, yeast, salt, sugar, and bread improver. This blend of ingredients ensures that the dough rises beautifully and develops a soft and fluffy crumb.
By using pizza dough as the foundation, it eliminates the need to start from scratch when making the bread. It saves time and effort while still delivering exceptional results.
Whether you have a favorite pizza dough recipe or prefer a store-bought option, this bread recipe will work with either. Just make sure to adjust the quantity accordingly to have enough dough to create the flaky layers.
Ingredients for Easy and Versatile Dough:
- 1/2 quantity of pizza dough
- Plain flour
- Yeast
- Salt
- Sugar
- Bread improver
To get started, prepare the pizza dough according to your preferred recipe or package instructions. Once the dough is ready, it’s time to assemble the flaky layers and create the mouthwatering Flaky Cheesy Herb Bread.
Garlic Herb and Cheese Filling
The filling for this Flaky Cheesy Herb Bread Recipe is packed with flavor. A mixture of crushed garlic, chopped herbs like parsley, basil, and rosemary, and the grated cream cheese and tasty cheese blend creates a deliciously aromatic and cheesy filling. The combination of garlic, herbs, and cheese makes every bite of this bread burst with flavor.
| Ingredients | Quantity |
|---|---|
| Crushed garlic | 2 cloves |
| Chopped parsley | 2 tablespoons |
| Chopped basil | 1 tablespoon |
| Chopped rosemary | 1 teaspoon |
| Grated cream cheese | 1/2 cup |
| Grated tasty cheese | 1/2 cup |
Make sure to properly mix the crushed garlic, chopped herbs, and grated cream cheese and tasty cheese blend to evenly distribute the flavors throughout the filling. This aromatic and cheesy combination will transform the bread into a savory delight.
“The garlic herb and cheese filling adds a burst of flavor to every bite, creating a truly mouthwatering experience.” – Bread Lover Magazine
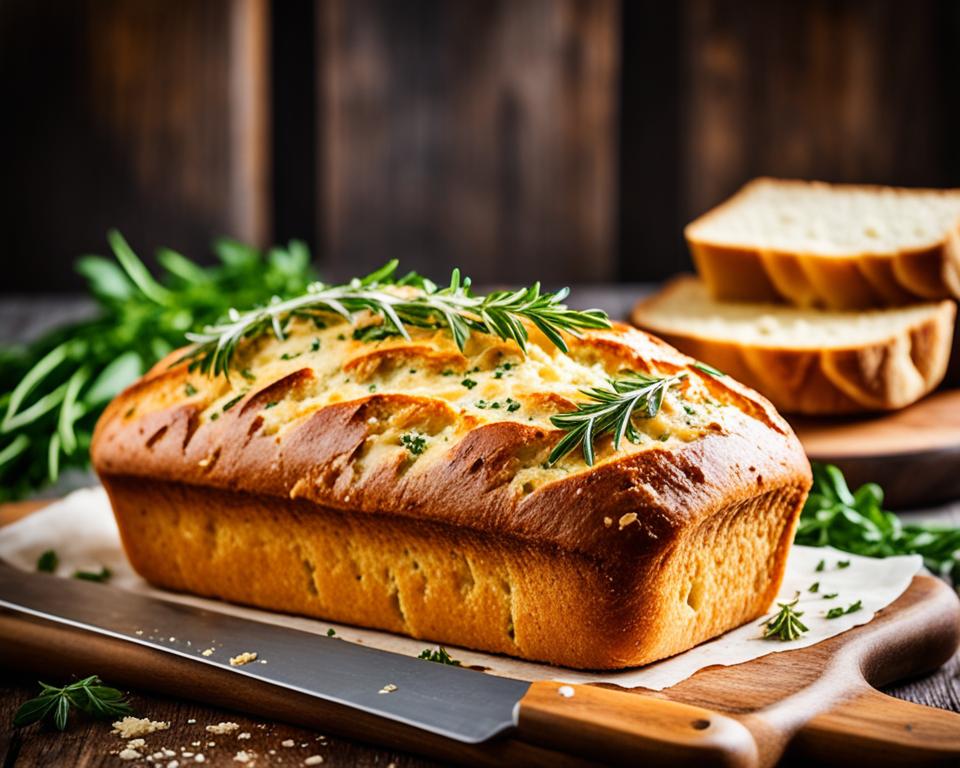
Now that we have a delectable garlic herb and cheese filling ready, it’s time to move on to the next step in creating the Flaky Cheesy Herb Bread. But before we proceed, let’s take a moment to appreciate the delightful visuals of this amazing bread recipe.

Assembling the Bread
Assembling this Flaky Cheesy Herb Bread Recipe is a fun and hands-on process. To start, I roll out the dough into large rectangles, creating a blank canvas for the delicious flavors to come.
Next, I spread a generous amount of butter on top of the dough, ensuring that each bite is rich and flavorful. This layer of butter adds moisture and enhances the overall taste of the bread.
Now comes the star of the show – the garlic herb and cheese mixture. I sprinkle this mouthwatering combination all over the buttered dough, making sure to cover every inch. The aroma of garlic and herbs fills the air, building anticipation for the final result.
With everything in place, it’s time to cut the dough into strips. I carefully slice the dough, creating long pieces that are then layered on top of each other in a loaf pan. This layering creates a beautiful pattern and adds visual appeal to the bread.
Once all the strips are neatly layered, I bake the bread to perfection. The result is a golden and flaky masterpiece, with each slice revealing the delicate layers of dough, melted cheese, and aromatic herbs.
Assembling the bread is not only a culinary process; it’s an artistic endeavor. The careful layering of the dough strips creates a stunning presentation that will impress your family and friends.
Tips for Assembling the Bread:
- Ensure that the dough is rolled out evenly to achieve consistent layers.
- Be generous with the butter and the garlic herb and cheese mixture for maximum flavor impact.
- Take your time when layering the strips of dough to create an eye-catching pattern.
- Use a loaf pan that fits the size of the dough strips for a perfect shape.
Now that the bread is assembled, it’s time to let it rise and bake. In the next section, I’ll guide you through the final proofing and baking process to ensure that the Flaky Cheesy Herb Bread turns out irresistibly delicious.
Final Proof and Baking
After the dough is assembled, it’s time for the final proofing process. The loaf pans are covered with plastic wrap and set aside for 30 minutes to allow the dough to rise further. This step is crucial to achieve a light and airy texture in the bread.
During the final proof, the yeast in the dough continues to ferment, producing carbon dioxide that creates air pockets and causes the dough to rise. This extra rise time helps to develop the flavors and ensures the bread has a nice, fluffy crumb.
While the dough is proofing, preheat the oven to 190°C. This temperature is ideal for baking bread and will give the crust a beautiful golden color.
Once the proofing time is complete, it’s time to bake the bread. Remove the plastic wrap from the loaf pans and place them in the preheated oven. Bake for approximately 55 minutes, or until the tops are golden and the bread is cooked through.
Keep a close eye on the bread as it bakes, as oven temperatures may vary. If the bread starts to brown too quickly, you can tent it with aluminum foil to prevent over-browning while ensuring the center cooks evenly.
Final Proof and Baking Process Recap:
- Assemble the dough and filling.
- Cover loaf pans with plastic wrap and set aside to proof for 30 minutes
- Preheat the oven to 190°C.
- Bake the bread for approximately 55 minutes or until golden.
Flaky Cheesy Herb Bread Baking Parameters:
| Baking Temperature | Baking Time |
|---|---|
| 190°C | 55 minutes |
Now that your bread is in the oven, the aroma of fresh-baked bread will soon fill your kitchen. Get ready to enjoy the delightful crust, flaky layers, and the flavorful combination of herbs and cheese in every bite!

Serving and Storing
Once the Flaky Cheesy Herb Bread is baked, it’s time to savor its warm and delicious goodness. Here are some serving and storing tips to make the most of this delightful homemade bread:
Serving Warm
After removing the bread from the oven, allow it to rest for 10 minutes. This helps the flavors settle and the bread to firm up slightly, making it easier to handle. Once the resting time is over, carefully remove the bread from the loaf pans, and you’ll be greeted with the enticing aroma of fresh-baked bread.
There’s nothing quite like the satisfaction of serving warm bread to your loved ones. Whether you’re enjoying a family meal, hosting a dinner party, or simply treating yourself, this Flaky Cheesy Herb Bread is a true crowd-pleaser.
With its flaky texture, savory herb-filled layers, and cheesy goodness, this bread is a standout on its own. It pairs perfectly with soups, stews, salads, and grilled meats. The possibilities are endless, so get creative and find your favorite way to serve this delicious bread.
Storing Leftovers
If you happen to have any leftovers (which is rare because this bread is usually devoured quickly), you can store them for later enjoyment. To keep the bread fresh, it’s important to store it properly:
- Refrigerator Storage: Place the bread in an airtight container or wrap it tightly in foil. This will help maintain its moisture and prevent it from drying out. Keep the bread stored in the refrigerator for up to 2-3 days.
- Reheating: When you’re ready to enjoy the leftovers, you can reheat them in the oven or air fryer. This will help restore the bread’s warmth, crispness, and cheesy goodness.
Remember, while the bread is still at its best when it’s fresh out of the oven, reheating it can help bring back some of that deliciousness. So don’t hesitate to enjoy those leftovers!
Now that you know how to serve and store this Flaky Cheesy Herb Bread, it’s time to indulge in its delectable flavors. Whether it’s a special occasion or an everyday treat, this bread is sure to impress and satisfy.
Make-ahead and Freezing Option
If you’re looking for a convenient way to enjoy the deliciousness of this Flaky Cheesy Herb Bread Recipe, I’ve got you covered. This recipe is perfect for make-ahead preparation, allowing you to have freshly baked bread whenever you desire. Here’s how you can make it ahead and freeze it:
Make-ahead Preparation:
- Start by preparing the dough according to the recipe instructions.
- Once the dough is ready, assemble the bread as directed, including the garlic herb and cheese filling.
- Instead of baking the bread right away, wrap it tightly in foil to protect it from freezer burn.
- Place the wrapped bread in the freezer and store it for up to 3 months.
By following these simple steps, you can prepare the Flaky Cheesy Herb Bread in advance, saving time and effort when you’re ready to enjoy it.
Thawing and Baking:
When you’re ready to savor the flavors of this make-ahead bread, you can easily thaw and bake it. Follow these steps:
- Remove the frozen bread from the freezer and unwrap it from the foil.
- Place the unwrapped bread in the refrigerator and let it thaw overnight.
- Once the bread is thawed, preheat your oven as directed in the recipe.
- Bake the bread according to the recipe instructions until the tops are golden and the bread is cooked through.
Thawing the bread in the refrigerator ensures even and gradual thawing, allowing the flavors to develop fully before baking. The end result will be a perfectly baked, warm, and delicious Flaky Cheesy Herb Bread.
So, whether you want to plan ahead for a special occasion or simply have a tasty treat on hand, the make-ahead and freezing option for this bread recipe is a game-changer. It’s a convenient way to enjoy freshly baked bread anytime you like.

Versatility of the Recipe
The Flaky Cheesy Herb Bread Recipe is a truly versatile bread recipe that allows for endless customization and experimentation. While the recipe calls for a specific garlic herb and cheese filling, you can easily tailor it to your preferences by incorporating different herbs or adding additional ingredients. Let your creativity run wild and infuse this bread with your favorite flavors.
Try adding ingredients such as:
- Sun-dried tomatoes
- Olives
- Cooked bacon
These additions will enhance the overall taste and texture of the bread, creating a unique and personalized flavor profile.
Whether you want to elevate the herb-infused elements or experiment with new combinations, this versatile bread recipe provides a solid foundation for culinary exploration.
Customizing with Different Herbs
One way to enhance the herb-infused bread experience is by incorporating different herbs into the filling. The choice of herbs can significantly impact the overall flavor profile of the bread. Here are a few herb suggestions:
- Rosemary
- Oregano
- Thyme
Feel free to mix and match different herbs to create a unique blend that suits your taste preferences. The combination of these aromatic herbs and the cheesy filling will add an extra layer of complexity to the bread.
Creating Flavorful Combinations
Another way to make this bread recipe your own is by combining different ingredients to create flavorful variations. Here are some inspiring ideas:
“I love adding a mixture of black and green olives to the filling. The briny flavors of the olives complement the herbs and cheese, creating a deliciously savory bread.” – Bread Enthusiast
“For a savory and indulgent twist, I like to add crispy cooked bacon to the bread. The smoky flavor of the bacon pairs perfectly with the herbs and cheese, creating an unforgettable taste.” – Home Baker Extraordinaire
By experimenting with different ingredients, you can transform this bread recipe into a culinary masterpiece that suits your individual preferences and dietary requirements.
| Ingredient | Suggested Measurements | Additional Notes |
|---|---|---|
| Sun-dried Tomatoes | 1/4 cup, chopped | Drain the excess oil from the sun-dried tomatoes before incorporating them into the filling. |
| Olives | 1/4 cup, chopped | Use your choice of black, green, or a combination of different olives. |
| Cooked Bacon | 3-4 slices, crumbled | Make sure the bacon is cooked crispy before adding it to the filling. Feel free to adjust the quantity according to your preference. |
The Joy of Homemade Bread
There’s something truly special about baking bread from scratch. The process of kneading the dough, watching it rise, and the aroma that fills the kitchen as it bakes is incredibly satisfying. Baking homemade bread brings a sense of joy and fulfillment that store-bought bread simply can’t match.
Creating a loaf of bread with your own hands is a rewarding experience that connects you to centuries of tradition and craftsmanship. The simple act of mixing together flour, water, yeast, and salt transforms into a work of art as the dough comes alive and takes shape.
As you knead the dough, your senses are heightened – the feel of the soft and pliable dough, the sound of it stretching and sighing under your hands, and the scent of the yeast awakening and filling the air. It’s a tactile and sensory experience that nourishes not just the body, but the soul as well.
“The smell of good bread baking, like the sound of lightly flowing water, is indescribable in its evocation of innocence and delight…”
― MFK Fisher
The anticipation builds as the bread goes through its rise and proofing stages. Watching the dough double in size, knowing that something magical is happening inside that humble ball of dough, is truly captivating. It’s a reminder that good things take time and patience.
And then, the moment arrives. The bread goes into the oven, and an incredible transformation takes place. The dough develops a golden crust, and the warmth of the oven releases the heavenly aroma of fresh-baked bread. The anticipation crescendos as you eagerly await the finished product.
Finally, the moment arrives to take the warm, fragrant loaf out of the oven. The crust crackles invitingly as you slice into it, revealing the soft and tender crumb inside. There’s nothing quite like that first bite – the texture, the flavor, and the satisfaction of knowing that you created this delicious masterpiece from start to finish.
The Benefits of Homemade Bread
Beyond the pure joy of the baking process, homemade bread offers a multitude of benefits. It allows you to control the quality of ingredients, ensuring that you’re using wholesome, natural components. You can customize the flavor and texture to suit your preferences and dietary needs, whether that’s adding seeds and grains for extra nutritional value or adjusting the salt content.
Another advantage of baking your own bread is the sheer variety of recipes and techniques available. From traditional baguettes and sourdough loaves to sweet buns and savory rolls, the possibilities are endless. You can explore different flavors, experiment with new ingredients, and even create your own signature bread recipe that delights your family and friends.
The Joy of Sharing Homemade Bread
The joy of homemade bread extends beyond the act of baking itself. It’s a gift that can be shared with others, a tangible expression of love, care, and creativity. Whether it’s hosting a dinner party, bringing a loaf to a potluck, or simply surprising a neighbor with a freshly baked treat, sharing homemade bread brings people together and creates lasting memories.
There’s nothing quite like seeing the smiles of delight as your loved ones take their first bite of a warm slice of bread you’ve made from scratch. It’s a small gesture that can bring immense joy and a sense of connection.
Conclusion
In conclusion, the Flaky Cheesy Herb Bread Recipe offers a delightful combination of textures and flavors that will impress both experienced bakers and beginners alike. This easy-to-follow recipe allows you to showcase your baking skills while enjoying the process of creating a delicious homemade bread.
With its flaky and tender texture, the bread provides a satisfying bite that pairs perfectly with the rich and gooey cheesy filling. The infusion of herbs adds a burst of freshness and aromatic complexity to each slice.
Whether you’re looking to elevate your brunch spread, impress guests at a dinner party, or simply indulge in a comforting snack, this recipe is a must-try. So, gather your ingredients, preheat your oven, and embark on a blissful baking adventure with the Flaky Cheesy Herb Bread Recipe.
FAQ
What is the Flaky Cheesy Herb Bread Recipe?
The Flaky Cheesy Herb Bread Recipe is a homemade bread recipe that features a flaky texture, a cheesy filling, and a burst of flavor from the herbs. It is a delicious and impressive bread that can be enjoyed for any occasion.
How easy is this bread recipe to make?
This Flaky Cheesy Herb Bread Recipe is an easy bread recipe that can be made by both seasoned bakers and novice cooks. With simple ingredients and straightforward instructions, it is a must-try recipe.
What makes The Best Cheesy Garlic Bread special?
The Best Cheesy Garlic Bread is a crowd-pleasing side dish that combines three types of cheese, fresh herbs, and plenty of garlic. It is a quick and easy homemade garlic bread that pairs perfectly with various dishes.
What is The Perfect Cheese Bread Mashup?
The Perfect Cheese Bread Mashup is an ingredient that combines cream cheese and tasty cheese. It is used in the recipe for a garlic herb and cheese pull-apart bread, resulting in a moist and fragrant side dish.
What kind of dough is used in this recipe?
This Flaky Cheesy Herb Bread Recipe starts with an easy and versatile dough made with plain flour, yeast, salt, sugar, and bread improver. It is a fluffy and delicious base for the cheesy herb filling.
What is the filling made of?
The filling for this Flaky Cheesy Herb Bread Recipe is made of crushed garlic, chopped herbs like parsley, basil, and rosemary, and a grated cream cheese and tasty cheese blend. It creates a flavorful and cheesy filling for the bread.
How is the bread assembled?
After rolling out the dough into large rectangles, the bread is spread with butter and topped with the garlic herb and cheese mixture. The dough is then cut into strips and layered on top of each other in a loaf pan, creating a beautiful finished bread.
How long does the bread need to bake?
The assembled bread goes through a final proofing process before being baked in the oven at a temperature of 190°C for 55 minutes, or until the tops are golden and the bread is cooked through.
How should the bread be served and stored?
Once baked, the Flaky Cheesy Herb Bread should be allowed to rest for 10 minutes before being removed from the loaf pans and served warm. It can be stored in an airtight container or wrapped in foil for up to 2-3 days in the refrigerator. Leftovers can be reheated in the oven or air fryer.
Can this bread be made ahead of time?
Yes, this Flaky Cheesy Herb Bread Recipe is a great option for make-ahead preparation. The unbaked bread can be wrapped in foil and stored in the freezer for up to 3 months. Simply thaw it in the refrigerator overnight when ready to bake.
Can I customize this bread recipe?
Absolutely! While the recipe provides a specific garlic herb and cheese filling, you can easily customize it with different herbs or add other ingredients like sun-dried tomatoes, olives, or cooked bacon. This bread allows for creative flavor combinations.
What is special about baking bread from scratch?
Baking bread from scratch offers a truly special experience. The process of kneading the dough, watching it rise, and the aroma that fills the kitchen is incredibly satisfying. This Flaky Cheesy Herb Bread Recipe captures the joy of homemade bread.