Welcome to our ultimate guide to creating the perfect flaky crust for your pies and pastries. Whether you’re a baking enthusiast or a beginner, this foolproof recipe will help you achieve a buttery and tender crust every time. Say goodbye to store-bought crusts and elevate your homemade creations with this easy and delicious flaky crust recipe.
There’s nothing quite like the aroma of a freshly baked pie or pastry with a flaky crust. It’s the foundation that holds together all the delicious fillings and adds a delightful crunch to every bite. With our step-by-step instructions and helpful tips, you’ll be able to master the art of making flaky crusts that will impress your family and friends.
Key Takeaways:
- Create a buttery and flaky crust with our foolproof recipe.
- The secret to a flaky pie crust lies in the “butter raincoat” technique.
- Use quality ingredients and keep them cold for the best results.
- Roll out the dough with care to achieve an even and thin crust.
- Try blind baking or making double crust pies with this versatile recipe.
The Secret to a Flaky Pie Crust
The secret to making a flaky pie crust lies in coating a portion of the flour with cold butter before mixing in the rest of the flour. This minimizes gluten formation and results in a super flaky and light crust.
The method used in this recipe is different from traditional pie crust recipes, as it involves mixing a portion of the flour with the butter first. This creates a “butter raincoat” effect, preventing too much gluten development and ensuring a tender and flaky crust.
This technique is a game-changer when it comes to achieving that perfect flaky crust texture. It’s what sets this recipe apart from others and guarantees the results you desire.
Ingredients and Method
Creating a delicious homemade flaky crust requires just a handful of simple ingredients and a straightforward method. Here’s what you’ll need:
| Ingredients | Quantity |
|---|---|
| Flour | 2 ½ cups |
| Cold Butter | 1 cup (2 sticks) |
| Salt | 1 teaspoon |
| Sugar (optional) | 1 tablespoon |
| Cold Water | 1/4 cup |
To prepare this flaky crust recipe, follow these simple steps:
- If using a food processor:
- Combine a portion of the flour, salt, and sugar (if using) in the food processor.
- Add the cold butter, cut into small pieces, to the flour mixture.
- Pulse the processor until the flour is well coated with the butter and the mixture resembles coarse crumbs.
- Add the remaining flour and pulse briefly until the mixture becomes crumbly.
- Sprinkle cold water over the mixture and pulse until the dough comes together.
- In a mixing bowl, combine a portion of the flour, salt, and sugar (if using).
- Add the cold butter and use a pastry cutter or your fingertips to cut the butter into the flour until the mixture resembles coarse crumbs.
- Add the remaining flour and mix until crumbly.
- Sprinkle cold water over the mixture and gently mix until the dough comes together.
With this easy flaky crust recipe, you’ll be well on your way to creating perfect homemade pies and pastries!
Tips for Rolling Out the Dough
Rolling out the dough is a crucial step in achieving a tender and flaky crust for your pies and pastries. To ensure success, follow these helpful tips:
- Lightly flour the work surface, rolling pin, and hands: Dusting these surfaces with a little flour will prevent the dough from sticking, making it easier to handle.
- Roll out from the center: Start rolling the dough from the center and work outwards in all directions. This technique helps maintain an even thickness throughout the crust.
- Turn and flip the dough: As you roll, regularly rotate the dough to prevent it from sticking and to ensure it’s rolled evenly. Flipping the dough occasionally also helps maintain its round shape.
The goal when rolling out the dough is to create a thin, even crust that can easily be transferred to your pie dish or used for pastry recipes. Following these tips will help you achieve the best results.
Expert Tip:
“Rolling out the dough evenly and with care is key to achieving a tender flaky crust. Be patient, take your time, and don’t be afraid to add a little extra flour if needed to prevent sticking.” – Chef Emily Johnson
Continue reading for insights on blind baking and creating double crust pies with this flaky crust recipe.
Blind Baking and Double Crust Pies
This flaky crust recipe can be used for both blind baking and double crust pies. Blind baking is a technique in which the crust is baked empty before adding the filling. This prevents a soggy bottom crust and ensures a crisp and golden pastry. Double crust pies, on the other hand, have both a bottom and top crust, enclosing delicious fillings. Here’s how you can make the most of this versatile flaky crust recipe for these two types of pies:
Blind Baking
Blind baking is especially useful for fillings that don’t require further baking or for custard-based pies. To blind bake using this flaky crust recipe, follow these steps:
- Preheat your oven to the recommended temperature.
- Roll out the chilled dough into a circle large enough to fit your pie dish.
- Gently press the dough into the pie dish, making sure it covers the bottom and sides evenly.
- Prick the bottom of the crust with a fork to prevent air bubbles.
- Line the crust with parchment paper or aluminum foil, and fill it with pie weights or dry beans.
- Bake the crust in the preheated oven for the specified time or until it turns golden brown.
- Remove the weights and parchment paper/foil, and let the crust cool completely before adding the filling.
Double Crust Pies
Double crust pies are a classic treat, often used for fruit pies like apple or cherry. Here’s how you can create a beautiful and flaky double crust pie:
- Divide the chilled dough into two portions, with one slightly larger than the other.
- Roll out the larger portion on a lightly floured surface into a circle big enough to cover the bottom and sides of your pie dish.
- Transfer the rolled-out dough to the pie dish, gently pressing it against the sides.
- Add your desired filling.
- Roll out the smaller portion of dough, and carefully place it on top of the filling.
- Trim any excess dough, leaving a slight overhang.
- Fold the edges of the dough together, and crimp or decorate them as desired.
- Brush the top crust with an egg wash or milk for a golden finish.
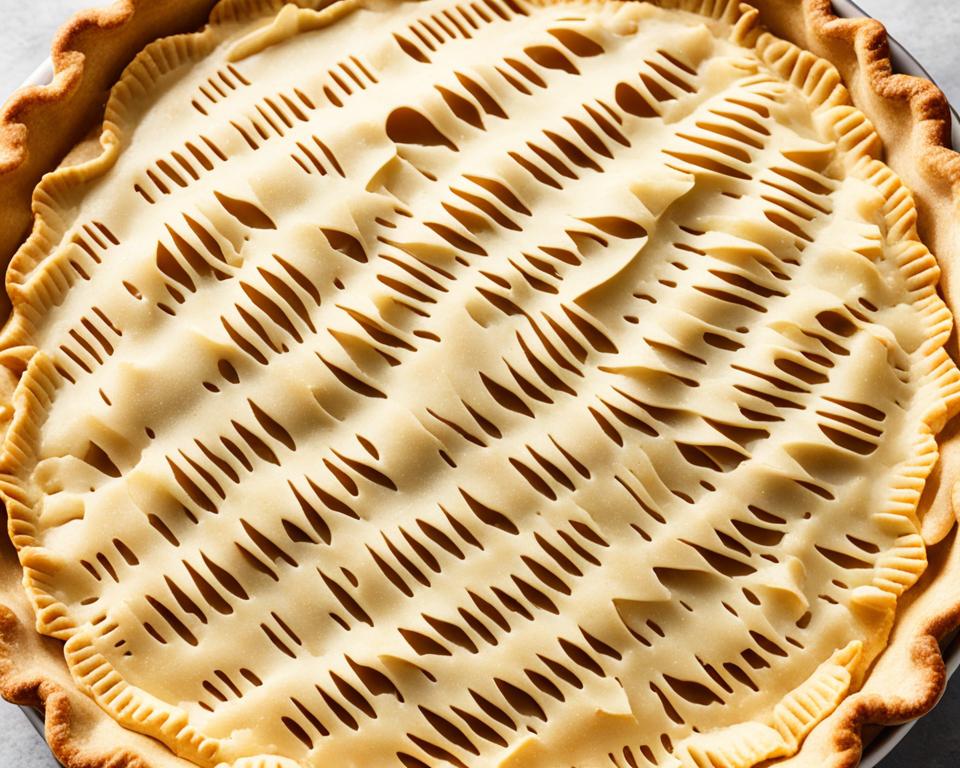
- Make a few slits on the top crust to allow steam to escape during baking.
- Bake the pie according to your recipe instructions until the crust is golden and the filling is bubbling.
With this flaky crust recipe, you’ll achieve a perfect balance of delicious flakiness in both blind baked and double crust pies. The crust will provide a buttery and tender base for your favorite fillings and elevate your pie-making skills to the next level.

Making Pie Crust in Advance and Freezing
You can save time in the kitchen by making your pie crust in advance. This allows you to have homemade flaky crust ready whenever you need it. Once you’ve prepared the dough, you can store it in the refrigerator for up to 3 days, or in the freezer for up to 3 months. This is especially useful when planning for special occasions or when you’re in need of a quick and easy dessert.
To ensure the longevity and quality of your pie crust, it’s important to wrap the dough well. This will keep it airtight and prevent any unwanted freezer burn or moisture absorption in the refrigerator. Use plastic wrap or airtight containers to protect the dough.
If you choose to freeze the dough, make sure to thaw it overnight in the refrigerator before using. This will allow the dough to soften and become pliable again, ensuring easy handling and rolling. Thawing in the refrigerator also helps maintain the integrity and texture of the crust.
Having a batch of homemade flaky crust ready in the fridge or freezer gives you the freedom to create delicious pies and pastries at a moment’s notice. Whether it’s a last-minute gathering or a spontaneous craving, you’ll be prepared with your easy flaky crust.
So go ahead and plan ahead by making your pie crust in advance. With the right storage and thawing methods, you’ll always have the foundation for a perfect pie or pastry. Enjoy the convenience and deliciousness of having homemade flaky crust at your fingertips!
Comparing Shortening and Butter
When it comes to creating the perfect flaky crust, the combination of shortening and butter reigns supreme. These two fats work synergistically to produce a crust that is not only buttery and flaky but also tender and delicious. Let’s take a closer look at how each ingredient contributes to the overall texture and flavor of your homemade flaky crust.
Butter: Flavor and Flakiness
Butter is undoubtedly the star of the show when it comes to adding flavor to your flaky crust. Its rich and creamy taste enhances the overall sensory experience of your pies and pastries. However, butter doesn’t just stop at flavor—it also plays a crucial role in creating those desirable layers of flakiness.
“Butter adds a rich and decadent flavor to the crust while simultaneously creating those beautiful flaky layers that we all love.”
When the butter melts during baking, it creates pockets of steam, which causes the layers of dough to separate and puff up, resulting in a light and airy texture. The higher fat content in butter also makes the crust more tender, further adding to its irresistible appeal.
Shortening: Pliability and Shape
While butter contributes flavor and flakiness, shortening brings pliability and shape-retention to the table. Shortening has a higher melting point than butter, which means it maintains its solid form for longer during baking, giving your flaky crust stability and structure.
Unlike butter, shortening lacks water content, which reduces the risk of gluten formation. This ensures that your crust remains pliable and easy to work with, allowing you to achieve a consistent thickness while rolling out the dough.
The Perfect Combination
By using both shortening and butter in your flaky crust recipe, you get the best of both worlds—a crust that is flavorful, flaky, tender, and easy to handle. The butter adds its signature flavor and flakiness, while the shortening lends pliability and shape-retention.
“The combination of shortening and butter creates a crust that is both tender and flaky—a winning combination for any pie or pastry.”
Just like a well-balanced partnership, shortening and butter work together harmoniously to enhance the texture, flavor, and overall quality of your homemade flaky crust.
The Importance of Temperature and Refrigeration
When it comes to achieving a tender and flaky crust, temperature plays a vital role. Keeping your ingredients and dough as cold as possible throughout the process is crucial. This helps prevent the fats from melting before baking, resulting in a beautifully flaky crust that melts in your mouth.
One key step to ensure the perfect texture is to chill the dough in the refrigerator for at least 2 hours. This allows the dough to rest and firm up, making it easier to handle and roll out. The chilled dough also gives you better control during the shaping process, resulting in a more uniform crust.
Refrigeration not only affects the physical texture of the crust but also contributes to its flavor. Allowing the dough to rest in the refrigerator allows the flavors to develop and meld together, resulting in a more complex and delicious taste.
Additionally, refrigeration helps relax the gluten in the dough. Gluten is a protein that forms when flour is mixed with water, and it gives structure to baked goods. By allowing the gluten to relax, the crust becomes more tender and delicate, enhancing the overall eating experience.
So, remember: when making your flaky crust, keep everything chilled. From the ingredients to the dough, refrigeration is the key to achieving that perfect flakiness and tenderness.
Quick Tips for Temperature and Refrigeration:
- Use cold ingredients straight from the refrigerator.
- Chill the dough for at least 2 hours before rolling it out.
- Work in a cool environment and avoid warm spots in your kitchen.
- Refrigerate or freeze the pie or pastry before baking to maintain its shape.
“The secret to a flaky crust lies in keeping everything cold. Embrace the chill and you’ll be rewarded with the most tender and flaky pastry.”
Conclusion
The flaky crust recipe provided in this article is a reliable and versatile base for both sweet and savory pies and pastries. By following the tips and techniques outlined, you can achieve a perfect flaky crust every time. Whether you’re a seasoned baker or just starting out, this recipe is sure to elevate your pies and pastries to the next level.
Enjoy the buttery, tender goodness of a homemade flaky crust in all your favorite baked creations. The combination of quality ingredients, a “butter raincoat” effect, and proper rolling techniques ensures a crispy flaky crust that will impress your family and friends.
Say goodbye to store-bought crusts that lack the taste and texture you desire. With this easy flaky crust recipe, you can create professional-quality pastries at home. From classic apple pies to savory tarts, your creations will stand out with their perfect flaky crust.
So go ahead and give this flaky crust recipe a try. You’ll be amazed by the results and wonder why you haven’t been making your own flaky pastry before. Whether it’s a special occasion or a simple treat for yourself, nothing beats the satisfaction of biting into a pie or pastry with a tender and flaky crust.
FAQ
What is the secret to making a flaky pie crust?
The secret lies in coating a portion of the flour with cold butter before mixing in the rest. This minimizes gluten formation and creates a super flaky and light crust.
What are the ingredients for a flaky crust recipe?
The ingredients include flour, cold butter, salt, sugar (optional), and cold water.
How do I make a flaky crust?
The method involves mixing a portion of the flour with the butter first to create a “butter raincoat” effect. The remaining flour is then added until crumbly, followed by cold water to bring the dough together.
How do I roll out the dough for a flaky crust?
Lightly flour the work surface, rolling pin, and hands. Roll out the dough from the center, working outwards in all directions, and turn and flip to ensure even rolling.
Can I use this flaky crust recipe for blind baking and double crust pies?
Yes, the recipe can be used for both. For blind baking, the crust is baked empty before adding the filling to prevent a soggy bottom crust. For double crust pies, roll out the dough into two discs and use one for the top and one for the bottom.
Can I make the pie crust in advance?
Yes, the pie crust can be made in advance and stored in the refrigerator for up to 3 days or in the freezer for up to 3 months. Just make sure to wrap it well to keep it airtight.
What is the difference between shortening and butter in a flaky crust?
Shortening helps the dough stay pliable and maintain its shape, while butter adds flavor and flakiness. Using both fats together creates a tender, flaky, and buttery crust.
Why is it important to keep the ingredients and dough cold for a flaky crust?
Keeping everything cold helps prevent the fats from melting before baking, which ensures a flaky texture. Chilling the dough also allows flavors to develop and gluten to relax, resulting in a more tender crust.