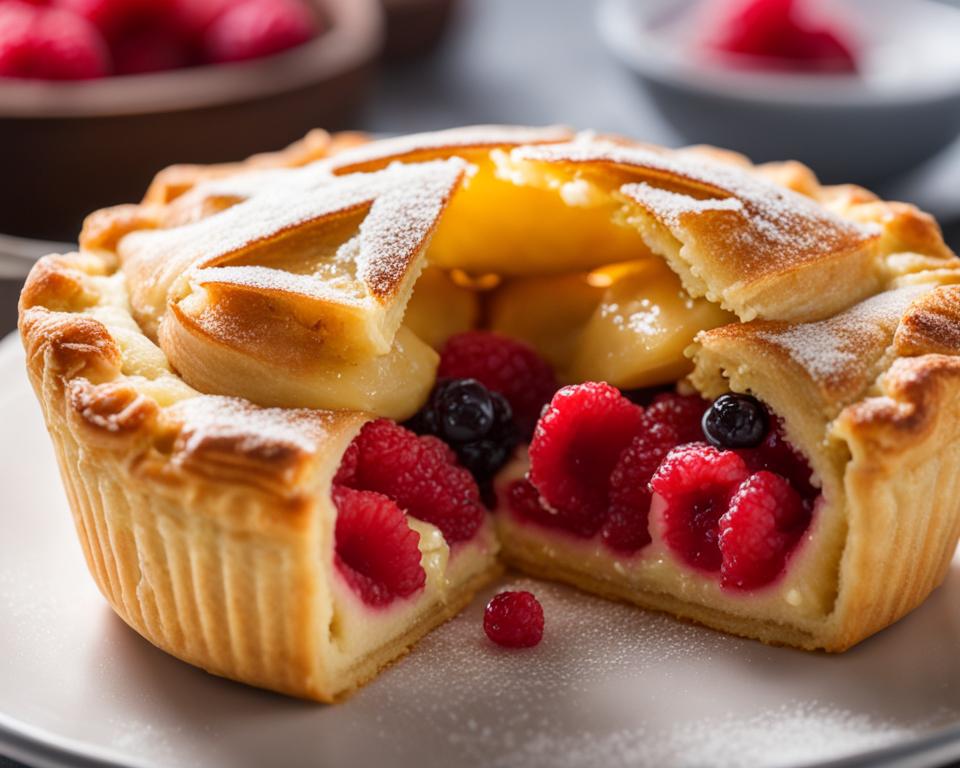
Are you ready to elevate your baking game with a mouthwatering treat? Look no further than this homemade turnover recipe for the perfect flaky fruit-filled turnovers. Imagine a buttery and flaky pastry filled with a delicious sweet and jammy fruit filling. It’s a delightful combination that will have your taste buds dancing with joy.
Creating these delectable turnovers is easier than you might think. With a few simple steps, you’ll be able to enjoy the satisfaction of making your own homemade turnovers. Plus, the final result will impress family and friends alike. Whether you’re looking for a sweet dessert or a special breakfast pastry, these turnovers are sure to hit the spot.
Key Takeaways:
- Learn how to make the perfect flaky fruit-filled turnovers from scratch.
- Discover the secret to achieving a flaky pastry that will leave you craving more.
- Choose the perfect fruit filling to complement the buttery pastry.
- Master the art of shaping and filling the turnovers for a professional finish.
- Bake the turnovers to golden perfection and add the finishing touches for an extra touch of sweetness.
The Secret to Flaky Pastry
If you’ve ever wondered how to achieve the perfect flaky pastry for your turnovers, I’m here to let you in on a little secret. It all comes down to using a technique called “rough puff” pastry. This method allows you to create a buttery and flaky dough that will take your fruit-filled turnovers to a whole new level of deliciousness.
Unlike traditional puff pastry, rough puff pastry doesn’t require the time-consuming process of laminating the dough with a separate layer of butter. Instead, the flakiness and crispness are achieved through the simple yet effective method of mixing and folding the dough multiple times to create layers.
By working cold butter into the dry ingredients and folding the dough, you create those delightful layers in the pastry that result in a light and airy texture. Each fold creates more layers, making the pastry flakier with every turn.
“Rough puff pastry is a game-changer for creating flaky and buttery dough without the lengthy process of traditional puff pastry. It’s a time-saving technique that delivers incredible results.” – Pastry Chef Emily Thompson
This technique is perfect for making homemade puff pastry without the hassle. You’ll be amazed at how easy it is to achieve professional-level results in your own kitchen. So let’s dive in and learn how to master the art of rough puff pastry and create the flakiest turnovers you’ve ever tasted.
The Laminating Process
Laminating the dough is a crucial step in creating the flaky layers that make rough puff pastry so desirable. This process involves folding the dough and rolling it out multiple times to create thin layers of butter between the pastry. As the butter melts during baking, the water evaporates and creates steam, resulting in those golden, flaky layers.
“The key to a beautifully layered and flaky pastry lies in the lamination process. It requires patience and precision, but the end result is well worth the effort.” – Chef Sarah Thompson
Pastry Folding Method
When it comes to folding the dough, there are various techniques you can use. One popular method is the letter fold, where the dough is folded into thirds like a letter. This creates even layers throughout the pastry. Another method is the book fold, where the dough is folded in half like a book. This method can produce larger, more defined layers in the pastry.
Depending on the recipe and the desired outcome, you can choose the folding method that works best for you. The important thing is to make sure the dough is folded gently and evenly to avoid crushing the layers and affecting the flakiness.
Buttery Dough and Flaky Layers
By using this pastry folding method, you’ll create a dough with visible layers and a texture that is light, crisp, and flaky. The butter in the dough melts during baking, creating steam that lifts the layers and gives the pastry its signature flakiness.
The result? A perfect balance of buttery, melt-in-your-mouth goodness and delicate layers that add depth to every bite of your fruit-filled turnovers.
Now that you know the secret to achieving flaky pastry, it’s time to put your newfound knowledge to the test and start creating your own delicious turnovers.
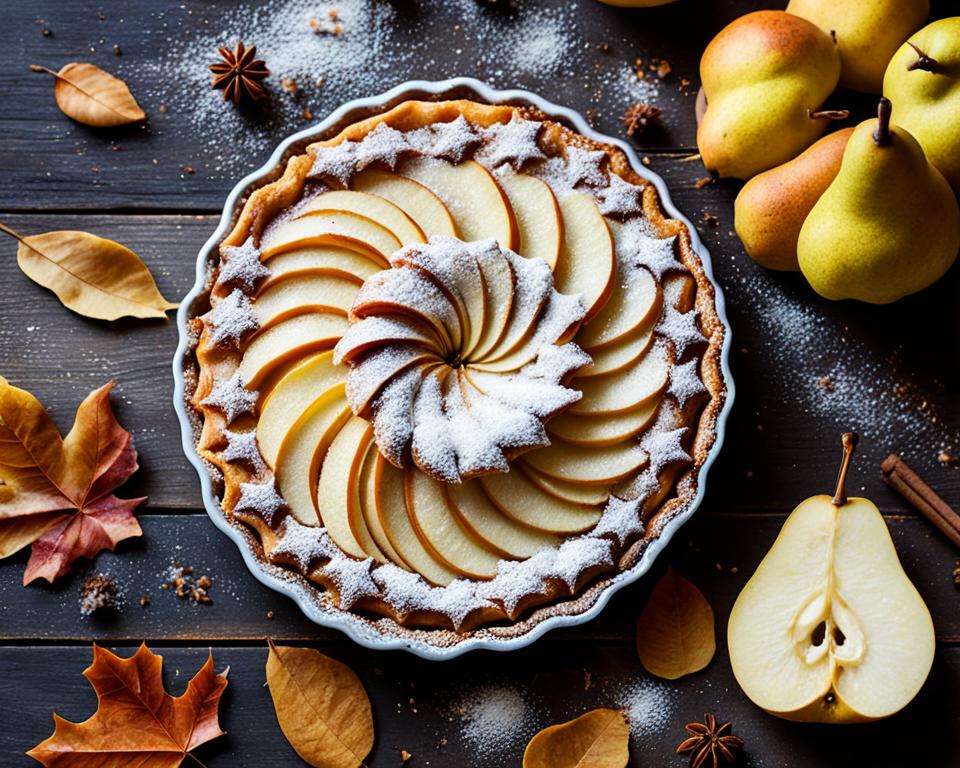
Choosing the Perfect Fruit Filling
The filling is an essential component of a fruit-filled turnover. When selecting the fruit filling for your turnovers, you have a plethora of options to choose from. Whether you prefer the vibrant sweetness of mixed berries, the comforting taste of apple, or any other fruit that piques your interest, the choice is yours. It’s important to opt for fruits that are firm and flavorful. This ensures that the filling retains its texture and taste throughout the baking process.
For a jammy and delectable filling, you can cook the fruit with sugar and other flavorings until it becomes thick and syrupy. This process intensifies the natural sweetness of the fruit and adds depth of flavor. The result is a burst of fruity goodness encapsulated within the flaky pastry of the turnover.
Experiment with different fruit options and combinations to create your desired flavor profile. Whether you prefer a sweet and tart filling or a more mellow flavor, there are endless possibilities to explore. The fruit filling is the heart of the turnover, complementing the flaky pastry and adding a refreshing and fruity note to each bite.
| Fruit Options for Turnovers | Description |
|---|---|
| Mixed Berry Filling | A medley of vibrant berries such as strawberries, blueberries, raspberries, and blackberries. Provides a burst of tangy sweetness. |
| Jammy Fruit Filling | A cooked fruit filling that has been simmered with sugar and other flavorings until thick and syrupy. Offers a luscious and intense fruit flavor. |
| Apple Filling | A classic choice with a comforting taste. Apple fillings can be sweet or tart depending on the variety used. |
| Homemade Filling | Get creative and experiment with a homemade fruit filling using your favorite fruits and flavorings. Allows for a personalized touch. |

Take your turnovers to the next level by carefully selecting the perfect fruit filling. Whether you opt for a classic apple filling or venture into the realm of mixed berry creations, the choice is yours. Let your taste buds guide you as you create a delightful combination of flavors that perfectly complements the flaky pastry of your turnovers. The fruit filling adds a touch of natural sweetness and a burst of fruity goodness to each bite, making your turnovers a truly irresistible treat.
Making the Flaky Pastry Dough
To create the perfect flaky pastry for your turnovers, you’ll need to master the art of making homemade rough puff pastry. This dough is the foundation of a deliciously flaky and buttery crust that will elevate your turnovers to a whole new level. Let me walk you through the process of making this delectable dough from scratch.
Ingredients:
- 2 cups all-purpose flour
- 1 teaspoon sugar
- 1/2 teaspoon salt
- 1 cup (2 sticks) cold unsalted butter, cut into small cubes
- 1/2 cup cold water
Instructions:
- In a large mixing bowl, combine the flour, sugar, and salt.
- Add the cold butter cubes to the flour mixture. Using your fingertips, rub the butter into the flour until the mixture resembles coarse crumbs. Leave some larger chunks of butter for extra flakiness.
- Make a well in the center of the mixture and pour in the cold water. Using a fork or your hands, gently mix the dough until it just comes together. Do not overmix.
- Turn the dough out onto a lightly floured surface and knead it a few times to bring it together. Shape the dough into a rectangle and wrap it tightly in plastic wrap. Refrigerate for at least 1 hour or overnight.
- After chilling, take the dough out of the refrigerator and place it on a lightly floured surface. Using a rolling pin, roll the dough into a long rectangle, about 1/4 inch thick.
- Fold the top third of the dough down towards the center, then fold the bottom third up over the top fold like a business letter. This is called a “single fold.”
- Rotate the dough 90 degrees and repeat the rolling and folding process. This is your first “fold.”
- Repeat the rolling and folding process two more times, for a total of three folds. This will create layers in the dough, resulting in a flaky texture.
- Wrap the dough in plastic wrap and refrigerate for at least 30 minutes before using.
And there you have it! Your homemade flaky pastry dough is ready to be transformed into delectable turnovers. The key to achieving the perfect flakiness lies in the mixing, folding, and chilling of the dough. Take your time with each step, and you’ll be rewarded with a pastry that is light, crisp, and oh-so-delicious.
Preparing the Fruit Filling
Before filling your turnovers, it’s important to prepare the fruit filling. This step involves cooking the fruit with sugar and other flavorings over medium heat until it becomes thick and jammy. To achieve the desired consistency, you can add cornstarch mixed with water to thicken the filling even further.
Once the fruit filling is cooked, it’s crucial to let it cool completely before using it in the turnovers. Cooling the filling allows it to set and prevents the dough from becoming soggy during baking. You can refrigerate the fruit filling for up to 5 days before using it in your turnovers.
Here is a step-by-step guide to preparing the fruit filling:
- Cook the fruit with sugar and other flavorings over medium heat until it thickens and becomes jammy.
- If desired, mix cornstarch with water and add it to the fruit filling to further thicken it.
- Remove the fruit filling from the heat and let it cool completely.
- Refrigerate the fruit filling for up to 5 days before using it in your turnovers.
The fruit filling should be fully cooled and chilled before filling your turnovers. This ensures the filling stays intact and creates a delicious contrast with the flaky pastry. Refrigerating the fruit filling also makes it easier to handle when assembling the turnovers.
So now that we have our delicious fruit filling ready, let’s move on to shaping and filling the turnovers!
Tip: The flavors of the fruit filling develop and intensify as it cools. This brief resting period allows for a more concentrated fruit flavor in your turnovers.
| Ingredients | Instructions |
|---|---|
| Fruit | 1. Cook the fruit with sugar and other flavorings over medium heat until thick and jammy. |
| Sugar | 2. Add sugar to the fruit mixture and stir to combine. |
| Flavorings (e.g., vanilla extract, lemon juice) | 3. Incorporate additional flavorings according to your preference, such as vanilla extract or lemon juice. |
| Cornstarch | 4. Optionally, mix cornstarch with water to create a slurry and add it to the fruit mixture to thicken it. |
Shaping and Filling the Turnovers
Now that we have our flaky pastry dough and delicious fruit filling ready, it’s time to shape and fill our turnovers. Let’s dive right in!
To start, roll out the pastry dough into a thin sheet. Using a sharp knife or a pastry cutter, cut the dough into squares of your desired size. This will be the base for our turnovers.
| Step | Description |
|---|---|
| 1 | Roll out the pastry dough into a thin sheet. |
| 2 | Cut the dough into squares of your desired size. |
Next, spoon the prepared fruit filling onto one side of each square, leaving a small border around the edges. This will ensure that the filling stays securely inside the turnover.
Once the filling is in place, fold the other side of the square over the filling, creating a triangle shape. Press the edges together firmly with a fork to seal the turnovers and prevent any filling from leaking out during baking.
Pro Tip: Be gentle when sealing the turnovers to avoid tearing the dough. Take your time and use a steady hand for the best results.
After shaping and sealing the turnovers, it’s time to give them a beautiful golden brown color. To achieve this, we’ll use an egg wash. Simply beat an egg in a small bowl and brush it evenly over the turnovers using a pastry brush. This will create a glossy finish and add a lovely golden hue to the pastry when baked.
Pro Tip: For a vegan alternative, you can use a mixture of non-dairy milk and melted vegan butter as a substitute for the traditional egg wash.
Now that our turnovers are ready to go into the oven, we need to make sure they have proper ventilation. This is where venting comes in. Using a sharp knife, make small slits on the top of each turnover. These slits will allow steam to escape during baking, preventing the turnovers from becoming too soggy.
Serving suggestion:
Once baked to perfection, these turnovers are best enjoyed fresh out of the oven. Serve them warm with a dusting of powdered sugar or a dollop of whipped cream for an extra touch of indulgence. They pair perfectly with a hot cup of coffee or tea, making them an ideal treat for breakfast or dessert.
That’s it! Our turnovers are shaped, filled, and ready to be baked to crispy, golden perfection.
Baking the Turnovers
Once you have shaped and filled your turnovers, it’s time to bake them to golden brown perfection. Follow these steps to ensure a delicious outcome:
- Preheat your oven to the specified temperature as indicated in the turnover recipe.
- Place the filled turnovers on a baking sheet lined with parchment paper, spacing them a few inches apart to allow for proper air circulation.
- Bake the turnovers in the preheated oven until they turn a beautiful golden brown and the pastry becomes crisp. The exact baking time will depend on the size of your turnovers and the temperature accuracy of your oven.
- While baking, keep an eye on the turnovers to prevent them from overbrowning. Depending on your oven, you might need to rotate the baking sheet halfway through the baking time for even browning.

Once the turnovers are evenly golden brown, remove them from the oven using oven mitts or kitchen tongs. Place them on a wire rack to cool completely. Cooling the turnovers on a wire rack helps them firm up and prevents them from becoming soggy. It also allows the flavors of the flaky pastry and the sweet filling to meld together, resulting in a delightful and satisfying bite.
Adding the Finishing Touches
Now that your turnovers are baked to perfection, it’s time to add the finishing touches that will take them to the next level of deliciousness. Whether you prefer a sweet glaze or a sprinkling of sugar, these simple additions will enhance both the visual appeal and overall taste of your turnovers.
One option is to glaze your turnovers using a powdered sugar glaze or a vanilla icing. This will add a touch of sweetness and provide a glossy finish that’s sure to make your mouth water. To make a powdered sugar glaze, simply mix powdered sugar with a little milk or water until you achieve a smooth and pourable consistency. For a vanilla icing, add a splash of vanilla extract to the glaze mixture for a delightful flavor twist.
If you prefer a little texture in your turnovers, consider sprinkling sugar on top before baking. Coarse sugar works best for this, as it will retain its crunchiness and create a sparkling appearance after baking. This gives your turnovers a sweet and crunchy crust that complements the flaky pastry and fruity filling.
Whether you choose to glaze your turnovers or sprinkle them with sugar, these finishing touches add a final layer of flavor and visual appeal. Experiment with different glaze flavors, such as lemon or almond, to create your own unique twists. Don’t be afraid to get creative and let your taste buds guide you as you put the finishing touches on your delectable turnovers!
Storing and Serving the Turnovers
Once your mouthwatering turnovers are baked and cooled to perfection, it’s important to know how to store them to maintain their deliciousness for as long as possible. You have a couple of options to choose from depending on your preference and the duration you plan to keep them.
Room Temperature Storage
If you anticipate devouring your turnovers within the next two days, you can store them at room temperature in an airtight container. This will help maintain their freshness and ensure they remain flaky and delightful.
Refrigerating Turnovers
For a longer shelf life, refrigerating the turnovers is recommended. Carefully place them in an airtight container and store them in the refrigerator. When refrigerated, turnovers stay delectable for up to five days, allowing you to savor them at your own pace.
Serving Suggestions
Now that you have your freshly baked turnovers ready, it’s time to think about serving them for an ultimate taste experience. These sweet treats can be enjoyed as a standalone delight, but they also pair amazingly well with certain accompaniments.
For a classic combination, serve warm turnovers alongside a generous scoop of creamy vanilla ice cream. The contrast of the warm pastry and the cool, melty ice cream creates a heavenly flavor fusion, leaving you craving for more.
If you prefer a lighter touch, top your turnovers with a dollop of homemade whipped cream. The airy and smooth texture of the whipped cream complements the flaky pastry and adds a touch of extra indulgence to every bite.
The choice is yours—experiment with different serving options to find your personal favorite. Whether you go for an ice cream pairing or opt for whipped cream, every serving will be a delightful experience that satisfies your sweet tooth.

| Serving Options | Description |
|---|---|
| Scoop of Vanilla Ice Cream | A classic choice that creates a perfect balance between warm turnovers and cool, creamy ice cream. |
| Dollop of Homemade Whipped Cream | Adds a light and airy touch to your turnovers, enhancing their texture and providing a deliciously sweet topping. |
Rough Puff Pastry vs. Other Doughs
When it comes to creating delicious and flaky pastries, the choice of dough is crucial. In this section, I will compare rough puff pastry, traditional puff pastry, pie crust, and yeasted pastry dough, highlighting their unique characteristics and uses.
The Flakiness Factor
Rough puff pastry, like traditional puff pastry, is renowned for its flaky texture. However, the processes for creating these two doughs differ. Rough puff pastry requires less time and effort as it skips the extensive laminating process. This dough still delivers the desired flakiness while providing a lighter and doughier texture compared to traditional puff pastry.
In contrast, pie crust offers a similar buttery and flaky experience but tends to be denser and more crumbly. Its texture perfectly complements pie fillings, making it an excellent choice for fruit pies and savory quiches.
For a different experience, yeasted pastry dough shines with its delicate and airy structure. This dough, commonly used for croissants and pastry braids, requires a longer proofing process due to the yeast used. The result is a buttery, flaky pastry with a distinctive chewiness.
Applications and Uses
Each dough has its ideal applications and pairs well with specific baked goods.
- Rough puff pastry: Perfect for turnovers, palmiers, and other lightly filled pastries.
- Traditional puff pastry: Ideal for delicate pastries like Napoleons, vol-au-vents, and tarts.
- Pie crust: The go-to choice for pies, quiches, and pot pies.
- Yeasted pastry dough: Best suited for laminated pastries like croissants, Danish pastries, and cinnamon rolls.
Dough Comparison
| Dough | Flakiness | Texture | Applications |
|---|---|---|---|
| Rough Puff Pastry | Flaky | Lighter and doughier | Turnovers, palmiers, lightly filled pastries |
| Traditional Puff Pastry | Flaky | Delicate and crispy | Napoleons, vol-au-vents, tarts |
| Pie Crust | Flaky | Denser and crumbly | Pies, quiches, pot pies |
| Yeasted Pastry Dough | Flaky | Delicate and airy with chewiness | Croissants, Danish pastries, cinnamon rolls |
As you can see, each dough brings its own unique qualities to the table and is best suited for particular baked goods. So, whether you’re making turnovers, tarts, or croissants, choose the dough that will elevate your pastries to new heights of flavor and texture.
Tips and Variations
When it comes to making delicious turnovers, here are some tips and variations to enhance your baking experience:
Tips for Making Turnovers
- Use your hands to rub the butter into the flour when making the flaky pastry dough. This helps to maintain the desired texture and incorporate the butter evenly.
- Chill the dough before rolling it out. This allows the butter to solidify and creates flakiness in the pastry.
- If you don’t have the time or prefer not to make homemade rough puff pastry, you can use store-bought puff pastry as an alternative. It will still result in a delicious, flaky crust for your turnovers.
- When sealing the turnovers, make sure to press the edges firmly together with a fork to prevent the filling from leaking during baking.
Variation Ideas
Get creative with your turnovers by experimenting with different fillings and flavors. Here are a few ideas to inspire you:
- Try a savory variation by filling turnovers with ingredients like cheese, spinach, or sausage. It’s a great way to add variety and make them suitable for savory appetizers or snacks.
- Combine different fruits to create unique flavor combinations. For example, mix apples with cinnamon, or berries with a touch of lemon zest.
- Add a twist of flavor by incorporating spices like nutmeg or cardamom into your fruit fillings.
Remember to let your creativity shine through as you explore different flavors and fillings for your turnovers. It’s a chance to make the recipe your own and delight your taste buds.
Rough Puff Pastry Alternatives
If you’re looking for alternatives to rough puff pastry, consider the following options:
- Traditional puff pastry: This classic pastry dough requires laminating layers of butter between thin sheets of dough, resulting in a flaky texture.
- Pie crust: A buttery and tender dough commonly used for pies that can also work well for turnovers.
While these alternatives may require different techniques and have slightly different textures, they can still result in delicious turnovers. Choose the option that best suits your preferences and baking skills.
Freezing Turnovers
If you want to enjoy turnovers at a later time, you can freeze them before or after baking. Here are some tips for freezing turnovers:
- Before baking: Prepare the turnovers as usual, but instead of baking them, place them on a baking sheet lined with parchment paper. Freeze the turnovers until firm, then transfer them to a freezer-safe container or bag. When ready to bake, simply place them directly in the oven and add a few extra minutes to the baking time.
- After baking: Allow the turnovers to cool completely, then place them in a freezer-safe container or bag. When you’re ready to eat, reheat the frozen turnovers in the oven at a low temperature until warmed through.
Make-Ahead Dough
If you want to save time or plan ahead, you can make the dough for turnovers in advance. Here’s how:
- Prepare the dough according to your recipe and stop before rolling it out and shaping the turnovers.
- Wrap the dough tightly in plastic wrap, place it in a sealed container, and refrigerate for up to 3 days.
- If you want to store the dough for an extended period, you can freeze it for up to 3 months. Thaw it in the refrigerator overnight when you’re ready to use it.
- When you’re ready to make turnovers, roll out the chilled dough, fill it with your desired filling, and bake as directed.
Having make-ahead dough on hand provides flexibility in your baking schedule and allows you to enjoy freshly baked turnovers whenever you wish.
| Tips and Variations | Benefits |
|---|---|
| Use your hands to rub butter into the flour | Ensures butter is evenly distributed for flaky pastry |
| Try store-bought puff pastry as an alternative | Saves time without compromising on taste |
| Freeze turnovers before or after baking | Convenient for make-ahead or future enjoyment |
| Make-ahead dough for flexibility | Saves time and allows for planning |
These tips, variations, and alternatives provide you with the knowledge and options to create delicious turnovers that suit your preferences and baking needs. So, get ready to indulge in flaky pastries filled with tasty fillings!
Conclusion
In conclusion, the flaky fruit-filled turnover recipe is a delightful and versatile baked treat that will satisfy your sweet tooth. These turnovers can be enjoyed as a scrumptious dessert or as a delightful breakfast pastry. The key to their irresistible texture lies in the buttery and flaky homemade rough puff pastry that encases a luscious and jammy fruit filling.
Whether you choose to make your own rough puff pastry or opt for store-bought puff pastry, the result will be a delectable combination of flavors and textures. The buttery and flaky pastry, when paired with the sweet and jammy fruit filling, creates a mouthwatering taste experience. Don’t hesitate to experiment with different types of fruit fillings to add variety and customize your turnovers to your liking.
Embrace the joy of baking from scratch and take pleasure in creating these flaky fruit-filled turnovers. With every bite, you’ll experience the satisfying crunch of the pastry and the burst of fruity goodness from the filling. So grab your apron, gather your ingredients, and indulge in the homemade goodness of these irresistible turnovers.
FAQ
What is the key to achieving a flaky pastry for turnovers?
The key is using a technique called “rough puff” pastry, which involves working cold butter into the dry ingredients and folding the dough multiple times to create layers.
What are some popular fruit fillings for turnovers?
Popular choices include mixed berry fillings, apple fillings, and more. It’s important to choose fruits that are firm and flavorful, as they will hold up well during baking.
How do I make the flaky pastry dough for turnovers?
The dough is made by rubbing cold butter into a mixture of flour, sugar, salt, and cold water. After chilling the dough, it is rolled out and folded multiple times to create layers.
How do I prepare the fruit filling for turnovers?
Cook the fruit with sugar and other flavorings until it becomes thick and syrupy. Let the filling cool completely before using it in the turnovers.
How do I shape and fill the turnovers?
Roll out the pastry dough, cut it into squares, spoon the fruit filling onto one side of the square, fold the other side over the filling, and seal the edges with a fork.
How do I bake the turnovers?
Bake the turnovers in a preheated oven until they are golden brown and crisp. The baking time will depend on the size of your turnovers and the temperature of your oven.
How can I add finishing touches to the turnovers?
You can glaze them with a powdered sugar glaze or vanilla icing, or sprinkle coarse sugar on top before baking for a crunchy texture and sparkling appearance.
How should I store and serve the turnovers?
Store the turnovers in an airtight container at room temperature for up to 2 days or refrigerate them for up to 5 days. Serve them on their own or paired with ice cream or whipped cream.
How does rough puff pastry compare to other types of dough?
Rough puff pastry is similar to traditional puff pastry but easier and quicker to make. It provides a lighter, doughier, and crispier texture compared to pie crust or yeasted pastry dough.
What are some tips and variations for making turnovers?
Use your hands to rub the butter into the flour for the flaky pastry dough. You can also use store-bought puff pastry instead of homemade rough puff pastry. Turnovers can be frozen before or after baking.