Welcome to Bake Heaven, where we share the secrets to creating the perfect flaky pie dough right in your own kitchen. Whether you’re a seasoned baker or a pie-making novice, this foolproof homemade pie crust recipe will guarantee you consistently delicious results.
Made with a combination of butter and shortening, this flaky pie dough is tender, flavorful, and easy to work with. The key to achieving that perfect flakiness lies in keeping everything cold, from the butter to the ingredients and equipment. By following our step-by-step instructions, you’ll master the art of pie crust making and impress your family and friends with your baking skills.
In this article, we’ll provide detailed notes on essential techniques such as cutting the butter into small uniform pieces, determining the right amount of water to use, and giving the dough ample resting time. We’ll also guide you on how to roll out the dough and provide tips for blind baking.
Key Takeaways:
- Homemade pie crusts are more flavorful, flaky, and tender than store-bought.
- The secret to flaky crust lies in keeping everything cold, especially the butter.
- Cutting the butter into small uniform pieces helps achieve flakiness.
- The amount of water to add can vary, but the dough should hold its shape when pinched.
- Giving the dough proper resting time prevents shrinking and toughening.
How to Make the Best Ever Pie Crust
When it comes to creating the perfect pie crust, there are a few key tips and techniques that can make all the difference. Follow these steps to achieve a flaky, buttery pie crust that will have everyone coming back for seconds.
- Keep it cool: Start by ensuring that all your ingredients and equipment are kept cold. This includes the butter, flour, and even the bowl you’ll be using. If you’re working in a warm kitchen, consider refrigerating the ingredients before starting or using a food processor to make the dough.
- Cut the butter just right: The size of the butter chunks you use can impact the texture of your crust. Smaller chunks will result in a mealy texture, while larger chunks will create a flakier crust. For easy cutting, try grating the chilled butter or using a food processor.
- Add the perfect amount of water: The amount of water needed in your pie dough can vary depending on factors like kitchen temperature and the brand of flour you’re using. The goal is to add just enough water for the dough to hold its shape without crumbling or being too dry.
- Give it some rest: Resting the dough is crucial for preventing the crust from shrinking and toughening. After mixing the dough, let it rest in the refrigerator for at least 30 minutes. Additionally, allow the dough to rest again after rolling it out and placing it in the pie dish.
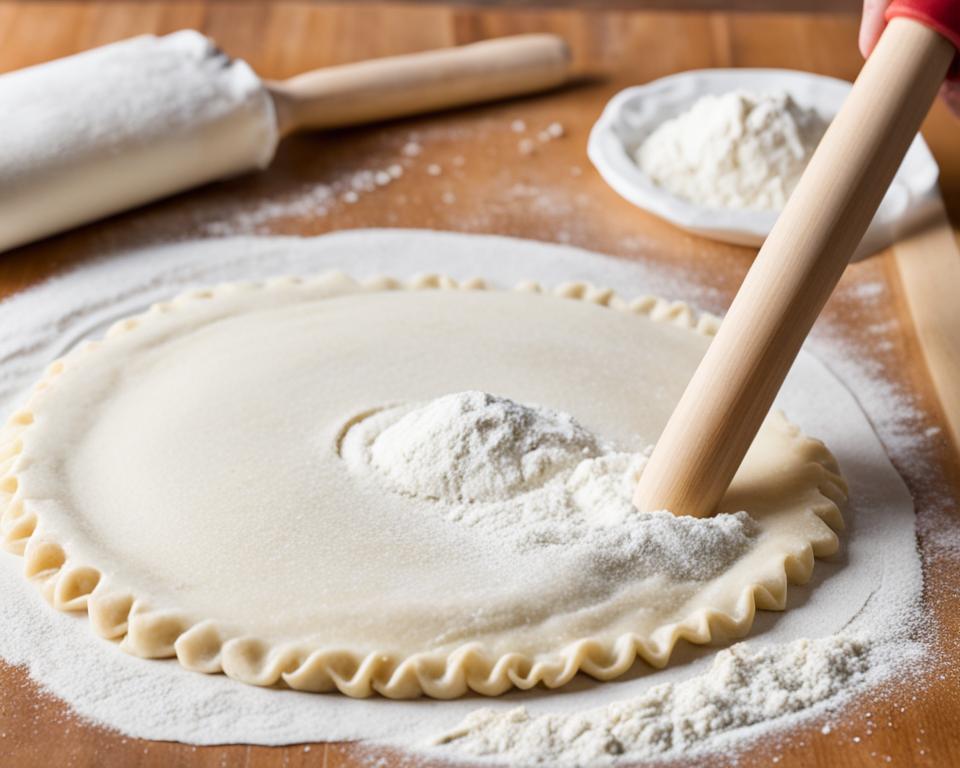
- Roll it out just right: When rolling out your pie dough, aim for a thickness of about 1/8 inch. Roll it out on a lightly floured surface, keeping the dough moving to avoid overworking it. Remember to flour your rolling pin as needed to prevent sticking.
Remember, the secret to a perfect pie crust lies in the details. Keep everything cold, cut the butter just right, add the perfect amount of water, give it some rest, and roll it out just right. With these tips, you’ll be well on your way to creating the best ever pie crust!
Now that you know the secrets to a perfect pie crust, it’s time to put your skills to the test. Up next, we’ll dive into the importance of cutting the butter into small uniform pieces, so stay tuned!
Cut the Butter Into Small Uniform Pieces
When it comes to making a foolproof pie crust from scratch, cutting the butter into small uniform pieces is an essential step. This technique ensures that the butter is evenly distributed throughout the dough, resulting in a consistent and flaky texture.
There are a few methods you can use to cut the butter. One option is to grate frozen butter using a box grater. This will create small, uniform pieces that can easily be incorporated into the dough. Another method is to cube the butter and use a food processor to pulse it until it reaches the size of peas. This produces the same effect.
It’s important to work quickly while cutting the butter to prevent it from melting. The goal is to create pea-sized bits of butter that will be distributed evenly throughout the dough. This will help prevent the butter from pooling into greasy puddles and ensure a flaky texture in the baked crust.
By taking the time to cut the butter into small uniform pieces, you’ll be well on your way to creating a perfect pie crust from scratch that is sure to impress.
Tip: Cutting the butter into small uniform pieces is a crucial step in achieving a flaky pie crust. Make sure to work quickly and aim for pea-sized bits of butter for optimal results.
How Much Water to Use For Pie Dough?
Determining the right amount of water to use for pie dough can be a bit tricky. It’s not an exact science. The ideal amount of water depends on various factors such as kitchen climate and humidity. Thankfully, the recipe we provide offers a range of water measurements to help you achieve the perfect consistency.
When starting, it’s recommended to use about half of the total amount of water suggested in the recipe. This will give you a good baseline to work with. However, if the dough seems excessively dry and crumbly, you’ll likely need to add more water. The goal is to have a dough that is firm and holds its shape without falling apart.
To check if the dough has enough moisture, turn it out onto a work surface and gently press it together with your hands. If it crumbles and doesn’t come together, add a little more water. However, be cautious not to overwork the dough. Overworking can develop excess gluten, resulting in a tough and dense crust.
Another important tip is to achieve pea-sized bits of butter when incorporating it into the dough. This helps to prevent the butter from melting during baking, which can create greasy pools in the crust.
Remember, practice makes perfect! It may take a few tries to find the right amount of water for your specific conditions, but with persistence, you’ll master the art of creating a tender and flaky pie crust.
Now that you have a better understanding of how much water to use for pie dough, let’s move on to the next section, where we will discuss the importance of giving the dough a proper rest.
Give the Dough a Rest
Giving the dough a rest is essential for achieving a tender and flaky homemade pie crust. This step helps prevent shrinking while baking and allows the gluten to relax, resulting in a more delicate crust.
Resting the Dough
After mixing the dough, it’s important to let it rest for at least 30 minutes to an hour. This allows the ingredients to fully hydrate and the dough to become more manageable. For the best results, refrigerate the dough overnight. This extended resting time allows the flavors to develop and the dough to achieve optimal tenderness.
Resting the Rolled-Out Dough
Once the dough is rolled out and placed in the pie dish, it should be given a second resting period before adding the filling. This short resting period, typically around 15-30 minutes, helps prevent the dough from shrinking while baking.
Pro tip: To avoid stretching the dough while transferring it to the pie dish, roll it onto your rolling pin and gently unroll it over the dish. This technique helps maintain the shape of the dough.
By allowing the dough to rest at various stages of the pie-making process, you ensure that the crust maintains its tender and flaky texture, resulting in a perfect homemade pie crust that will impress your taste buds!

How to Roll Out Pie Dough
Rolling out pie dough is a crucial step in creating a perfect pie crust. Follow these tips to achieve flawless results.
1. Use a Lightly Floured Surface
Start by preparing a clean, flat surface with a light dusting of flour. This will prevent the dough from sticking and make rolling easier.
2. Keep the Dough Moving
When rolling out the dough, avoid rolling over the same areas repeatedly. Instead, gently move the dough in different directions to ensure even thickness and prevent sticking.
3. Achieve the Right Diameter
For a standard 9-inch pie pan, roll the dough into a 12-inch diameter to account for the depth of the pan. This extra inch will allow you to seal the edges and ensure a full crust coverage.
4. Aim for the Perfect Thickness
The desired thickness for a pie crust is around 1/8 inch. Too thin, and the crust may rip or become too fragile. Too thick, and it may not bake properly and lack flakiness.
5. Prevent Sticking
To prevent the dough from sticking to the rolling pin and work surface, lightly flour them as needed during the rolling process. This will make it easier to handle the dough and maintain its shape.
6. Utilize Helpful Tools
Using a flour shaker can be handy for lightly dusting the dough and work surface with flour during rolling. Additionally, a bench scraper can help lift and move the dough, allowing for better control.
7. Keep the Dough Cold
If the butter in the dough starts to melt and become sticky, it’s essential to return the dough to the fridge immediately. This will prevent any difficulties in handling the dough and ensure a flaky crust.
Rolling out pie dough requires patience and a gentle touch. With these tips, you’ll be able to create a beautifully rolled pie crust for your homemade delights. Remember to practice and experiment to find the perfect technique that works for you.
More Dough Than Other Recipes?
This pie crust recipe stands out from others because it calls for slightly more ingredients. But don’t worry, the extra dough is not a mistake – it’s actually an advantage! Having a little more dough than usual makes it easier to work with and allows for any mistakes or design choices you may make along the way. Plus, having extra dough is especially beneficial when working with deeper pie dishes or when attempting fancy designs.
But that’s not all. This recipe is incredibly versatile and can be used for both sweet and savory pies. So whether you’re making a classic apple pie or a savory quiche, this recipe has got you covered.
Having a bit of extra dough also ensures that there is enough to create a beautiful fluted edge or other decorative elements on your pie. These little touches can make your pie presentation truly stand out and impress your guests.
This recipe provides consistent results and a dreamy dough that is easy to roll out. The additional dough allows for light and flaky layers in the baked crust, creating a perfect pie crust every time.
Pie Crust: Butter vs. Shortening?
The debate between using butter or shortening in a homemade pie crust is a common one. Each fat has its own advantages, but for the best results, this recipe recommends using a combination of both.
Shortening adds tenderness and flakiness to the crust, creating those desirable layers. It has a higher melting point than butter, which helps the crust hold its shape and remain flaky during baking.
Butter contributes rich flavor to the crust. Its lower melting point allows it to create pockets of steam during baking, leading to a flakier texture.
By using a blend of butter and shortening, you can achieve a balance of tenderness, flakiness, and flavor in your pie crust. This recipe calls for a ratio of half shortening and half butter, but you can adjust it to suit your personal preferences.
It’s important to note that using all butter in a pie crust can be more challenging to work with, as butter is temperature-sensitive and melts more easily. However, the flavor it imparts is unbeatable.
Ultimately, the choice between butter and shortening comes down to your personal preference and desired outcome. Experiment with different ratios to find the perfect balance of flavor and texture for your homemade pie crust.
Easy All Butter Flaky Pie Crust
This all-butter flaky pie crust recipe is simple and yields consistent results. By combining flour, salt, and cold butter in a food processor until the mixture resembles coarse meal, you’re on your way to a perfect pie crust. Gradually add chilled water until the dough comes together, ensuring it holds its shape without being too crumbly or dry. Divide the dough into discs, wrap them in plastic wrap, and refrigerate for at least 30 minutes to allow the gluten to relax and prevent shrinking.
When you’re ready to roll out the dough, let it sit at room temperature for about 30 minutes to soften slightly. On a lightly floured surface, roll the dough into a 12-inch diameter for a 9-inch pie pan. Aim for an 1/8-inch thickness to achieve the desired flakiness and texture in the baked crust.
This versatile recipe can be used for both single or double-crust pies, whether you’re craving a sweet or savory filling. With its light and buttery layers, this flaky pie crust will elevate your homemade pies to a whole new level of deliciousness.
How to Blind Bake a Crust for a Single-Crust Pie
Blind baking a crust is a crucial step for certain pies, especially those with fillings that don’t require further baking. Follow these simple instructions to achieve a perfectly tender and flaky pie crust:
- Preheat your oven to the specified temperature. Place a baking sheet in the oven while it heats up. The baking sheet will help distribute heat evenly and prevent the bottom of the crust from becoming soggy.
- Roll out your pie dough and carefully transfer it to a pie dish.
- Prick the bottom of the crust with a fork. This will prevent the crust from puffing up during baking.
- Line the crust with parchment paper or foil, gently pressing it against the crust and covering the edges.
- Fill the lined crust with pie weights or dried beans. This will help the crust maintain its shape and prevent it from shrinking or bubbling up.
- Place the pie dish on the preheated baking sheet and bake for the specified time in the recipe.
- After the initial baking time, remove the weights and parchment paper/foil. Return the crust to the oven and continue baking until it turns golden brown. This step ensures that the crust is fully cooked and adds a beautiful color.
Once your crust is blind baked, it’s ready to be filled with your delicious pie filling. You can confidently create pies with a tender and flaky crust, knowing that it will hold its shape and provide the perfect base for your favorite fillings.
| Blind Baking Guide | |
|---|---|
| Preheat oven | Place a baking sheet in the oven to heat up |
| Roll out pie dough | Transfer it to a pie dish |
| Prick the bottom of the crust | Prevent puffing up during baking |
| Line the crust | Use parchment paper or foil |
| Fill the lined crust | Use pie weights or dried beans |
| Bake on a preheated baking sheet | For the specified time in the recipe |
| Remove weights and lined material | Bake until golden brown |
Conclusion
Creating the perfect tender flaky pie crust doesn’t have to be intimidating. With this easy homemade pie dough recipe, you can achieve a delicious crust that will elevate your pies to new heights. The key is to keep everything cold and work quickly to prevent the dough from becoming tough and the butter from melting.
Giving the dough proper resting time allows the gluten to relax, preventing the crust from shrinking while baking and ensuring a tender texture. Rolling out the dough to the correct thickness is also crucial for achieving a flaky crust. Whether you choose to use a combination of butter and shortening or opt for an all-butter crust, this foolproof recipe guarantees fantastic results every time.
Now, armed with these tips and techniques, you can confidently embark on your pie-making adventures. Impress your family and friends with homemade pies that feature a tender flaky pie crust. From sweet fruit pies to savory quiches, this versatile pie dough recipe will be your go-to for delicious and impressive baked treats. Get ready to indulge in the irresistible taste of homemade pie perfection!
FAQ
What makes a perfect flaky pie crust?
The key to a perfect flaky pie crust is keeping everything cold, especially the butter. Cutting the butter into small uniform pieces and using a combination of butter and shortening will also contribute to the flakiness of the crust. Proper resting time and rolling out the dough to the correct thickness are also important.
How do I make the best ever pie crust?
To make the best pie crust, keep everything cold, including the ingredients and equipment. Cut the butter into small uniform pieces and use a combination of butter and shortening. Add the right amount of water to the dough, and let the dough rest before rolling it out. Roll out the dough on a lightly floured surface to the desired thickness.
How do I cut the butter into small uniform pieces for pie crust?
You can cut the butter into small uniform pieces by grating it with a box grater or by using a food processor. Grating the frozen butter or pulsing it in a food processor until it reaches the size of peas will create evenly sized pieces of butter that will distribute throughout the dough.
How much water should I use for pie dough?
The amount of water to use for pie dough can vary depending on factors like kitchen temperature and flour brand. Start with half of the recommended amount and add more if needed. The dough should hold its shape without crumbling or being too dry. It’s best to turn the mixture out onto a work surface and press it together to determine if more water is needed.
Why is it important to give the dough a rest?
Giving the dough a rest is important for preventing shrinking while baking and achieving a tender and flaky pie crust. Resting the dough allows the gluten to relax, preventing it from snapping back to its original shape. Rest the dough for at least 30 minutes before rolling it out, and allow it to rest again after placing it in the pie dish.
How do I roll out pie dough?
Roll out the pie dough on a lightly floured surface. Keep the dough moving to avoid rolling over the same areas repeatedly. Roll the dough into a 12-inch diameter for a 9-inch pie pan, taking into account the depth of the pan. The desired thickness for the crust is about 1/8 inch. Flour the work surface, dough, and rolling pin as needed to prevent sticking.
Why does this pie crust recipe call for more dough than other recipes?
This recipe calls for more dough to make it easier to work with and allow for mistakes or design choices. Having extra dough is especially beneficial when working with deeper pie dishes or when attempting fancy designs. The recipe is versatile for both sweet and savory pies and ensures there is enough dough for fluted edges or other decorative elements.
Should I use butter or shortening in pie crust?
This recipe recommends using a combination of both butter and shortening for the best results. Shortening adds tenderness and flakiness, while butter contributes flavor. The ratio can be adjusted to personal preference, but using all butter can be more temperature-sensitive. The choice between butter and shortening depends on personal preference and desired outcome.
How do I make an easy all-butter flaky pie crust?
To make an easy all-butter flaky pie crust, combine flour, salt, and cold butter in a food processor until the mixture resembles coarse meal. Gradually add chilled water until the dough comes together. Divide the dough into discs, wrap in plastic wrap, and refrigerate for at least 30 minutes. Roll out the dough on a floured surface and use for sweet or savory pie fillings.
How do I blind bake a crust for a single-crust pie?
To blind bake a crust for a single-crust pie, preheat the oven and place a baking sheet in the oven while it heats up. Prick the crust with a fork and line with parchment paper or foil. Fill the crust with pie weights or dried beans. Bake on the preheated baking sheet for a specified time, then remove the weights and continue baking until golden brown.