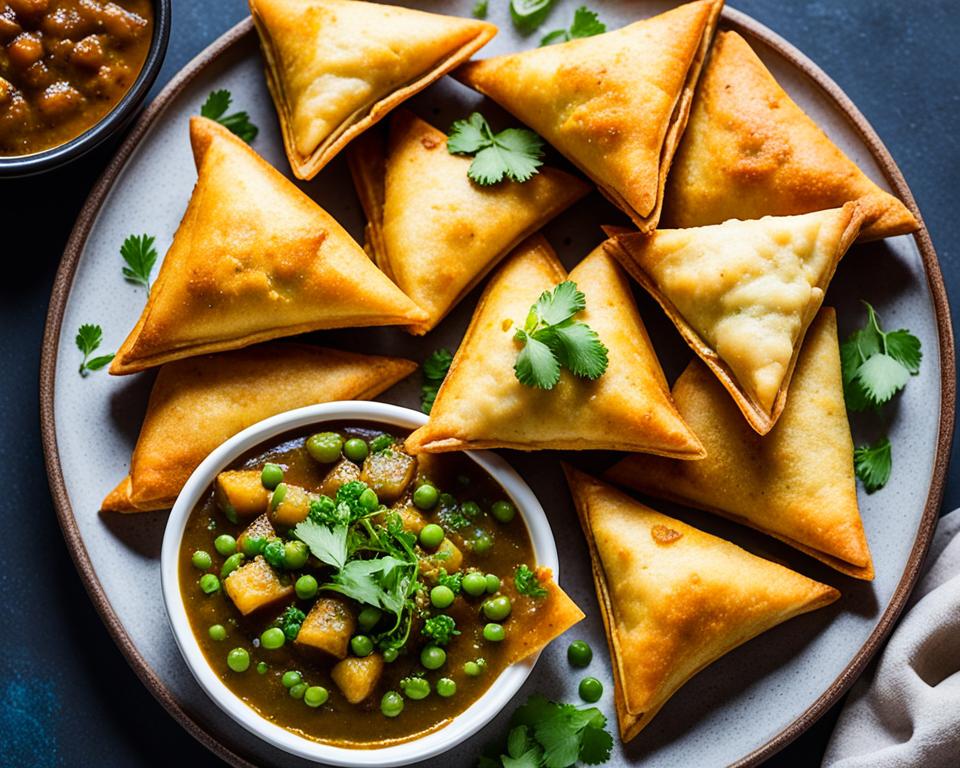
There’s nothing quite like delving into a warm, crispy, flaky samosa to elevate your snack time to an epicurean delight. These savory pastries have journeyed from the ancient Middle East to the bustling streets of India and beyond, becoming a favorite amongst snack aficionados. If the thought of creating this perfect snack in the comfort of your home is alluring, you’re in for a treat. With easy flaky samosas recipes in hand, one can effortlessly replicate the culinary artistry of homemade samosas.
Understanding how to expertly mix, fill, and fry these delightful pastries is key. From a floured rolling pin to the sizzle of hot oil, every step is a testament to the love of cooking. So whether you’re a novice or an adept chef, preparing a batch of these heavenly triangles is within your reach. Here’s your opportunity to discover how to make samosas at home, promising a result that’s as mouth-watering as any street vendor’s fare.
Key Takeaways
- Understanding the layers of history behind samosas adds depth to the cooking experience.
- Correctly blending oil and flour is crucial for achieving a flaky samosa crust.
- The art of samosa making is easily attainable at home with the right guidance and ingredients.
- Authentic spices are the secret to samosas with bold and memorable flavors.
- Serving samosas with complementary chutneys elevates them to the perfect snack category.
- Frying samosas at a controlled temperature ensures a non-oily, delightful crunch.
- Homemade samosa recipes provide a personalized touch to this universally beloved snack.
The Rich History of Samosas
Unwrapping the history of samosas uncovers a culinary tale that began in the ancient Middle East. These savory pastries lit up the Silk Roads, carried by the bustling trade, and infused into the South Asian gastronomic scene. As merchants traveled, they introduced their exotic dishes to new lands, and the samosa became a signature snack throughout the Indian subcontinent. An authentic samosa recipe from this region often cradles a hearty potato filling within its golden, flaky embrace.
The samosa’s evolution is a testament to its cultural adaptation, as it was tailor-made to complement local tastes and festivities. Over time, this delicious journey shaped what is known today as the quintessential Indian samosa recipe. From the sun-drenched stalls of local bazaars to the luxurious banquet tables during Holi and Ramadan, the samosa has cemented its status as more than just a snack; it has become a cherished piece of India’s social and cultural fabric.
Origins from the Middle East
Exploring the Middle Eastern origins of the samosa, one might discover its ancestral prototype—sambosa. This historic relative was an integral part of the diet in Middle Eastern cuisine, commonly filled with meats and nuts, showcasing the region’s rich tapestry of flavors and ingredients. As the recipe meandered through time and geography, each locale imbued its own essence into the dish, creating a spectrum of tastes under the umbrella of the samosa lineage.
Adaptation in India
The samosa’s voyage brought it to the Indian coasts, where it underwent a transformation, aligning with the vegetarian ethos prevalent in many parts of the country. The traditional spiced potato stuffing emerged, leading to an Indian adaptation that found favor with the diverse palate of the populous. It became synonymous with warmth and festivity, often accompanying moments of joy and togetherness. Thus, the Indian samosa emerged as a culinary symbol of the country’s flavor profile and ingenuity.
Defining Taste: What Makes Samosas a Popular Choice
The secret behind the irresistible allure of the popular Indian snack, the samosa, lies in its exquisite balance of textures and flavors. The defining taste of this beloved snack springs from its signature spiced filling, which can range from the classic zesty potatoes to a rich medley of minced meat and vegetables. Encapsulated within a perfectly crispy deep fried pastry shell, samosas win over palates with their delightfully satisfying crunch and robust flavors, making them universally admired across continents.
Imagine biting into the warmth of freshly prepared samosas, their rich flavors unleashed with each bite. This experience is the culmination of culinary expertise and tradition that transforms simple ingredients into a snacking sensation. Historically cherished and present-day adored, samosas have earned their place at the table of gastronomic excellence.
Here’s a closer look at the elements that contribute to the samosa’s defining characteristics:
- Crunchy Texture: The unmistakable crunch of a samosa is the result of the dough deep-fried to a perfect golden hue, achieving a flaky texture that’s both audible and palatable.
- Spiced Filling: Whether vegetarian or non-vegetarian, the filling determines the samosa’s character. A melange of spices and herbs beautifully merges with the main ingredients, delivering a punch of taste in every bite.
- Versatility in Varieties: Samosas cater to a diverse array of taste buds by offering an expansive range of fillings. From potatoes and peas to spiced keema, there’s a samosa for everyone.
- Cultural Icon: More than just a snack, samosas represent a slice of culture, enjoyed during festivals, family gatherings, and as a staple street food.
To truly comprehend what makes samosas such an exquisite selection, one might consider the delicate process of preparation that goes into each triangular parcel. The balance of ingredients and spices has been perfected over generations, culminating in the modern-day iteration savored with enthusiasm and delight, reaffirming the samosa’s position as a defining taste of globetrotting cuisine.
Indeed, the samosa is a testament to the eternal gastronomic truth – simplicity, when executed with authenticity and quality, yields the most memorable of flavors. So it comes as no surprise that this deep fried pastry of humble origins has risen to prominence as a cornerstone of comfort food, relished by millions as the perfect teatime companionship or a savory starter.
Choosing the Right Ingredients for Flaky Samosas Recipes
To craft the quintessential samosa with that revered flaky texture and robust flavor, one must begin with a foundation of premium ingredients. This begins undoubtedly with the base of any samosa pastry – all-purpose flour, known in the Indian culinary sphere as maida. It’s the canvas upon which the art of the samosa is painted, ensuring the pastry acquires the requisite crunch and delicate layers.
All-Purpose Flour or Maida: The Base Ingredient
At the heart of a crispy samosa pastry is all-purpose flour. Its versatile, finely milled texture makes it the ideal choice for achieving that desirable crispiness on the outside, while maintaining a soft bite within. Flour acts as the structural element, holding together spices and fillings and transforming into that perfect golden shell when fried.
Authentic Spices for Flavorful Samosas
What elevates a good samosa to a great one is, quite simply, the spices. The best samosa filling is a harmonious amalgamation of authentic spices that permeate the potatoes or meat and invigorate one’s palate with each bite. Garam masala offers warmth, amchur imparts a tart edge, and the ancient carom seeds, or ajwain, introduce a whisper of pungent sophistication to the pastry.
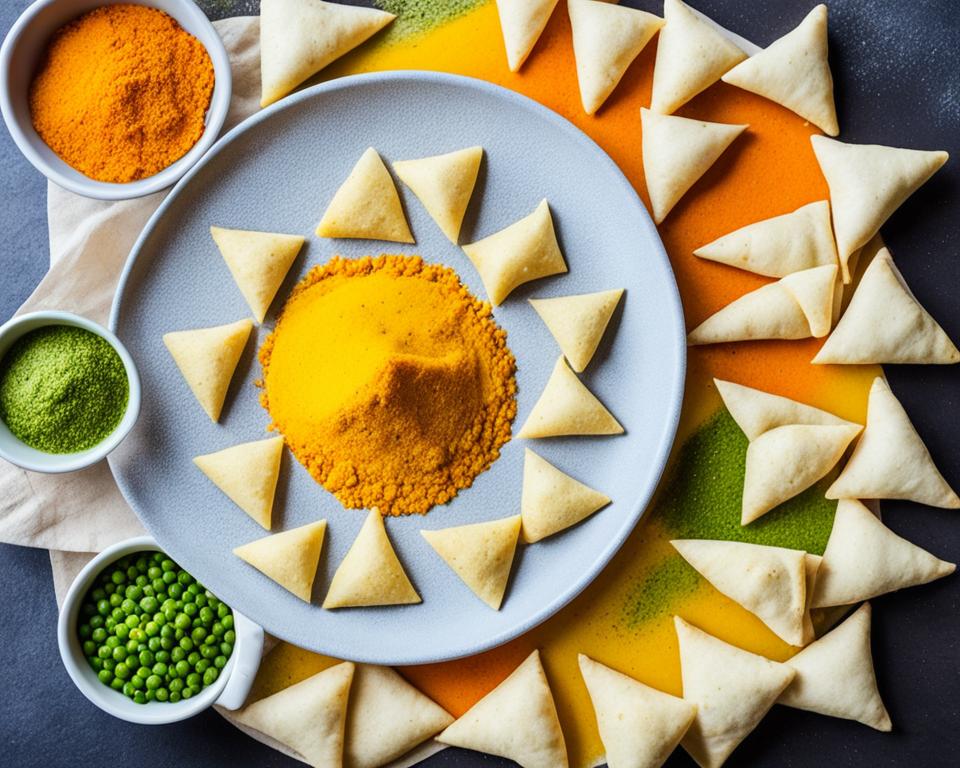
A well-balanced vegetarian samosa recipe wouldn’t dare neglect the base — a proficient mix of carom seeds, lending a subtle but memorable flavor to the crust, and a filling that’s been tenderly tossed in the likes of Kashmiri red chili for color, cumin for earthiness, and coriander powder for a fresh, citrus undertone. Together, they create an experience that celebrates Indian culinary traditions while delighting the contemporary gourmand.
| Filling Core Ingredients | Commonly Used Spices | Pastry Base |
|---|---|---|
| Potatoes | Garam Masala | All-Purpose Flour (Maida) |
| Green Peas | Amchur | Oil or Ghee |
| Meat (Keema) | Ajwain | Water |
| Carrots, Corn (optional) | Kashmiri Red Chili, Cumin, Coriander | Salt |
Armed with the best ingredients, the culinary artist can confidently venture into the realm of samosa-making, with reassurances of delivering an engaging palette of flavors. These elements, when chosen with intention and knowledge, set the stage for a samosa experience that is faithful to its rich cultural past, sparking joy and satiety in hungry diners everywhere.
The Art of Making the Perfect Samosa Crust
Creating the quintessential flaky samosa crust goes far beyond following a recipe; it’s a dance of precision and balance where every ingredient and every step plays a pivotal role. It begins with the right mix—a meticulous flour to fat ratio that dictates the texture and taste of the final crust. Let’s delve into the subtleties that make the crust of a samosa more than just an outer shell, transforming it into a delicate, crispy samosa pastry that perfectly envelopes the flavorful filling within.
Flour to Fat Ratio
Achieving the perfect samosa dough is akin to an alchemist’s task: convert simple elements into gold. The secret lies in the delicate balance of flour to the fat within the dough. Too much fat, and the dough will become oily; too little, and you lose that coveted flakiness.
“The magic is in the mixture where every grain of flour is kissed by just enough fat to create layers of crispy samosa pastry when it hits the oil.”
Incorporation of Oil or Ghee
The second act of this culinary ballet involves the thorough incorporation of oil or ghee into the flour. This step must be undertaken with patience and care, coaxing the fat into every crevice of the flour to ensure a crumbly, breadcrumb-like texture before water even makes its entrance. This is the foundation of what will become an exquisitely flaky samosa crust.
- The dough should be malleable yet firm, elastic enough to shape, yet tight enough to hold.
- A sign of well-incorporated fat is the dough holding together without crumbling when pressed in the palm of your hand.
- A light touch is essential—the fat should be worked in just until it is evenly distributed, never overmixed, maintaining the dough’s layered potential.
| Ingredient | Function | Tip |
|---|---|---|
| All-Purpose Flour | Provides structure | Use a scale for precision |
| Oil or Ghee | Creates flakiness | Incorporate evenly |
| Water | Binds dough | Add slowly, as needed |
| Salt | Enhances flavor | Measure accurately |
Patience in the preparation of samosa dough translates to delight in each bite of the finished product. The methodical process may seem demanding, but it promises indisputable rewards: a shell that audibly snaps under the slight pressure of the teeth, revealing the succulent treasures it crisply encases.
Creating a Flaky Samosa Pastry
The journey to crafting homemade samosas begins with the basics: creating a delicately flaky samosa pastry. For those in pursuit of culinary excellence, a well-defined process is critical, starting with the inception of the pastry dough. Let’s explore the crucial stages that contribute to an impeccably textured samosa.
Ideal Dough Texture
Integral to the success of a flaky samosa pastry is achieving the ideal dough texture. This precise consistency, somewhere between firm and pliable, is essential for the hallmark crispness of the samosa’s exterior. A dough that’s too soft can result in samosas lacking their characteristic snap, while one that’s overly rigid may lead to a tough and unyielding crust.
Kneading and Resting: A Critical Step
The process of kneading and resting the dough is no less important than the ingredients themselves. This technique firms up gluten structures, giving the samosa crust the strength to envelop its filling securely, while the resting period allows the dough to hydrate fully and become more malleable. It’s this dedicated time that ensures easy rolling and a uniform thickness when it’s time to shape your samosas.
| Step | Description | Importance |
|---|---|---|
| Measure Ingredients | Begin by precisely measuring flour, fat (oil/ghee), and water. | Accuracy here sets the foundation for texture and taste. |
| Blend Fat and Flour | Incorporate fat into the flour to create a crumbly texture. | Essential for the flakiness of the pastry. |
| Knead Gently | Knead the mixture into a stiff dough without overworking. | Prevents the formation of a tough crust. |
| Rest the Dough | Let the dough rest to allow moisture distribution and relax gluten. | Results in a pliable dough that’s easier to handle and shape. |
By meticulously observing these methods, one can confidently ascend to new heights of samosa-preparation artistry. It is this attention to the finer details that crowns a cook not merely a maker of homemade samosas, but a crafter of culinary memories, stamped with the indelible mark of a beautifully browned, flaky samosa pastry.
Mastering Samosa Filling: From Potatoes to Keema
The heart of every samosa is its filling, and aficionados agree that the best samosa filling strikes a balance between spice and sustenance. The foundation for most samosa fillings is the spicy potato filling, a blend that’s cherished for its ability to capture the essence of Indian cuisine. Picture the humble potato, boiled to fork-tender perfection, then generously seasoned with a symphony of spices before nestling into its flaky pastry abode.
For the keema samosa, the process mirrors that of its vegetarian counterpart, yet here, the savory minced meat seizes the spotlight. The meat is coaxed into a rich mélange of flavors with carefully chosen herbs and spices, cooked to savory excellence. Whether it’s the vegetarian favorite or its hearty meat-filled cousin, each recipe promises a flavorful filling that complements the delicate pastry crust.
“To master the art of samosa filling is to weave a tapestry of flavors that come alive with each bite.”
Creating the perfect samosa requires a blend of culinary precision and creative flavor pairing. With the essence of traditional recipes and a touch of personal flair, the filling itself becomes a centerpiece that can transport anyone straight to the bustling streets of India.
| Ingredient | Role | Suggested Spices |
|---|---|---|
| Potatoes | Base for vegetarian filling | Cumin, garam masala, amchur (dried mango powder) |
| Minced Meat (Keema) | Base for non-vegetarian filling | Coriander, turmeric, chili powder |
| Green Peas | Texture and sweetness | Pair with potatoes or keema |
| Herbs (Cilantro, Mint) | Aroma and freshness | Garnish for filling before sealing |
Mindful preparation of each component ensures a harmonious blend, resulting in an irresistibly flavorful filling that’s synonymous with the best homemade samosas. Whether it’s a traditional family gathering or a spontaneous get-together, these stuffed delights are sure to impress and satiate all who partake in their flavorful journey.
Flaky Samosas Recipes: A Step-by-Step Guide
Embarking on the culinary journey of how to make samosas at home encapsulates tradition and innovation in one culinary experience. The craft of samosa-making invites both novice and seasoned chefs to delve into the intricate process of creating this savory delight. From mixing the dough to mastering the art of a well-constructed filling, every step contributes to the creation of the perfect samosa. Follow this comprehensive, step-by-step samosa guide to ensure your samosas are not only flavorful but also boast the ideal texture and form.
Preparing the Dough and Filling
In the first phase of preparing flaky samosa pastry, attention to detail is key. The dough’s consistency will set the stage for the overall texture. After the initial mix, allow the dough to rest, which is crucial for achieving optimum pliability. Subsequently, roll out the dough to a medium thickness before slicing it into semi-circles—a foundational step for the iconic triangular shape.
The samosa’s soul lies in its filling, which carries the essence of flavor within the crisp outer shell. Aromatic spices blend with either tender spicy potatoes or succulent keema to create a filling that’s both hearty and heartwarming.
Shaping and Sealing Technique
The artistry of shaping and sealing samosas is akin to a rite of passage for any aspiring samosa connoisseur. Transforming the dough into sturdy cones ready to cradle the filling requires deft hands and a gentle touch. Once filled, a meticulous seal ensures that none of the precious contents escape during the frying process. With correct shaping and sealing, your samosas will not only taste divine but also present beautifully with a golden, flaky allure.
Following these steps closely will result in perfectly formed samosas, ready to take the plunge into a warm bath of oil, emerging as the beloved snack that has captured hearts and palates across the globe. A well-sealed samosa guarantees that each bite is an explosion of flavor, encased within a meticulously crafted, flaky exterior. Whether shared with loved ones or enjoyed solo, these homemade samosas are sure to leave a lasting impression.
| Stage | Task | Details |
|---|---|---|
| 1. Dough Preparation | Mixing Ingredients | Combine flour, fat, and water to form a stiff dough |
| 2. Resting Period | Hydrating the Dough | Allow the dough to rest to achieve elasticity |
| 3. Rolling & Cutting | Forming Semi-Circles | Roll to medium thickness and cut into semi-circles |
| 4. Cone Formation | Shaping the Dough | Shape into cones and prepare for filling |
| 5. Filling | Adding Spice Blend | Fill cones with flavorful potato or keema filling |
| 6. Sealing | Securing Edges | Properly seal the edges to lock in the filling |
The perennial allure of the samosa is undeniable, and by following this guide, samosa crafting at home transitions from daunting task to delightful hobby. The satisfaction that comes from folding, filling, and frying these triangular treats is unparalleled, and the end result is a warm invitation to flavors that resonate with homemade comfort and authenticity. Revel in the pleasure of creating—and consuming—these pockets of joy.
Samosa Cooking Techniques: Frying vs. Baking
When it comes to preparing samosas, cooking enthusiasts can employ different techniques, each impacting the final texture and healthfulness of these beloved snacks. One can opt for the traditional route of frying samosas, which results in a golden and crispy fried samosa with that classic taste and texture. Alternatively, figuring out how to bake samosas offers a lighter version, better suited for those searching for a healthier snack.
Secrets to a Crispy Fried Samosa
The key to achieving a crispy fried samosa is to carefully control the temperature of the oil. Starting with oil that is moderately hot allows the samosa pastry to cook through slowly, sealing its flaky layers without absorbing excess oil. Gradually increasing the heat as the pastry firms up ensures the final product is both beautifully golden and satisfyingly crunchy.
| Temperature Stage | Heat Level | Result |
|---|---|---|
| Initial Submersion | Moderately hot | Pastry begins to set without browning too quickly |
| Mid-Cooking | Medium | Pastry cooks through and becomes flaky |
| Final Stage | Medium-to-high | Pastry achieves golden-crispy texture |
How to Bake Samosas for a Healthier Option
Baking samosas provides a fantastic alternative for those looking to minimize their oil intake while still enjoying this traditional snack. The secret to baking samosas lies in using puff pastry sheets to replicate the layers of flakiness and brushing them with oil before placing them in the oven. This method produces a healthier option with a pleasing crispness, albeit slightly different from its fried counterpart.
- Preheat the oven to the recommended temperature.
- Prepare samosas using puff pastry sheets as the base.
- Generously brush each samosa with oil to ensure a crispy outcome.
- Bake until they turn golden brown and puff up.
The choice between frying or baking predominantly boils down to preference and dietary considerations. While nothing competes with the traditionally crispy fried samosa in terms of authenticity, baked samosas earn their merit through reduced fat content and a lighter feel, making both methods exemplary in their own respects.
Chutneys and Dips: The Ideal Samosa Companions
What elevates the satisfying crunch and savory filling of a samosa to new heights of flavor? The answer lies in the tantalizing array of samosa chutneys and dips. These vibrant accoutrements enrich the samosa experience, melding harmoniously with its spices, and providing a depth of flavor that is both complex and irresistible. Whether it’s the refreshing zest of mint chutney, the sweet and tangy delight of tamarind chutney, or the bold and spicy note of coriander chutney, each contributes a unique profile, essential to the art of enjoying samosas with dipping sauces.
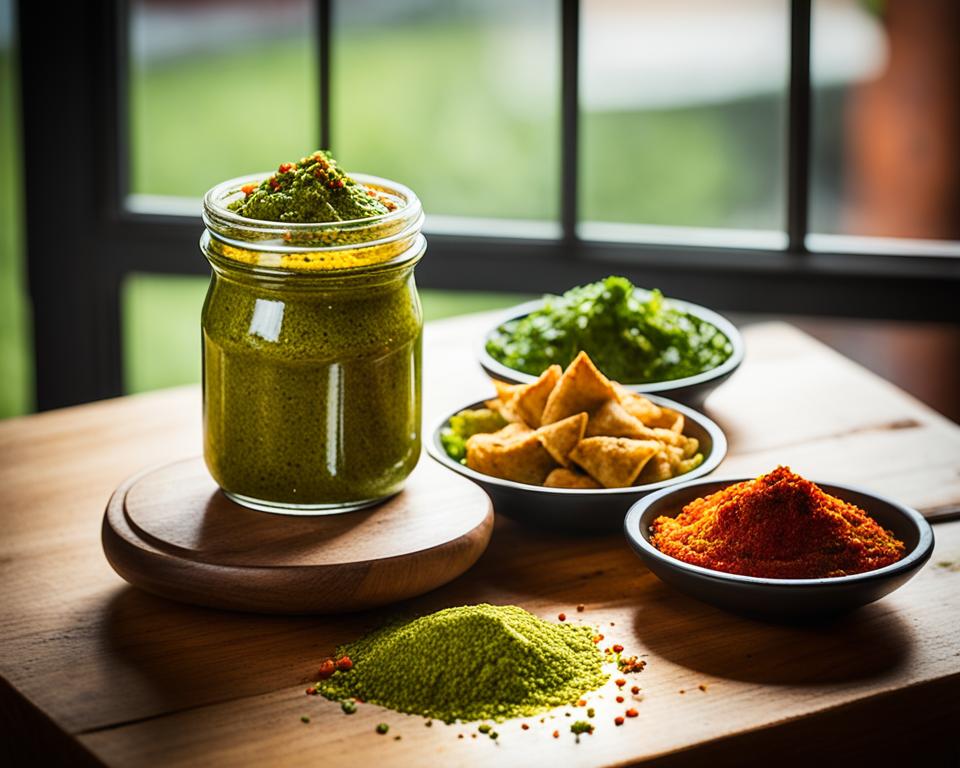
While indulging in the handcrafted layers of a samosa, one can’t help but imagine the dip that completes its taste. The chutneys are not mere afterthoughts; they are carefully crafted to complement the filling, ensuring each bite is a balance of texture, heat, and palate-cleansing freshness. Highlights like the mint chutney glisten with herbs and citrus, while the tamarind chutney enriches with its signature jaggery-sweetened depth.
| Chutney Type | Taste Profile | Ingredient Highlight |
|---|---|---|
| Mint Chutney | Cool and Refreshing | Fresh Mint Leaves |
| Tamarind Chutney | Sweet and Sour | Tamarind Pulp |
| Coriander Chutney | Spicy and Tangy | Coriander Leaves |
A testament to the versatility of samosa chutney recipes, one finds that they cater to a wide range of preferences, from those favoring intense, fiery flavors to others seeking a gentler, sweeter note. Little wonder then that a platter of samosas with dipping sauces often features a rainbow of these delectable dips, each vying for attention, and each transforming the samosa into a new taste experience with every dab and dunk.
In the end, samosa chutney and dips exemplify the culinary philosophy that great food is about contrasts and complements. Here, the crunchy whispers of the samosa pastry find their voice alongside the robust song of the chutneys. And as any samosa aficionado will testify, this union of taste and texture is not just food; it is a flavor symphony in which every note is savored and every culinary nuance appreciated.
Avoiding Common Pitfalls in Samosa Preparation
To achieve the perfect non-oily samosa, one that is delightfully crispy and free of unwanted sogginess or bubbles, certain precautionary measures in the preparation process must be meticulously observed. The art of samosa-making is nuanced, involving a balance of the right techniques and ingredient proportions to avoid these common culprits that can mar the culinary perfection of this savory classic.
Ensuring the Samosa Crust Isn’t Oily
The key to a non-oily samosa crust lies in the precise ratio of fat to flour and just the right amount of water. Too much water leads to a soft, pliable dough, which inevitably absorbs more oil and becomes greasy upon frying. Conversely, a stiff dough, prepared with the perfect balance of ingredients, fries to a beautiful, crispy samosa crust, evoking the iconic texture samosa lovers seek.
Preventing Sogginess and Bubbles
Preventing sogginess and avoiding bubbles on your samosa crust are both matters of temperature control and patience. When samosas are immersed in oil that’s too hot, the dough faces a harsh environment that causes it to blister and develop bubbles, while also potentially remaining undercooked inside. Frying the samosas at a low temperature allows the dough to cook thoroughly and the texture to remain consistent, ensuring each bite is as crispy as the last.
| Common Pitfall | Problem | Solution |
|---|---|---|
| Oily Crust | Dough has excess water | Adjust water in the dough for stiffness |
| Sogginess | Insufficient frying temperature | Fry at lower temperature to cook evenly |
| Bubbles on Crust | Oil is too hot when frying | Maintain a moderate oil temperature |
Customizing Samosas: Vegan and Non-Vegetarian Variants
When it comes to samosa customization, the versatility of this beloved snack is evident in its ability to cater to a variety of dietary preferences. Crafting the perfect vegan samosa recipe involves replacing traditional ghee with vegetable oil, while showcasing a rich array of vegetable fillings such as spiced potatoes, carrots, and peas. The vegan variant embodies inclusivity and health-conscious indulgence without compromising on taste.
On the other hand, non-vegetarian samosa options provide a robust flavor profile with fillings like seasoned minced meat, creating a deeper, meaty experience within the crispy pastry shell. This adaptability makes samosas a comprehensive treat, whether you adhere to a plant-based diet or prefer the protein-richness of meat.
Here’s a breakdown of how to modify samosa fillings for diverse tastes, showcasing that customizing samosas not only reflects personal dietary choices but also the rich culinary tapestry they represent:
| Vegan Samosa Ingredients | Non-Vegetarian Samosa Ingredients |
|---|---|
| Spiced potatoes with turmeric and mustard seeds | Minced chicken or lamb with garam masala |
| Green peas and diced carrots | Ground beef spiced with cumin and coriander |
| Drawn from locally-sourced vegetable markets | Chosen from fresh butcher cuts or organic meat sources |
Whatever your lifestyle and taste preferences may be, the journey of creating the perfect batch of samosas is a delightful exploration of flavors, textures, and culinary creativity. Indulge in the art of customizing samosas and you’ll discover a whole new world of snacking that’s appetizing, memorable, and truly your own.
Preserving Samosas: Freezing and Reheating Tips
Whether made at home or bought from the store, samosas are a delightful treat that can be preserved for later enjoyment. For those who enjoy the convenience and satisfaction of having samosas on hand, understanding the proper techniques for freezing samosas and later reheating samosas is essential. It is a straightforward process that ensures your samosas maintain their signature taste and texture, making them ready to serve at a moment’s notice.
Freezing samosas is a practical way to extend their shelf life. Whether you’re preparing traditional Indian samosas with spicy potato filling or keema samosas with minced meat, ensure they are completely cool before freezing. Once shaped and filled, place the samosas on a baking sheet lined with parchment paper, not touching each other, to freeze individually. After they’re solidly frozen, transfer them to a freezer-safe bag or container. This prevents them from sticking together and makes it easy to take out only as many as you need at a time.
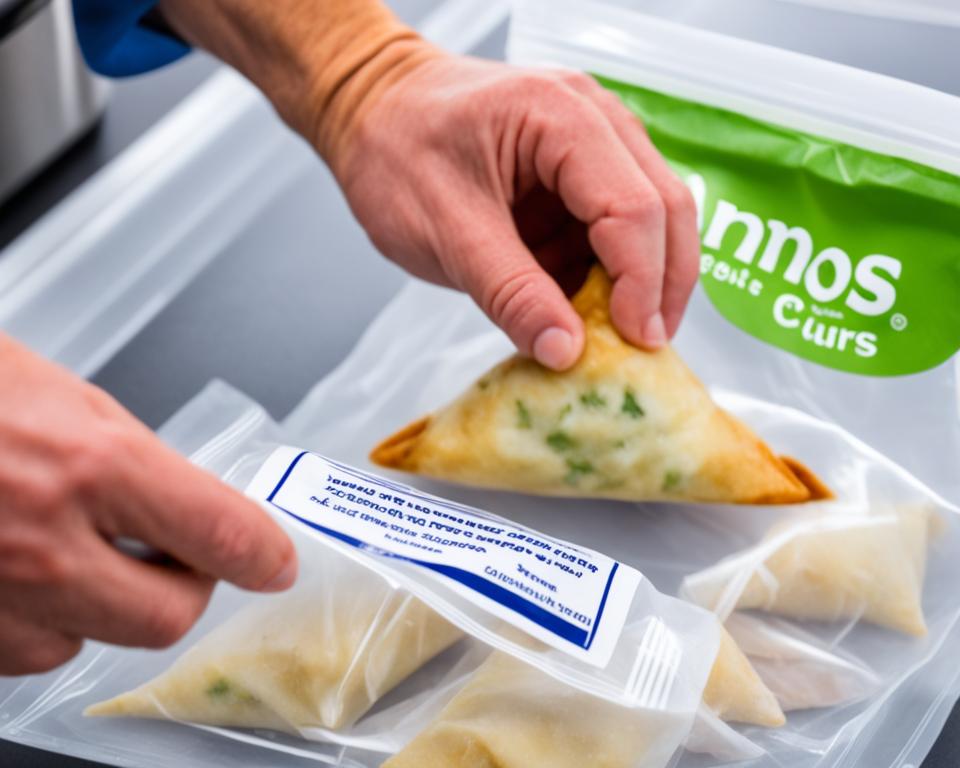
To preserve the homemade samosas after cooking, let them cool thoroughly before following the same freezing steps. The goal when freezing samosas is to capture and lock in freshness, thereby preserving homemade samosas in a state closest to their original form.
To reheat, gently thaw the samosas in the refrigerator and then bake or air-fry to bring back the fresh, crispy feel.
- Preheat the oven or toaster oven to 350°F (175°C).
- Place the thawed samosas on a baking sheet.
- Heat for 10-15 minutes, or until fully heated through and crispy.
An alternative reheating method is the air fryer, which requires less time and can yield a crispy texture without needing to preheat. However, the method you choose for reheating samosas will depend on your texture preference and the appliances at your disposal.
| Freezing | Reheating |
|---|---|
| Before cooking: Freeze on a tray, then store. | Oven or toaster oven: Preheat to 350°F, heat until warm and crisp. |
| After cooking: Cool completely, freeze similarly. | Air fryer: No need to preheat, quick and efficient. |
| Storage: Use freezer-safe bags or containers. | Microwave: Quick but may soften the crust. |
To sum up, the keys to preserving homemade samosas through freezing are simple: individual freezing to avoid sticking, using appropriate containers, and labeling with dates for reference. When it comes to reheating, gently warming in an oven or toaster oven can replicate the fresh, crisp texture of just-made samosas. Such convenience makes the samosa an ever-ready delight for snack lovers and ensures that every bite delivers the perfect crunch and flavor expected of this beloved snack.
Exploring Regional Samosa Variations
The Indian samosa, with its flaky crust and savory filling, is not just a delectable treat; it’s a canvas for regional creativity. Across the Indian subcontinent, regional samosa variations exemplify the cultural diversity and culinary inventiveness that enrich local cuisines. From filling to form, the samosa adapts to local tastes while maintaining its identity as an iconic Indian samosa recipe.
In Northern India, for instance, the classic spiced potato filling reflects the region’s agricultural abundance, while Southern India might infuse their samosas with aromatic spices and coconut. The Eastern states often indulge in samosas filled with cabbage, cauliflower, and sometimes incorporate fish, a staple in their diet. The Western regions are known to experiment with sweet and savory combinations, often indicative of the geographic locale and the vibrant mix of flavors associated with it.
| Region | Distinctive Filling | Notable Spices | Typical Pairing |
|---|---|---|---|
| Northern India | Potatoes and peas | Garam masala, cumin | Mint chutney |
| Southern India | Coconut, curry leaves | Mustard seeds, curry leaves | Coconut chutney |
| Eastern India | Cabbage, cauliflower, fish | Nigella seeds, turmeric | Tamarind chutney |
| Western India | Sweet raisins, nuts | Amchur (dried mango powder), asafoetida | Coriander chutney |
Despite these differences, one common thread remains—the integral technique of perfectly folding and frying to achieve that universally adored crispness. This exploration into the various regional samosa variations is more than just a journey of taste; it’s a celebration of how a simple snack like the samosa can be incredibly versatile, serving as a testament to India’s rich and varied food heritage.
As the samosa persists in its journey across borders and palates, enthusiasts continue to be captivated by its ability to harmonize with regional ingredients and tastes. Whether it’s the classic potato-filled version or one that’s brimming with minced meat or inventive vegan adaptations, the samosa’s journey is ongoing. And for those who relish in the savory delights of this traditional Indian snack, the myriad of regional samosa variations presents an endless array of flavors to discover and enjoy.
- North India: Famed for the ‘Punjabi samosa’, generously stuffed with spiced potatoes and peas.
- South India: Offers a spicy kick with chilies and unique flavors like curry leaves and mustard seeds.
- Eastern India: Encases intricate fillings that may include ingredients like cauliflower, paneer, and sometimes fish.
- Western India: Notable for including sweet elements such as raisins or even a hint of jaggery in their fillings.
Discovering the regional samosa variations encourages appreciation for the regional subtleties that contribute to India’s larger culinary narrative. As one savors the nuances from one region’s iteration to the next, it becomes evident why the samosa is not just a dish but a cultural icon, lovingly embraced in countless Indian homes and beyond.
Conclusion
The journey to crafting homemade samosas culminates not just in the creation of perfect snacks, but in the unfolding of a storied tradition in the kitchen. By carefully kneading the dough to its optimal stiffness, choosing fillings that resonate with the rich tapestry of spices, and mastering the delicate process of frying or baking, one unlocks the secrets to samosa perfection. These savory treasures, which have traversed continents and centuries, remain a testament to culinary heritage and creativity.
Unlocking the Secrets to Homemade Samosa Perfection
Samosa perfection is an art, where every ingredient serves a purpose, and timing is of the essence. For those enamored by the allure of a warm, flaky crust encasing a spicy, aromatic filling, the various techniques detailed throughout offer guidance to creating sublime homemade samosas. These pastries not only bridge cultural gaps but also serve to remind us that some of the most delightful culinary experiences are borne out of patience and passion.
Serving Suggestions and Final Thoughts
When it comes to serving suggestions, samosas rise from being mere snacks to becoming the star of the gastronomic show. Served alongside vibrant chutneys and complemented by a steaming cup of chai, they offer an immersive taste of tradition and conviviality. With the insights provided, aspiring cooks can now confidently prepare and savor homemade samosas that rival any savored in bustling markets or esteemed eateries. Across the United States, these triangular delights continue to captivate food lovers, affirming their place as a beloved indulgence in any culinary repertoire.
FAQ
What is the origin of samosas?
The samosa has its origins in the Middle East and was introduced to the Indian subcontinent by merchants and travelers. Over time, it became a popular snack across the region, especially in India, where it was adapted to local tastes and ingredients.
What are the key ingredients for making flaky samosas?
The key ingredients include all-purpose flour or maida for the dough, and a range of authentic spices like garam masala, amchur, and carom seeds for the filling. A proper ratio of flour to fat is essential for achieving a flaky samosa crust.
How do I ensure my samosa pastry is crispy and flaky?
To guarantee a crispy and flaky pastry, be meticulous with the dough’s fat to flour ratio, evenly incorporate oil or ghee, and allow the dough to rest before rolling and shaping. Additionally, fry the samosas at a moderate temperature to achieve the desired texture.
Can I bake samosas instead of frying them?
Yes, samosas can be baked for a healthier alternative. To bake, preheat your oven and consider using puff pastry sheets for extra flakiness. Brush the samosas with oil before baking to help achieve a crisp finish.
How can I prevent my homemade samosas from becoming oily?
To avoid oily samosas, ensure the dough is not too soft, use the correct amount of water and fat, and fry them at the right temperature. If the oil is too hot, the samosas will cook too quickly on the outside while remaining uncooked inside.
What fillings can I use for vegetarian or vegan samosas?
For vegetarian or vegan samosas, you can use a spiced potato and pea filling. Just ensure to substitute ghee with vegetable oil. You could also explore using other vegetables like carrots or cauliflower, along with traditional spices.
How do I preserve samosas and reheat them later?
To preserve samosas, freeze them after shaping and before cooking. When ready to enjoy, bake or fry them straight from the freezer. Reheat cooked samosas in an oven or toaster oven to restore their crispy texture.
Can you suggest some good dipping sauces for samosas?
Absolutely, classic dipping sauces for samosas include mint chutney, tamarind chutney, and coriander chutney. Each sauce complements the flavors of the samosa with either a tangy, spicy, or sweet profile.
How do I prepare the perfect samosa dough?
To prepare the perfect samosa dough, mix all-purpose flour with the right amount of fat, such as ghee or oil, until the mixture resembles breadcrumbs. The dough should be stiff and then allowed to rest to ensure elasticity and the ideal texture for rolling and shaping.
Are there different types of samosas found across India?
Yes, there are regional variations of samosas across India, reflecting the diversity of Indian cuisine. For example, samosas from the northern regions typically contain spiced potatoes, while other regions may include minced meat or lentils.
What is the best way to shape samosas?
The traditional way to shape samosas is to roll the dough out, cut it into circles or semi-circles, and then form each piece into a cone. Fill the cone with the prepared stuffing, then fold and seal the edges securely to ensure the filling doesn’t leak during frying or baking.
How can I achieve a less oily but still moist filling?
To achieve a moist but less oily filling, cook your ingredients, such as spiced potatoes or minced meat, until they are dry enough so as not to make the pastry soggy. When preparing the filling, make sure to drain off any excess fat or liquid.
Can samosas be made with meat fillings?
Yes, samosas can be filled with minced meat, commonly known as keema. The minced meat is seasoned with a blend of spices and cooked before being encased in the pastry.
What are some tips for deep-frying samosas?
When deep-frying samosas, start with moderately hot oil and then gradually increase the heat. This helps cook the samosas evenly and ensures a crispy exterior. Fry in small batches to maintain the oil temperature and avoid overcrowding the pan.

