Welcome to our comprehensive guide that will make baking simple and enjoyable for beginners. If you’ve always wanted to try your hand at baking but felt intimidated, this article is perfect for you. We’ll provide you with easy baking recipes, beginner-friendly baking tips, and step-by-step instructions to help you get started on your baking journey.
Whether you have a sweet tooth and want to create decadent cakes or you’re more into savory treats like bread, we have you covered. Our guide is designed to help you gain confidence in the kitchen and create delicious baked goods that will impress your family and friends.
With our easy baking recipes, you’ll be able to whip up delectable delights in no time. From fluffy cupcakes to gooey brownies, we have recipes that cater to every taste bud. You don’t need to be a seasoned baker to achieve great results – our recipes are simple and beginner-friendly.
Key Takeaways:
- Start your baking journey with easy recipes that cater to beginners.
- Use our beginner-friendly baking tips to gain confidence in the kitchen.
- Follow step-by-step instructions to ensure success in every bake.
- Don’t be afraid to experiment and have fun with your baking creations.
- Remember, practice makes perfect – keep baking and improving your skills!
The Best Baking Kit: What to Buy and Why
When it comes to baking, having the right tools is essential for success. Whether you’re a beginner or an experienced baker, investing in a quality baking kit can make all the difference. To help you make the right choice, we’ve compiled a review of the best baking kit, recommended by former GBBO contestants.
This baking kit is carefully curated with all the essential tools you need to create delicious baked goods. It includes:
| Essential Baking Tools |
|---|
| Rolling Pin |
| Piping Bags |
| Spatulas |
With a sturdy rolling pin, you’ll be able to roll out your dough with ease. Whether you’re making pie crusts, cookies, or puff pastry, a rolling pin is a must-have tool in any baker’s arsenal.
Piping bags are perfect for creating beautiful designs and adding finishing touches to your cakes and desserts. From simple swirls to intricate patterns, these bags allow you to unleash your creativity and achieve professional-looking results.
Spatulas are versatile tools that come in handy for various baking tasks. They are ideal for folding ingredients, mixing batters, and scraping every last bit of batter or frosting from the bowl. With a good set of spatulas, you’ll be able to work efficiently and minimize waste.
Investing in a high-quality baking kit ensures that you have the right tools at your fingertips, making your baking experience enjoyable and hassle-free. You’ll be able to tackle any recipe with confidence and achieve excellent results.
So, if you’re ready to take your baking to the next level, consider purchasing the best baking kit available. The former GBBO contestants have put their stamp of approval on this kit, and it’s sure to elevate your baking game.
With the essential baking tools like the rolling pin, piping bags, and spatulas at your disposal, you’ll be well-equipped to create extraordinary desserts that impress both friends and family.
Mary Berry’s Top 10 Baking Tips
Who better to learn baking tips from than the beloved baking expert, Mary Berry? Mary Berry is a renowned British baker and television personality known for her exquisite cakes and delightful baking recipes. In this section, she generously shares her top 10 tips for cake success. Whether you’re a beginner or an experienced baker, these tips will help you master the art of baking delicious cakes.
- Use room temperature ingredients: Before starting your baking adventure, make sure all your ingredients, such as butter, eggs, and milk, are at room temperature. This ensures smoother and more consistent mixing.
- Measure ingredients accurately: Baking is a science, and precise measurements are crucial. Invest in a good kitchen scale and measure both dry and liquid ingredients carefully.
- Preheat your oven: Always preheat your oven before baking to ensure even heat distribution and consistent results.
- Follow the recipe: While it may be tempting to experiment, especially for seasoned bakers, it’s essential to follow the recipe, especially if you’re a beginner. Baking is about precision, and tweaking ingredients or measurements may lead to unexpected results.
- Check cake doneness: Use a toothpick or skewer to check if your cake is done. Insert it into the center of the cake, and if it comes out clean or with a few crumbs, it’s ready.
- Allow cakes to cool: Patience is key when it comes to baking. Allow your cakes to cool completely before frosting or decorating them. This prevents the frosting from melting and ensures a neat presentation.
- Invest in good quality pans: Quality baking pans distribute heat more evenly, resulting in better cakes. Opt for sturdy, non-stick pans to prevent your cakes from sticking and ensure easy release.
- Practice patience when mixing: When mixing your cake batter, avoid overmixing. Once all the ingredients are incorporated, stop mixing to prevent a dense and tough cake texture.
- Add flavors and textures: Experiment with different flavors and textures by adding ingredients like fruits, nuts, or chocolate chips to your cake batter. This enhances the taste and makes your cakes more exciting.
- Decorate with creativity: Enjoy the decorating process by adding your personal creative touch to your cakes. From buttercream flowers to fondant decorations, let your imagination run wild.
“Baking is a delightful journey filled with wonderful aromas and delicious treats. Follow these tips from Mary Berry, and you’ll be on your way to baking success!”
Mary Berry’s Baking Tips at a Glance
| Tips | Description |
|---|---|
| Use room temperature ingredients | Ensure that ingredients like butter, eggs, and milk are at room temperature before baking. |
| Measure ingredients accurately | Invest in a kitchen scale and measure dry and liquid ingredients carefully. |
| Preheat your oven | Always preheat your oven to ensure even heat distribution. |
| Follow the recipe | Stick to the recipe for precise results, especially if you’re a beginner. |
| Check cake doneness | Use a toothpick or skewer to check if your cake is fully baked. |
| Allow cakes to cool | Let your cakes cool completely before frosting or decorating. |
| Invest in good quality pans | Quality baking pans distribute heat evenly and prevent sticking. |
| Practice patience when mixing | Avoid overmixing your cake batter for a tender texture. |
| Add flavors and textures | Enhance your cakes by adding fruits, nuts, or chocolate chips. |
| Decorate with creativity | Let your imagination shine through as you decorate your cakes. |
Now that you have Mary Berry’s expert baking tips, it’s time to grab your apron and get baking!
Six Steps to Brilliant Bread
Creating bakery-quality bread at home is a rewarding experience. With these six essential steps, you’ll be well on your way to baking brilliant bread that will impress your family and friends. From kneading to knocking back, these tips will guide beginners in achieving a perfect loaf of bread.
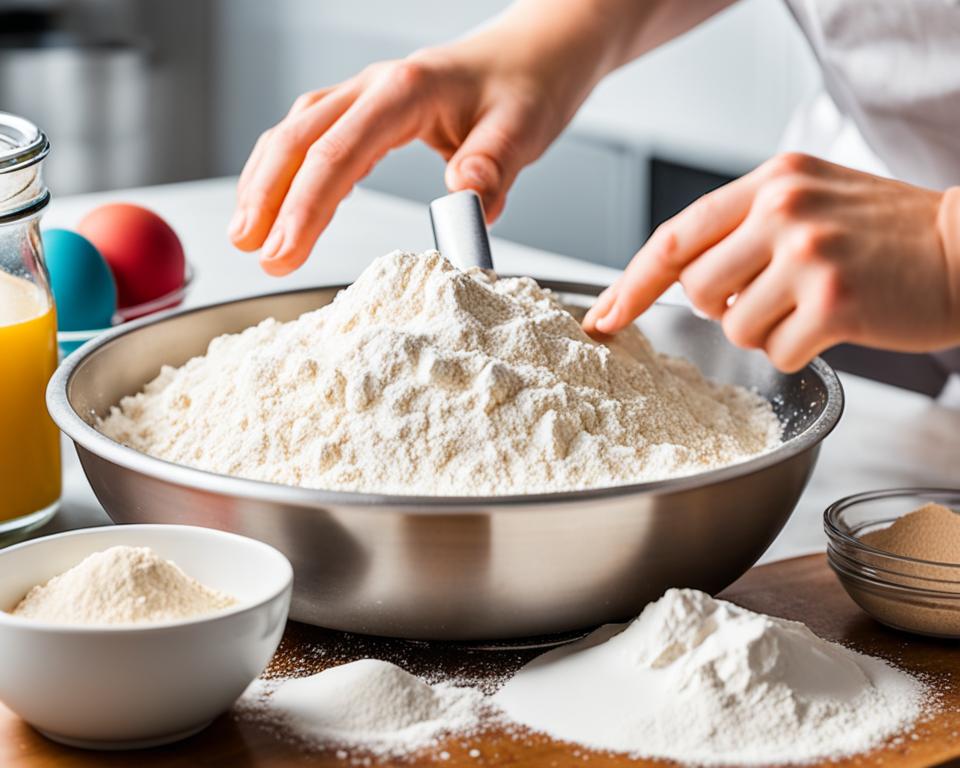
Step 1: Mixing and Kneading
The first step in bread baking is mixing the ingredients and kneading the dough. This process helps develop gluten, giving bread its characteristic structure and texture. Knead the dough for about 10-15 minutes until it becomes smooth and elastic.
Step 2: First Proofing
After kneading, the dough needs time to rise and ferment. Place the dough in a greased bowl, cover it with a kitchen towel, and let it rest in a warm place for 1-2 hours, or until it has doubled in size. This step is called the first proofing, and it allows the yeast to work its magic, creating air bubbles and developing flavors.
Step 3: Knocking Back
Once the dough has risen, gently punch it down to release the trapped air. This process, known as knocking back, helps redistribute the yeast and improves the final texture of the bread. Shape the dough into a ball and allow it to rest for a few minutes before moving on to the next step.
Step 4: Shaping
Now it’s time to shape your bread. There are various techniques for shaping, depending on the type of bread you’re making. Whether it’s a classic sandwich loaf or a rustic artisan boule, shaping the dough ensures an appealing presentation and even distribution of air bubbles.
Step 5: Second Proofing
After shaping, the dough needs a second proofing to allow it to rise before baking. Place the shaped dough on a lined or greased baking sheet, cover it with a kitchen towel, and let it rest for another 30-60 minutes. This additional rise will add lightness and volume to the bread.
Step 6: Baking
Finally, it’s time to bake your bread to golden perfection. Preheat your oven and carefully transfer the proofed dough onto a baking stone or sheet. Bake at the recommended temperature and time specified in your recipe. The aroma of freshly baked bread will fill your kitchen, signaling that your homemade masterpiece is ready to be enjoyed.
Remember, practice makes perfect when it comes to baking bread. Don’t be discouraged if your first loaf doesn’t turn out as expected. With each bake, you’ll gain confidence and discover your own techniques for achieving brilliant bread.
| Step | Description |
|---|---|
| 1 | Mixing and Kneading |
| 2 | First Proofing |
| 3 | Knocking Back |
| 4 | Shaping |
| 5 | Second Proofing |
| 6 | Baking |
Now that you know the six essential steps to baking brilliant bread, it’s time to put your newfound knowledge to the test. Remember to follow each step carefully, and don’t be afraid to experiment with different types of bread and flavors. Happy baking!
How to Make Cake: Top 10 Tips for Success
Whether you’re a baking enthusiast or just getting started, creating a delicious cake can be a rewarding experience. To help you achieve baking success, here are ten essential tips that every aspiring baker should know. Follow these cake-baking commandments, and you’ll be well on your way to creating mouthwatering treats that will delight your friends and family!
- Use quality ingredients: Start with the best. High-quality ingredients will result in a superior cake.
- Measure accurately: Baking is a science, so precision is key. Use measuring cups and spoons to ensure accurate measurements of ingredients.
- Preheat your oven: Give your cake the right start by preheating your oven to the specified temperature.
- Prepare your pan: Grease and flour your baking pan to prevent sticking and ensure an easy release.
- Mix at the right speed: Follow the recipe instructions for mixing speed and time. Overmixing can result in a dense cake.
- Check for doneness: Use a toothpick or cake tester to check if your cake is fully baked. It should come out clean or with a few crumbs.
- Cool properly: Allow your cake to cool in the pan for a few minutes before transferring it to a wire rack to cool completely.
- Frost with care: When frosting your cake, ensure that it has cooled completely. This prevents the frosting from melting or sliding off the cake.
- Get creative with decorations: Let your imagination run wild when decorating your cake. From piping designs to adding fresh fruit, the possibilities are endless.
- Practice makes perfect: Don’t be discouraged if your first cake doesn’t turn out as expected. Keep practicing and experimenting to refine your baking skills.
Follow these top 10 tips for cake-baking success, and you’ll soon be able to whip up delectable cakes that will impress everyone. Remember, baking is both an art and a science, so have fun, be patient, and enjoy the delicious results of your baking adventures!
These tips will help beginners understand the secrets to baking successful cakes.
Kitchen Kit: Paul Hollywood’s Top 10 Baking Picks
When it comes to baking, having the right tools can make all the difference. And who better to turn to for expert advice than the renowned British baker, Paul Hollywood? With years of experience and numerous baking successes under his belt, Paul Hollywood knows exactly which kitchen essentials are a must-have for any aspiring baker.
In this section, we’ll explore Paul Hollywood’s top ten baking picks. From versatile utensils to precision measuring tools, these carefully selected items will equip beginners with the necessary kitchen kit for successful baking.
Paul Hollywood’s Top 10 Baking Picks
| Tool | Description |
|---|---|
| Rolling Pin | A high-quality rolling pin is a baker’s best friend. Look for one that is sturdy and comfortable to hold, enabling you to roll dough with ease and precision. |
| Piping Bags and Nozzles | To add decorative flair to your cakes and pastries, invest in a set of piping bags and nozzles. These tools allow you to create intricate designs and perfectly piped frosting. |
| Pastry Brush | A pastry brush is essential for applying glazes, egg washes, and melted butter to baked goods. Opt for a brush with natural bristles for even distribution. |
| Bench Scraper | A bench scraper is a versatile tool that makes working with dough much easier. Use it to divide dough, scrape sticky mixture off surfaces, and clean your work area. |
| Palette Knife | A palette knife is ideal for tasks such as lifting delicate cakes, spreading icing, and smoothing batters. Choose a knife with a flexible blade for precise control. |
| Silicone Baking Mat | A silicone baking mat is a non-stick surface that eliminates the need for parchment paper. It’s perfect for use with sticky doughs and provides even heat distribution for better baking results. |
| Digital Scale | Accuracy is key in baking, and a digital scale ensures precise measurements of ingredients. Look for a scale that can switch between metric and imperial units for convenience. |
| Oven Thermometer | An oven thermometer is essential for achieving consistent baking temperatures. It helps you verify that your oven is at the correct temperature for perfect results every time. |
| Whisk | A whisk is indispensable for incorporating air into batters and whipping cream. Opt for a balloon whisk for efficient mixing and creating light, fluffy textures. |
| Sieve | A sieve is essential for removing lumps from dry ingredients and ensuring a smooth texture in your batters and doughs. Look for one with a fine mesh and a comfortable handle. |
These ten essential tools recommended by Paul Hollywood will set you on the path to baking success. They will not only make your baking experiences more enjoyable but also enhance your results. Invest in these kitchen essentials and watch your skills soar!
Baking Terms Demystified
Understanding the terminology used in baking recipes is essential for beginners. To help you navigate through the world of baking, this section provides explanations and videos for common baking terms. With these definitions at your fingertips, you’ll be able to confidently tackle any recipe. Let’s dive in!
Fondant Icing
Fondant icing is a smooth and pliable icing that is often used to cover cakes or create decorative elements. It is made by mixing powdered sugar with liquid and can be flavored or colored to suit your preference.
“Fondant icing adds a polished and professional touch to any cake. It provides a smooth finish and allows for stunning decorations.” – Pastry Chef Rebecca Jones
Baking Blind
Baking blind refers to the process of pre-baking a pastry shell before adding the filling. This is often done when the filling requires less cooking time than the pastry or when the filling is moist and could make the base soggy.
“Baking blind is an important technique to ensure a crisp and perfectly cooked pastry shell. It prevents the dreaded soggy bottom!” – Chef David Martinez
Beat
To beat in baking means to vigorously mix ingredients together using a brisk up-and-down and side-to-side motion. This helps to incorporate air into the mixture and create a smooth and uniform texture. Beating can be done by hand or with an electric mixer.
“When a recipe calls for beating, it’s important to follow the instructions precisely. This helps to achieve the desired texture and consistency of the batter or dough.” – Baking Enthusiast Jennifer Lee
Fold
Folding is a gentle mixing method used to incorporate delicate ingredients, such as whipped cream or beaten egg whites, into a batter. It is done by using a spatula to gently lift and fold the mixture over itself until the ingredients are evenly combined.
“When folding, take your time and be gentle. This technique ensures that the airy texture of whipped cream or egg whites is preserved, resulting in a light and fluffy final product.” – Baking Expert Sarah Thompson
Cream
In baking, creaming refers to the process of beating together butter and sugar until light and fluffy. This helps to incorporate air into the mixture, resulting in a soft and tender texture. Creaming is often the first step in recipes for cakes, cookies, and other baked goods.
“Creaming butter and sugar is the foundation of many baked treats. It creates a light and velvety texture, making your desserts absolutely irresistible!” – Pastry Chef Michael Reynolds
| Baking Term | Definition |
|---|---|
| Fondant Icing | A smooth and pliable icing used for covering cakes and creating decorative elements. |
| Baking Blind | The process of pre-baking a pastry shell before adding the filling to avoid a soggy base. |
| Beat | To vigorously mix ingredients together using an up-and-down and side-to-side motion. |
| Fold | A gentle mixing method used to incorporate delicate ingredients by lifting and folding the mixture. |
| Cream | The process of beating together butter and sugar until light and fluffy. |
Now that you’re familiar with these baking terms, you’ll be able to confidently tackle any recipe that comes your way. Happy baking!

The Best Stand Mixers for Baking Lovers
When it comes to baking, having the right equipment can make all the difference. A stand mixer is a must-have tool for any serious baker, providing convenience and efficiency in the kitchen. If you’re in the market for a stand mixer, look no further. This section offers reviews of the best stand mixer brands, including the ever-popular KitchenAid and the reliable Kenwood. Whether you’re a beginner or a seasoned baker, we’ve got you covered with affordable options that won’t break the bank.
When choosing a stand mixer, consider factors such as power, capacity, attachments, and durability. Our experts have conducted thorough research and compiled a comprehensive table below, highlighting the key features and specifications of each stand mixer brand. Take a look:
| Brand | Power | Capacity | Attachments | Price |
|---|---|---|---|---|
| KitchenAid | 325W – 1000W | 4.5 – 8 quarts | Whisk, dough hook, flat beater | $ – $$$ |
| Kenwood | 500W – 1400W | 5 – 7 quarts | Whisk, dough hook, K-beater | $ – $$$ |
| Other Brands | Varies | Varies | Varies | $ – $$$ |
As you can see, both KitchenAid and Kenwood offer a range of options to suit different baking needs and budgets. KitchenAid stand mixers are known for their iconic design, reliability, and versatility, while Kenwood stand mixers are praised for their powerful performance and durability.
Whether you’re whipping up a batch of cookies, kneading dough for bread, or mixing cake batter, a stand mixer will make your baking experience much smoother and enjoyable. With the right stand mixer by your side, you’ll achieve consistent results and save valuable time in the kitchen.
Now that you have all the information you need, it’s time to choose the perfect stand mixer for your baking adventures. Invest in a quality stand mixer and take your baking to new heights!
Testimonial
“I absolutely love my KitchenAid stand mixer! It’s a real game-changer in the kitchen. The attachments make it so versatile, and it’s incredibly reliable. I can’t imagine baking without it!” – Sarah, Home Baker
How to Rescue Baking Disasters
Even the most experienced bakers encounter baking disasters from time to time. But don’t fret! With some expert tips and tricks, you can salvage your sunken sponges and curdled cake mixes, turning your baking mishaps into scrumptious successes. Learn from the best as famous bakers like Jo Wheatley and Luis Troyano share their invaluable advice.
Salvaging Sunken Sponges
Sunken sponges can be disheartening, but they can often be saved. Here are a few tips:
- Try pricking the surface of the sunken sponge with a toothpick and pouring some fruit syrup or flavored liqueur over it. This will add moisture and enhance the flavor.
- Fill the sunken part of the cake with whipped cream, custard, or a fruit filling to create a decadent surprise inside.
- If all else fails, crumble the sunken sponge and use it as the base for a trifle or a creative cake pop creation.
Rescuing Curdled Cake Mix
Curdling happens when the fat in the cake mix separates from the liquid. To rescue your curdled cake mix:
- Stop mixing immediately to prevent further curdling.
- Add a tablespoon of flour and continue mixing gently. This can help stabilize the mix and bind the ingredients together.
- If the mix remains curdled, try adding a small amount of hot water while whisking vigorously. This may help bring the mix back together.
- If all else fails, transform the curdled mix into a pleasant surprise by turning it into pancakes or muffins.
“Remember, even professional bakers have their fair share of mishaps. The key is to stay calm and get creative with your solutions.” – Jo Wheatley
With these expert tips, you’re well-equipped to rescue common baking disasters. Remember, practice makes perfect, and every mistake is an opportunity for growth and learning. So, don’t let a sunken sponge or curdled mix discourage you. Instead, embrace the challenge and turn it into a triumph!
11 Baking Ingredients for Your Storecupboard
When it comes to baking, having a well-stocked storecupboard is essential. With these 11 staple ingredients, you’ll be able to whip up delectable treats whenever the baking bug strikes. Whether you’re a beginner or an experienced baker, these ingredients are must-haves for hassle-free baking adventures.
1. All-Purpose Flour: The foundation of many baked goods, all-purpose flour is versatile and perfect for cakes, cookies, and bread.
2. Granulated Sugar: Sweeten your bakes with this pantry staple. Use it in cakes, cookies, and even to make caramel.
3. Butter: Unsalted butter is a key ingredient in baked goods, adding rich flavor and moisture to your creations.
4. Milk: From cakes to muffins, milk adds moisture and richness to your bakes.
5. Eggs: Eggs serve many purposes in baking, providing structure, richness, and moisture to your recipes.
6. Baking Powder: This leavening agent helps your baked goods rise and become airy and light.
7. Baking Soda: Similar to baking powder, baking soda helps with leavening and adds tenderness to your baked goods.
8. Salt: A pinch of salt enhances the flavors in baked goods, balancing sweetness and adding depth.
9. Vanilla Extract: Add a touch of luxury to your bakes with the enchanting aroma of vanilla extract.
10. Cocoa Powder: For all the chocolate lovers out there, cocoa powder is a must to create decadent brownies, cakes, and cookies.
11. Cornstarch: Use cornstarch as a thickening agent in custards, puddings, and fruit fillings for pies.
Having these baking ingredients on hand ensures that you’re ready to bake up something delicious at any time. Don’t forget to store them properly to maintain their freshness and quality.

With these baking staples in your storecupboard, you’ll be well-prepared to whip up a wide range of delightful treats. From fluffy cakes to buttery cookies, these ingredients form the foundation of countless baking recipes. Don’t let a lack of ingredients hold you back from exploring the wonderful world of baking. Stock up your storecupboard and let your creativity shine!
Bread Basics and Beyond
If you’re looking to venture into the world of baking bread, this section has got you covered. From aromatic olive bread to mouthwatering prosciutto plaits, we have a variety of bread recipes perfect for beginners and various occasions.
1. Olive Bread
Indulge in the delicious flavors of our beautifully swirled olive bread. This recipe combines the richness of olives with the softness of freshly baked bread, resulting in an irresistible combination. Impress your friends and family with this artisanal bread that goes perfectly with soups and salads.
2. Prosciutto Plaits
Take your bread-making skills to the next level with our perfectly sculpted prosciutto plaits. This recipe features a delicate balance of fluffy dough and savory prosciutto, creating a stunning centerpiece for any gathering. Enjoy these golden-brown plaits as an appetizer or as a filling sandwich.
3. Bread Recipes for Every Occasion
Expand your bread repertoire with our collection of recipes for every occasion. Whether you’re in the mood for a hearty whole wheat bread, a soft and buttery brioche, or a crispy baguette, we have you covered. With step-by-step instructions and helpful tips, these bread recipes are designed to inspire confidence and satisfy your cravings.
“Bread is the king of the table and all else is merely the court that surrounds the king. The countries are the soup, the meat, the vegetables, the salad, but bread is king.”
| Bread Recipe | Description |
|---|---|
| Olive Bread | Aromatic swirls of olives in a soft and flavorful bread |
| Prosciutto Plaits | Delicately braided bread with savory prosciutto |
| Whole Wheat Bread | Hearty and healthy bread made with whole wheat flour |
| Brioche | Butter-rich and soft bread perfect for brunch or dessert |
| Baguette | Classic French bread with a crispy crust and fluffy interior |
Embark on your bread baking journey with these enticing recipes. With a little practice and the right techniques, you’ll soon master the art of baking bread and enjoy the satisfaction of freshly baked goodness.
Conclusion
In conclusion, this article has provided a comprehensive guide for beginners in baking. By following the easy recipes, implementing the essential tips, and using the recommended tools, beginners can embark on a successful baking journey.
With practice, patience, and a passion for baking, anyone can achieve baking success. It is important to remember that baking is both an art and a science, requiring attention to detail and precision. However, with the right techniques and a willingness to learn, aspiring bakers can hone their skills and create delicious baked goods.
Whether it’s a simple cookie recipe or a complex cake creation, these baking tips will serve as valuable guidance along the way. Remember to have fun, experiment with flavors, and don’t be afraid to make mistakes. Baking is a journey of discovery and creativity, and every batch brings an opportunity to learn and improve.
So, grab your apron, preheat that oven, and let your baking journey begin. With the knowledge gained from this guide and the passion in your heart, baking success is within reach. Happy baking!
FAQ
What is this article about?
This article is a comprehensive guide to help beginners in baking. It provides easy baking recipes, beginner-friendly tips, and step-by-step instructions to get started with baking.
What does the baking kit include?
The baking kit includes essential tools like rolling pins, pastry brushes, piping bags, and spatulas.
What are Mary Berry’s top 10 baking tips?
Mary Berry shares her top 10 tips for cake success, which help beginners understand the key techniques and secrets to baking delicious cakes.
What are the six essential steps for baking bread?
The six essential steps for baking brilliant bread include kneading, knocking back, and other techniques that guide beginners in achieving a perfect loaf of bread.
What are the ten commandments for making great cakes?
The ten commandments for making great cakes provide tips that help beginners understand the secrets to baking successful cakes.
What are Paul Hollywood’s top ten baking picks?
Paul Hollywood, a renowned British baker, recommends essential tools that equip beginners with the necessary kitchen kit for successful baking.
What are some common baking terms used in recipes?
Common baking terms such as fondant icing, baking blind, beat, fold, and cream are explained in this section, along with helpful videos to decode the terminology used in baking recipes.
What stand mixer brands are reviewed in this article?
This article offers reviews of top brands like KitchenAid and Kenwood, along with affordable options, to help beginners find the perfect stand mixer for their baking needs.
How can I salvage baking disasters?
This section provides expert advice on saving common baking mishaps from famous bakers like Jo Wheatley and Luis Troyano. It includes tips on saving sunken sponges and curdled cake mix.
What are the essential baking ingredients to have in my storecupboard?
This section provides a list of 11 staples that every baker should have on hand for hassle-free baking.
What bread recipes are included in this article?
This article offers a variety of bread recipes, from beautifully swirled olive bread to perfectly sculpted prosciutto plaits. These recipes cater to beginners and offer options for different occasions.