Are you ready to take your homemade pies to the next level? Look no further than this flaky pie crust recipe made with Crisco. With just a few simple ingredients and easy-to-follow instructions, you’ll be able to create a buttery and tender crust that will make your pies truly unforgettable.
Whether you’re a seasoned baker or just starting out, this recipe is perfect for anyone looking to achieve that perfect flaky crust. Using Crisco shortening, this classic method guarantees consistent and delicious results every time.
So dust off your apron and preheat your oven, because it’s time to master the art of pie crust with Crisco!
Key Takeaways:
- Using Crisco in your pie crust recipe ensures a flaky and tender texture.
- This recipe is easy to follow and suitable for both sweet and savory pies.
- Chilling the dough before rolling it out is essential for achieving the best results.
- You can customize the crust by adding sugar or experimenting with different flavors.
- Pre-baking the crust is necessary for certain pie recipes.
Ingredients for Single-Crust Pie
To make a single-crust pie using the Crisco recipe, you will need the following ingredients:
| Ingredient | Quantity |
|---|---|
| All-purpose flour | 1 1/2 cups |
| Salt | 1/2 teaspoon |
| Chilled Crisco shortening | 1/2 cup |
| Ice-cold water | 4-8 tablespoons |
Instructions for Making the Pie Crust
-
In a large bowl, mix together the flour and salt.
-
Add the chilled Crisco shortening to the flour mixture and cut it in using a pastry blender or fork until the mixture resembles small peas.
-
Gradually add the ice-cold water, one tablespoon at a time, stirring with a fork until the dough holds together and forms a smooth ball.
-
Shape the dough into a ball for a single pie crust or divide it in half and shape into two balls for a double-crust pie.
-
Wrap the dough in plastic wrap and chill for at least 30 minutes or up to 2 days.
-
Roll out the dough on a lightly floured surface to the desired size for your pie plate.
-
Transfer the dough to the pie plate and press it firmly against the bottom and sides.
-
Trim and crimp the edges as desired.
-
Chill the crust until ready to use or pre-bake according to specific recipe directions.
| Step | Instructions |
|---|---|
| 1 | In a large bowl, mix together the flour and salt. |
| 2 | Add the chilled Crisco shortening to the flour mixture and cut it in using a pastry blender or fork until the mixture resembles small peas. |
| 3 | Gradually add the ice-cold water, one tablespoon at a time, stirring with a fork until the dough holds together and forms a smooth ball. |
| 4 | Shape the dough into a ball for a single pie crust or divide it in half and shape into two balls for a double-crust pie. |
| 5 | Wrap the dough in plastic wrap and chill for at least 30 minutes or up to 2 days. |
| 6 | Roll out the dough on a lightly floured surface to the desired size for your pie plate. |
| 7 | Transfer the dough to the pie plate and press it firmly against the bottom and sides. |
| 8 | Trim and crimp the edges as desired. |
| 9 | Chill the crust until ready to use or pre-bake according to specific recipe directions. |
Tips for Rolling and Handling the Dough
When it comes to creating a perfect pie crust, how you handle the dough can make all the difference. Follow these helpful tips to roll and handle your pie crust dough with ease and achieve that flaky, golden crust you desire.
1. Roll the dough on a lightly floured surface
To prevent the dough from sticking to your countertop or rolling pin, lightly flour the surface before rolling it out. This will make it easier to handle and transfer to your pie plate.
2. Start rolling from the center and roll outward
Begin rolling the dough from the center, applying even pressure as you roll outward. This technique helps to maintain an even thickness and prevents the crust from becoming too thin in certain areas.
3. Use parchment paper or a pastry cloth
If you’re finding it difficult to roll the dough without it sticking, try using parchment paper or a pastry cloth. Place the dough between two sheets of parchment paper or on a lightly floured pastry cloth to prevent any sticking.
4. Turn the dough 45 degrees between each roll
To ensure an even thickness and prevent the dough from sticking, turn it 45 degrees between each roll. This will help you achieve a round and evenly rolled crust.
5. Refrigerate the dough if it becomes too soft or sticky
If at any point the dough becomes too soft or sticky to handle, place it in the refrigerator for a few minutes to firm up. Chilled dough is much easier to work with and less likely to tear or stick to your rolling pin.
6. Gently fold the dough when transferring it to the pie plate
When transferring the rolled-out dough to your pie plate, gently fold it into quarters. This makes it easier to handle and helps prevent it from tearing. Unfold the dough in the pie plate and gently press it against the bottom and sides to fit.
7. Press the dough firmly against the bottom and sides of the pie plate
To ensure a perfect crust without any gaps or air pockets, press the dough firmly against the bottom and sides of the pie plate. This will help the crust hold its shape and prevent it from shrinking during baking.
| Tips for Handling Pie Crust Dough |
|---|
| Roll the dough on a lightly floured surface |
| Start rolling from the center and roll outward |
| Use parchment paper or a pastry cloth |
| Turn the dough 45 degrees between each roll |
| Refrigerate the dough if it becomes too soft or sticky |
| Gently fold the dough when transferring it to the pie plate |
| Press the dough firmly against the bottom and sides of the pie plate |
Variations and Additions to the Pie Crust
Take your Crisco pie crust to the next level by customizing it with various additions and flavorings. Here are a few ideas to inspire you:
-
Add 2 teaspoons of sugar to the flour and salt mixture for a slightly sweet crust. This subtle sweetness pairs well with fruity fillings and adds a delightful touch to your pie.
-
For a buttery flavor, use butter-flavored Crisco in your crust. This simple swap gives your pie crust a rich and decadent taste that complements both sweet and savory fillings.
-
Get creative with herbs and spices to infuse your crust with unique flavors. Try adding a hint of cinnamon or nutmeg for a warm and aromatic pie crust that enhances the overall taste of your pie.
These variations and additions allow you to customize your pie crust and create a unique flavor profile that perfectly complements your desired filling. Don’t be afraid to experiment and let your creativity shine!
Expert Tip:
When adding herbs or spices to your pie crust, start with small amounts and gradually increase to achieve your desired flavor. Remember to taste the crust before baking to ensure the flavor is balanced.
Pre-Baking the Pie Crust
If your recipe calls for a pre-baked pie crust, follow these steps:
- Preheat the oven: Preheat your oven to 425°F (218°C) to ensure a hot and evenly heated baking environment.
- Prick the crust: Thoroughly prick the bottom and sides of the unbaked pie crust with a fork. This step is important to prevent air bubbles from forming during the baking process.
- Bake the crust: Place the pie crust on the lowest rack in the oven and bake it for about 15 minutes or until it turns a beautiful golden brown. This step is known as blind baking or pre-baking.
- Cool the crust: Once the crust is baked, remove it from the oven and allow it to cool completely on a wire rack. Cooling the crust ensures that it becomes firm and ready to be filled with your delicious pie filling.

Nutritional Information
When it comes to enjoying a delicious pie, it’s always good to know the nutritional information of the crust. Here’s a breakdown of the calories and nutrition facts for a serving size of 1/8 of a double crust pie:
| Nutrient | Amount per Serving |
|---|---|
| Calories | 280 |
| Total Fat | 18g |
| Saturated Fat | 5g |
| Cholesterol | 0g |
| Sodium | 290mg |
| Carbohydrates | 24g |
| Dietary Fiber | 1g |
| Protein | 3g |
These figures provide an estimated value for the nutritional content of the pie crust. Keep in mind that the actual values may vary depending on the specific recipe and ingredients used. As always, it’s important to enjoy pie in moderation as part of a balanced diet.
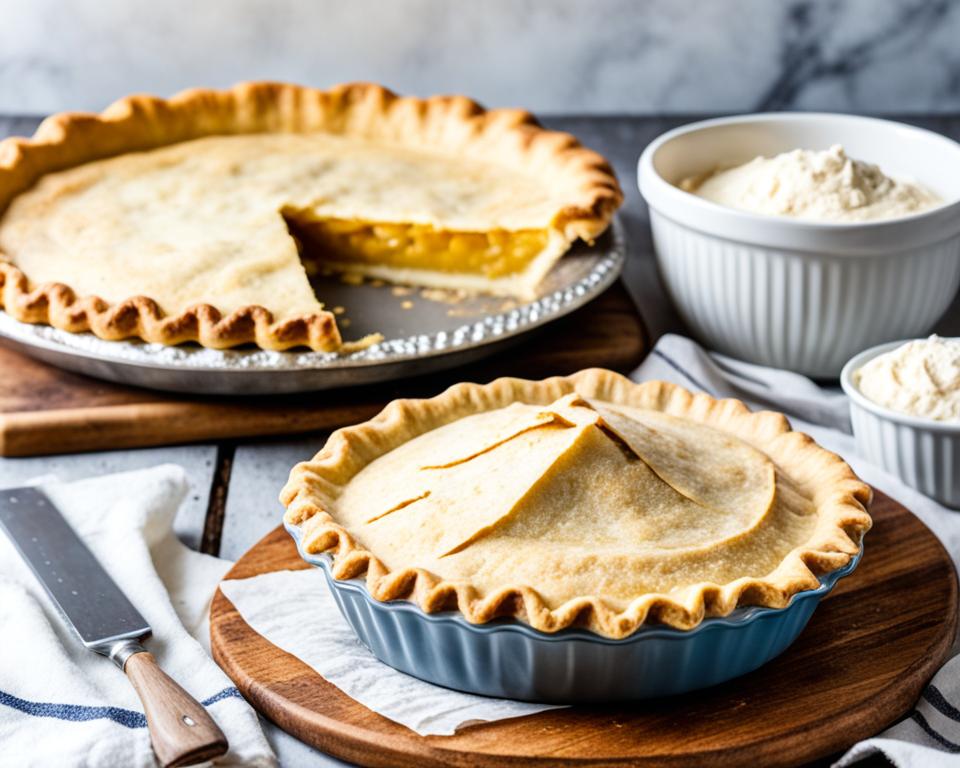
Classic Crisco Pie Crust Recipe
The Crisco pie crust recipe is a classic and traditional method that has been used by many home bakers for years. It yields a flaky and tender crust that is perfect for all types of pies. Whether you’re making a fruit pie, a custard pie, or a savory pie, this recipe will ensure a delicious and buttery crust every time.
Creating a classic Crisco pie crust is easier than you think. With just a few simple ingredients, you’ll have a flaky and delicious crust that will elevate your homemade pies to a whole new level. Follow the step-by-step instructions below to make the perfect crust:
- In a large bowl, mix together 1 1/2 cups of all-purpose flour and 1/2 teaspoon of salt.
- Add 1/2 cup of chilled Crisco shortening to the flour mixture.
- Using a pastry blender or fork, cut in the shortening until the mixture resembles small peas.
- Gradually add 4-8 tablespoons of ice-cold water, one tablespoon at a time, stirring with a fork until the dough holds together and forms a smooth ball.
- Shape the dough into a ball for a single pie crust or divide it in half and shape into two balls for a double-crust pie.
- Wrap the dough in plastic wrap and chill for at least 30 minutes or up to 2 days.
- Roll out the chilled dough on a lightly floured surface to the desired size for your pie plate.
- Transfer the rolled-out dough to the pie plate and press it firmly against the bottom and sides.
- Trim and crimp the edges as desired.
Now you have a beautiful, homemade pie crust ready to be filled with your favorite ingredients. Whether you’re baking a classic apple pie or a savory quiche, this Crisco pie crust will provide the perfect foundation for your culinary creations.
Tips for Success with Crisco Pie Crust
Creating a foolproof and flaky pie crust with Crisco is easier than you might think! Follow these tips to ensure success with your homemade crust:
- Use chilled shortening and cold water to achieve a flaky texture in your crust. Cold ingredients help create pockets of buttery goodness when baked.
- Handle the dough as little as possible to prevent overworking and developing gluten. Overworked dough can result in a tough crust. Remember, a light touch is key!
- Chill the dough before rolling it out. When the dough is cold, it’s easier to handle and less likely to stick to your rolling pin or work surface. Plus, the butter in the Crisco will stay solid, creating those coveted flaky layers.
- If your dough becomes too warm or soft while rolling, don’t panic! Simply pop it in the refrigerator for a few minutes to firm it up again.
- Before baking, remember to prick the crust with a fork. This step helps prevent air bubbles from forming, keeping your crust nice and flat.
- Lastly, always follow the specific recipe instructions for baking times and temperatures. Different fillings and crust thicknesses may require slight adjustments in baking to achieve that perfect golden color and flakiness.
With these tips in your baking arsenal, you’ll be well on your way to mastering the art of the foolproof Crisco pie crust.
| Tips for Success with Crisco Pie Crust |
|---|
| Use chilled shortening and cold water |
| Handle the dough as little as possible |
| Chill the dough before rolling it out |
| If the dough becomes too warm, refrigerate it until firm |
| Prick the crust with a fork before baking |
| Follow recipe instructions for baking times and temperatures |
Crisco Pie Crust vs. Other Pie Crusts
When it comes to pie crusts, Crisco offers several advantages over other types. Its high fat content contributes to its flakiness and tenderness, making for a deliciously light and delicate crust. The use of shortening also makes it easier to work with, as it is less likely to become tough when overworked. Additionally, Crisco pie crust has a neutral flavor that allows the filling of the pie to truly shine and take center stage.
If you’re looking for a pie crust that is easy to handle and yields consistently excellent results, Crisco is the way to go. Its versatility makes it suitable for both sweet and savory pies, guaranteeing a delicious crust every time.
Comparison of Pie Crusts
| Pie Crust Type | Advantages | Disadvantages |
|---|---|---|
| Crisco Pie Crust | High fat content for flakiness and tenderness | Neutral flavor may not provide the desired taste for certain pies |
| Butter Pie Crust | Rich flavor profile | Tends to be less flaky than shortening-based crusts |
| Graham Cracker Crust | Convenient and quick to make | Not suitable for all pie fillings |
| Oil Pie Crust | Heart-healthy option | May lack the flakiness of shortening-based crusts |
As you can see from the table above, Crisco pie crust stands out for its ability to consistently deliver a flaky and tender crust. However, different crust types offer their own unique advantages and disadvantages, allowing you to choose the perfect crust for your specific pie needs.
Tips for Storing and Freezing Crisco Pie Crust
After making a delicious Crisco pie crust, you may find yourself with leftovers that you want to store for later use. Whether you want to save it for another pie or have a make-ahead option on hand, here are some helpful tips for storing and freezing your Crisco pie crust.
Storing Crisco Pie Crust
To store leftover Crisco pie crust, follow these steps:
- Ensure the crust is thoroughly cooled before storing.
- Wrap the crust tightly in plastic wrap to prevent air exposure.
- Place the wrapped crust in the refrigerator.
- Store in the refrigerator for up to 2 days.
By following these steps, your Crisco pie crust will stay fresh and ready to use whenever you need it.
Freezing Crisco Pie Crust
If you want to freeze your pie crust for longer storage, here’s what you need to do:
- Ensure the crust is thoroughly cooled before freezing.
- Double wrap the crust in plastic wrap to provide extra protection.
- Place the double-wrapped crust in a freezer bag.
- Seal the bag tightly, removing as much air as possible.
- Label the bag with the date and contents.
- Place the bag in the freezer.
- Store in the freezer for up to 3 months.
Freezing your Crisco pie crust allows you to make pie preparation more convenient in the future. When you’re ready to use the frozen crust, simply thaw it in the refrigerator overnight, and it will be ready to roll out and fill with your favorite pie filling.
Whether you choose to store or freeze your Crisco pie crust, these tips will help you keep it fresh and ready to use whenever you’re in the mood for a homemade pie.
Conclusion
In conclusion, the Crisco pie crust recipe provides a foolproof method for creating a flaky and delicious crust that will elevate your pies to a whole new level. With just a few simple ingredients and easy-to-follow instructions, you can achieve bakery-worthy results every time.
Whether you’re an experienced baker or just starting out, this recipe is a great addition to your repertoire. The use of Crisco shortening ensures a tender and buttery texture, while the precise measurements and techniques outlined in the instructions guarantee a perfect crust.
So why not give it a try? Impress your family and friends with homemade pies that boast a flaky, golden crust made from scratch. With the Crisco pie crust recipe, you can create delectable sweet or savory pies that will have everyone coming back for seconds. Happy baking!
FAQ
What ingredients do I need to make a single-crust pie?
To make a single-crust pie using the Crisco recipe, you will need 1 1/2 cups all-purpose flour, 1/2 teaspoon salt, 1/2 cup chilled Crisco shortening, and 4-8 tablespoons ice-cold water.
How do I make the perfect flaky pie crust using Crisco?
Follow these step-by-step instructions to make the perfect flaky pie crust using Crisco:
1. Mix together the flour and salt.
2. Cut in the chilled Crisco shortening until the mixture resembles small peas.
3. Gradually add ice-cold water, stirring until the dough holds together.
4. Shape the dough into a ball, wrap it in plastic wrap, and chill.
5. Roll out the chilled dough to the desired size for your pie plate.
6. Transfer the dough to the pie plate and press it firmly against the bottom and sides.
7. Trim and crimp the edges as desired.
8. Chill the crust until ready to use or pre-bake according to recipe directions.
What tips can you provide for rolling and handling the pie crust dough?
Here are some helpful tips for rolling and handling the pie crust dough:
– Roll the dough on a lightly floured surface, starting from the center and rolling outward.
– Use parchment paper or a pastry cloth to prevent sticking.
– Turn the dough 45 degrees between each roll to ensure an even thickness.
– Refrigerate the dough if it becomes too soft or sticky while rolling.
– When transferring the rolled-out dough to the pie plate, gently fold it into quarters and then unfold it in the plate.
– Press the dough firmly against the bottom and sides of the pie plate to avoid any gaps or air pockets.
Can I customize the Crisco pie crust recipe with different flavors or additions?
Yes, you can customize the Crisco pie crust recipe by adding 2 teaspoons of sugar for a slightly sweet crust or using butter-flavored Crisco for a buttery flavor. You can also experiment with different herbs or spices, such as cinnamon or nutmeg, for a flavored crust that complements your filling.
How do I pre-bake the pie crust?
If your recipe calls for a pre-baked pie crust, follow these steps:
1. Preheat the oven to 425°F (218°C).
2. Thoroughly prick the bottom and sides of the unbaked pie crust with a fork.
3. Place the pie crust on the lowest rack in the oven and bake for about 15 minutes or until golden brown.
4. Cool the pre-baked crust completely on a wire rack before filling.
What is the nutritional information for the Crisco pie crust?
According to the nutritional information provided, a serving size of 1/8 of a double-crust pie contains approximately 280 calories, with 18 grams of total fat, 5 grams of saturated fat, 0 grams of cholesterol, and 290 milligrams of sodium. The pie crust also provides 24 grams of carbohydrates, 1 gram of dietary fiber, and 3 grams of protein.
What are the advantages of using Crisco in a pie crust?
Crisco pie crust has a high fat content, which contributes to its flakiness and tenderness. The use of shortening makes it easier to work with and less likely to become tough when overworked. Additionally, Crisco pie crust has a neutral flavor, allowing the filling of the pie to take center stage.
How should I store and freeze Crisco pie crust?
To store leftover Crisco pie crust, wrap it tightly in plastic wrap and refrigerate for up to 2 days. To freeze the crust for later use, double wrap it in plastic wrap and place it in a freezer bag. It can be frozen for up to 3 months. Before using a frozen pie crust, thaw it in the refrigerator overnight.
What are some tips for success with Crisco pie crust?
Here are some tips for success with Crisco pie crust:
– Use chilled shortening and cold water to ensure a flaky texture.
– Handle the dough as little as possible to prevent overworking and developing gluten.
– Chill the dough before rolling it out to make it easier to handle.
– If the dough becomes too warm or soft while rolling, refrigerate it until firm.
– Prick the crust with a fork before baking to prevent air bubbles.
– Follow recipe instructions for baking times and temperatures to ensure a perfectly baked crust.
How does Crisco pie crust compare to other types of pie crusts?
Crisco pie crust offers several advantages compared to other types of pie crusts. Its high fat content contributes to its flakiness and tenderness. The use of shortening makes it easier to work with and less likely to become tough when overworked. Additionally, Crisco pie crust has a neutral flavor, allowing the filling of the pie to take center stage.
Can I make the Crisco pie crust ahead of time?
Yes, you can make the Crisco pie crust ahead of time and store it in the refrigerator for up to 2 days. You can also freeze the crust for up to 3 months before using it.